IntelliJ IDEA 是公認最強 Java IDE,配合 Maven 依賴管理,能讓 Spring MVC 專案搭建事半功倍。本教程涵蓋專案創建、依賴配置、核心 XML 配置、控制器編寫、運行驗證全流程。
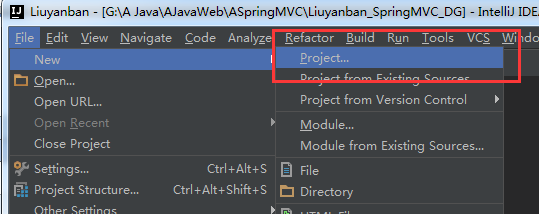
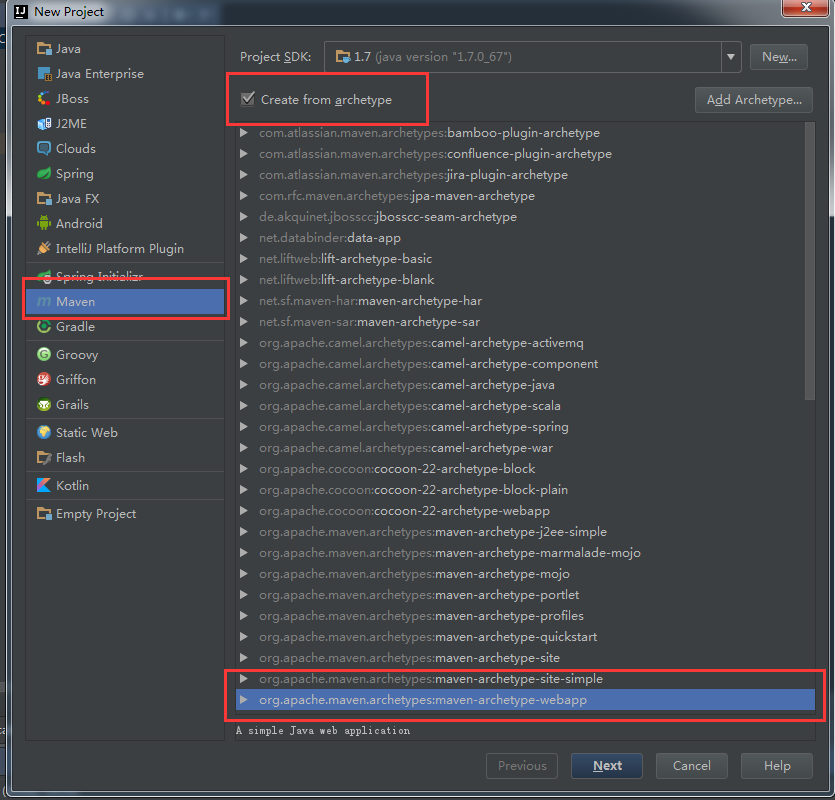
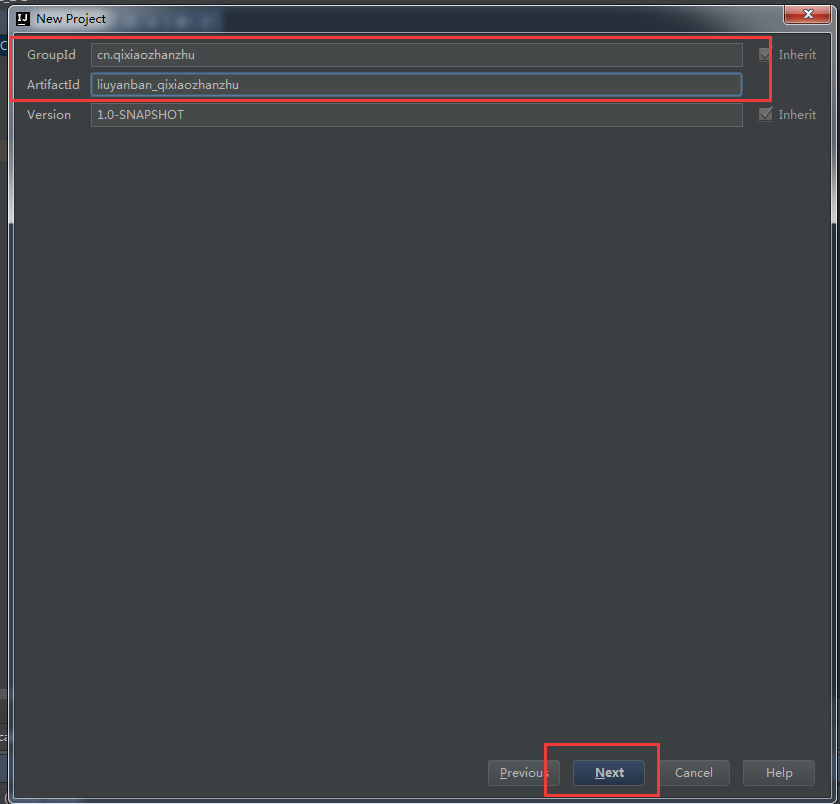
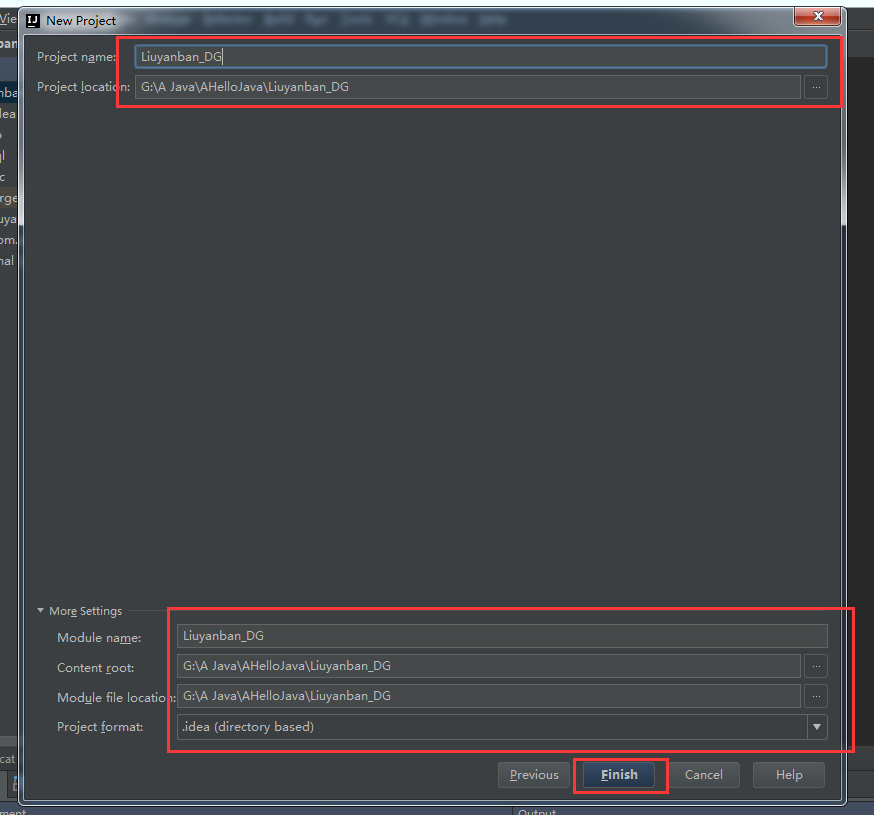
Maven 標準目錄:
src
├── main
│   ├── java          → Mark as Sources Root (藍色)
│   ├── resources     → Mark as Resources Root
│   └── webapp
│       └── WEB-INF
│           └── web.xml
└── test
    ├── java          → Mark as Test Sources Root (綠色)
    └── resources     → Mark as Test Resources Root
操作:右鍵目錄 → Mark Directory as → 選對應類型。

<project xmlns="https://maven.apache.org/POM/4.0.0" ...>
    <modelVersion>4.0.0</modelVersion>
    <groupId>cn.qixiao</groupId>
    <artifactId>Liuyanban_SpringMVC</artifactId>
    <packaging>war</packaging>
    <version>1.0-SNAPSHOT</version>

    <properties>
        <spring.version>4.3.1.RELEASE</spring.version>
        <project.build.sourceEncoding>UTF-8</project.build.sourceEncoding>
    </properties>

    <dependencies>
        <!-- JUnit -->
        <dependency>
            <groupId>junit</groupId> <artifactId>junit</artifactId> <version>3.8.1</version> <scope>test</scope>
        </dependency>
        <dependency>
            <groupId>org.springframework</groupId> <artifactId>spring-test</artifactId> <version>${spring.version}</version>
        </dependency>

        <!-- Spring Core -->
        <dependency> <groupId>org.springframework</groupId> <artifactId>spring-beans</artifactId> <version>${spring.version}</version> </dependency>
        <dependency> <groupId>org.springframework</groupId> <artifactId>spring-core</artifactId> <version>${spring.version}</version> </dependency>
        <dependency> <groupId>org.springframework</groupId> <artifactId>spring-context</artifactId> <version>${spring.version}</version> </dependency>

        <!-- Spring Web MVC -->
        <dependency> <groupId>org.springframework</groupId> <artifactId>spring-web</artifactId> <version>${spring.version}</version> </dependency>
        <dependency> <groupId>org.springframework</groupId> <artifactId>spring-webmvc</artifactId> <version>${spring.version}</version> </dependency>

        <!-- Database -->
        <dependency> <groupId>mysql</groupId> <artifactId>mysql-connector-java</artifactId> <version>6.0.3</version> </dependency>
        <dependency> <groupId>c3p0</groupId> <artifactId>c3p0</artifactId> <version>0.9.1.2</version> </dependency>

        <!-- JSTL (解決 NoClassDefFoundError: javax/servlet/jsp/jstl/core/Config) -->
        <dependency> <groupId>jstl</groupId> <artifactId>jstl</artifactId> <version>1.2</version> </dependency>
    </dependencies>

    <build>
        <finalName>Liuyanban_SpringMVC</finalName>
        <plugins>
            <plugin>
                <groupId>org.apache.tomcat.maven</groupId>
                <artifactId>tomcat7-maven-plugin</artifactId>
                <version>2.2</version>
                <configuration>
                    <port>8080</port>
                    <path>/</path>
                    <uriEncoding>UTF-8</uriEncoding>
                </configuration>
            </plugin>
        </plugins>
    </build>
</project>
保存後 IDEA 自動下載 JAR 包至本地倉庫。
<web-app xmlns="https://java.sun.com/xml/ns/javaee" version="3.0">
    <welcome-file-list><welcome-file>/index.jsp</welcome-file></welcome-file-list>

    <!-- Spring MVC DispatcherServlet -->
    <servlet>
        <servlet-name>spring</servlet-name>
        <servlet-class>org.springframework.web.servlet.DispatcherServlet</servlet-class>
        <init-param>
            <param-name>contextConfigLocation</param-name>
            <param-value>/WEB-INF/spring-servlet.xml</param-value>
        </init-param>
        <load-on-startup>1</load-on-startup>
    </servlet>
    <servlet-mapping>
        <servlet-name>spring</servlet-name>
        <url-pattern>/</url-pattern>
    </servlet-mapping>

    <!-- Spring 容器監聽器 -->
    <listener>
        <listener-class>org.springframework.web.context.ContextLoaderListener</listener-class>
    </listener>
    <context-param>
        <param-name>contextConfigLocation</param-name>
        <param-value>classpath:applicationContext.xml</param-value>
    </context-param>
</web-app>
<beans xmlns="https://www.springframework.org/schema/beans"
       xmlns:mvc="https://www.springframework.org/schema/mvc"
       xmlns:context="https://www.springframework.org/schema/context"
       xsi:schemaLocation="...spring-mvc-3.1.xsd">

    <mvc:annotation-driven/>
    <context:component-scan base-package="liuyanban.controller"/>

    <bean class="org.springframework.web.servlet.view.InternalResourceViewResolver">
        <property name="viewClass" value="org.springframework.web.servlet.view.JstlView"/>
        <property name="prefix" value="/"/>
        <property name="suffix" value=".jsp"/>
    </bean>

    <mvc:resources location="/images/" mapping="/images/**"/>
    <mvc:resources location="/scripts/" mapping="/scripts/**"/>
    <mvc:resources location="/styles/" mapping="/styles/**"/>
</beans>
<beans ...><!-- DataSource, TransactionManager, Service Bean 等放這裡 --></beans>
package liuyanban.controller;

import org.springframework.stereotype.Controller;
import org.springframework.web.bind.annotation.*;

@Controller
@RequestMapping("/Test")
public class TestController {

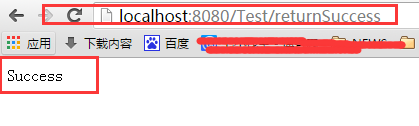
    @RequestMapping("/returnSuccess")
    public String returnSuccess() {
        return "/Views/success";  // 對應 /Views/success.jsp
    }

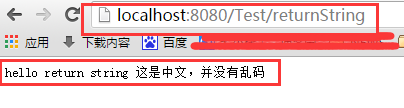
    @RequestMapping(value = "/returnString", produces = "text/plain;charset=UTF-8")
    @ResponseBody
    public String returnString() {
        return "hello return string 這是中文,並沒有亂碼";
    }
}
| 問題 | 原因 | 解決 |
|---|---|---|
| 404 Not Found | url-pattern 配置錯誤或 Controller 掃描包路徑不匹配 | 檢查 web.xml ` |
| 中文亂碼 | 未設置 produces 或 ViewResolver 編碼 | @RequestMapping(produces="text/plain;charset=UTF-8") 或配置 CharacterEncodingFilter |
| JSP 不解析 | 缺少 jstl 依賴或 ViewResolver 前綴後綴錯誤 | 添加 jstl:jstl:1.2,prefix="/", suffix=".jsp" |
| 靜態資源 404 | DispatcherServlet 攔截了靜態請求 | 配置 <mvc:resources mapping="/static/**" location="/static/"/> |
| 依賴衝突 | Spring 版本不一致 | 統一使用 ${spring.version} 屬性,排除傳遞依賴 |
通過 Maven 管理依賴、IDEA 智能提示、Spring MVC 註解驅動開發,可快速構建規範、可維護的 Web 應用。掌握核心配置邏輯(DispatcherServlet、HandlerMapping、ViewResolver、Interceptor),才能在遇到疑難雜症時游刃有餘。