Windows 執行階段的 Windows.Media.Capture 命名空間提供強大的媒體捕獲 API,其中 CameraCaptureUI 類別大幅簡化了相機與麥克風的存取。本文將以 Contoso Cookbook 為例,示範如何新增應用列、整合拍照/錄影功能,並透過共用合約分享媒體內容。
Callisto 是社群維護的 XAML 控制項套件,提供 Menu 與 Flyout 等實用元件。安裝步驟:
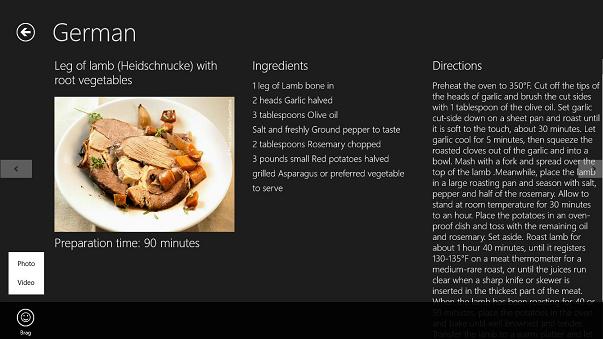
Callisto.vsix 並安裝。<Page.BottomAppBar>
<AppBar x:Name="PageAppBar" Padding="10,0,10,0">
<Grid>
<Grid.ColumnDefinitions>
<ColumnDefinition Width="50*"/>
<ColumnDefinition Width="50*"/>
</Grid.ColumnDefinitions>
<StackPanel x:Name="LeftCommands" Orientation="Horizontal" Grid.Column="0" HorizontalAlignment="Left">
<Button x:Name="BragButton" Style="{StaticResource BragAppBarButtonStyle}" Click="OnBragButtonClicked"/>
</StackPanel>
<StackPanel x:Name="RightCommands" Orientation="Horizontal" Grid.Column="1" HorizontalAlignment="Right"/>
</Grid>
</AppBar>
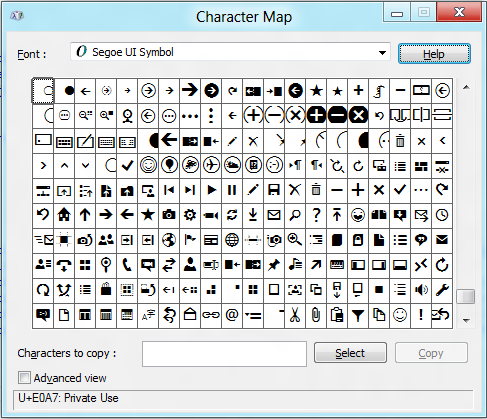
</Page.BottomAppBar>按鈕樣式 BragAppBarButtonStyle 繼承自 AppBarButtonStyle,圖示使用 Segoe UI Symbol 字型編碼 。
private void OnBragButtonClicked(object sender, RoutedEventArgs e)
{
    var menu = new Menu();
    var item1 = new MenuItem { Text = "Photo" };
    item1.Tapped += OnCapturePhoto;
    menu.Items.Add(item1);
    var item2 = new MenuItem { Text = "Video" };
    item2.Tapped += OnCaptureVideo;
    menu.Items.Add(item2);

    var flyout = new Flyout();
    flyout.Placement = PlacementMode.Top;
    flyout.HorizontalAlignment = HorizontalAlignment.Left;
    flyout.PlacementTarget = BragButton;
    flyout.Content = menu;
    flyout.IsOpen = true;
}private async void OnCapturePhoto(object sender, TappedRoutedEventArgs e)
{
var camera = new CameraCaptureUI();
var file = await camera.CaptureFileAsync(CameraCaptureUIMode.Photo);
if (file != null)
{
_photo = file;
DataTransferManager.ShowShareUI();
}
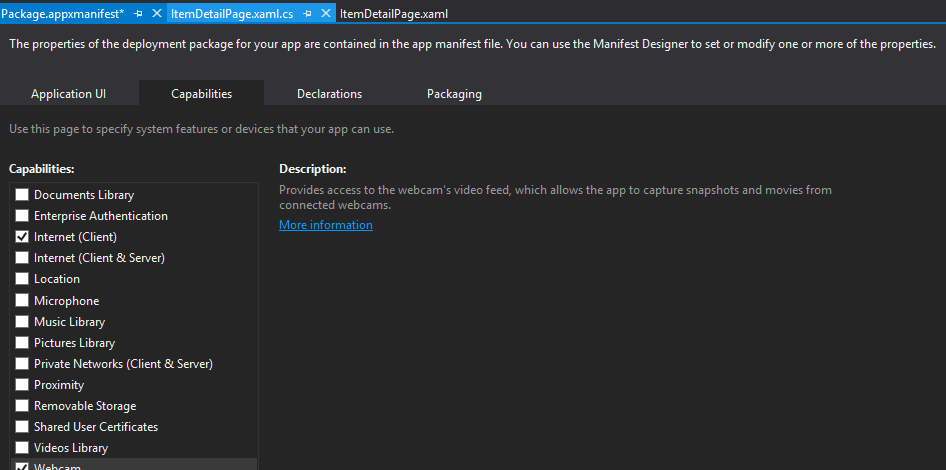
}CaptureFileAsync 會啟動系統內建相機 UI,使用者拍照確認後回傳 StorageFile。需在 Package.appxmanifest 的「功能」頁面勾選「網路攝影機」。
void OnDataRequested(DataTransferManager sender, DataRequestedEventArgs args)
{
    var request = args.Request;
    var item = (RecipeDataItem)this.flipView.SelectedItem;
    request.Data.Properties.Title = item.Title;

    if (_photo != null)
    {
        request.Data.Properties.Description = "Recipe photo";
        var reference = RandomAccessStreamReference.CreateFromFile(_photo);
        request.Data.Properties.Thumbnail = reference;
        request.Data.SetBitmap(reference);
        _photo = null;
    }
    else
    {
        // 共用文字與預設圖片...
    }
}private async void OnCaptureVideo(object sender, TappedRoutedEventArgs e)
{
var camera = new CameraCaptureUI();
camera.VideoSettings.Format = CameraCaptureUIVideoFormat.Wmv;
var file = await camera.CaptureFileAsync(CameraCaptureUIMode.Video);
if (file != null)
{
_video = file;
DataTransferManager.ShowShareUI();
}
}需額外在清單勾選「麥克風」功能,因錄影需同時存取音訊。
else if (_video != null)
{
    request.Data.Properties.Description = "Recipe video";
    var items = new List<StorageFile> { _video };
    request.Data.SetStorageItems(items);
    _video = null;
}當清單宣告網路攝影機與麥克風權限後,使用者可在系統「設定」→「權限」頁面隨時開啟/關閉存取權,開發者無需撰寫額外程式碼。
CameraCaptureUI 封裝了複雜的裝置驅動互動,讓媒體捕獲變得極為簡單。結合應用列與共用合約,應用能提供直觀的拍照/錄影分享體驗。後續可擴充將媒體檔案儲存至本地圖庫,建立個人化食譜相簿。