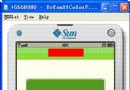
在 WTK 模擬器上啟用觸控支援驚人地簡單:修改裝置屬性檔即可。本文說明啟用步驟,並實戰示範如何在 Canvas 中處理 pointerPressed、pointerReleased、pointerDragged 三大觸控事件,實作軟鍵區域與選單點擊判定。
WTK22\wtklib\devices\DefaultColorPhone\DefaultColorPhone.propertiestouch_screen=false 改為 touch_screen=true。| 方法 | 觸發時機 | 參數 |
|---|---|---|
pointerPressed(int x, int y) | 手指按下螢幕 | 螢幕座標 |
pointerReleased(int x, int y) | 手指離開螢幕 | 螢幕座標 |
pointerDragged(int x, int y) | 手指在螢幕上滑動 | 螢幕座標 |
protected void pointerPressed(int x, int y) {
    switch (currentState) {
        case STATE_MENU: // 主選單:左側 90px 寬、底部 10 項 × 17px
            if (x < MENU_WIDTH &&
                y > screenHeight - (MENU_ITEM_H * MENU_COUNT + MENU_BAR_H)) {
                int index = (y - (screenHeight - (MENU_ITEM_H * MENU_COUNT + MENU_BAR_H))) / MENU_ITEM_H;
                doMenuAction(index);
            }
            break;

        case STATE_LIST:
        case STATE_SEARCH:
        case STATE_MAP:
            // 左軟鍵區域:左下 40×20
            if (x < 40 && y > screenHeight - 20) doLeftSoftkey();
            // 右軟鍵區域:右下 40×20
            if (x > screenWidth - 40 && y > screenHeight - 20) doRightSoftkey();
            break;
    }
}
currentState 區分畫面,針對不同 UI 佈局計算點擊區域。pointerReleased 配合時間差判斷。pointerDragged 累加位移量處理。掌握這三個事件與座標判定,即可在 J2ME 上打造直覺的觸控介面,無需依賴第三方 UI 框架。