接續基礎 UI 組件,本文深入講解 Ticker 跑馬燈效果、TextBox 用戶輸入值的獲取、java.util 包下的日期時間處理(Date、TimeZone、Calendar),並以完整示例演示如何建立 HttpConnection 訪問遠程資源,最終實現 J2ME + JavaMail 發送電子郵件的端到端方案。
Ticker 僅接受一個字符串構造參數,通過 Displayable.setTicker(Ticker) 綁定到任意顯示對象(Form、List、TextBox 等)頂部,實現橫向滾動播放。
Ticker ticker = new Ticker("歡迎使用 J2ME 應用 - 官網:www.example.com");
form.setTicker(ticker);
關鍵在於調用 TextBox.getString() 方法。典型流程:用戶編輯完畢 → 觸發特定 Command(如「GETVALUE」)→ 彈出新 Form 顯示獲取的字符串。
private Command getCommand = new Command("GETVALUE", Command.OK, 1);

public void startApp() {
    txtBox = new TextBox("Text Box", null, 200, 0);
    txtBox.addCommand(exitCommand);
    txtBox.addCommand(getCommand);
    txtBox.setCommandListener(this);
    display.setCurrent(txtBox);
}

public void commandAction(Command c, Displayable s) {
    if (c == getCommand) {
        showValueScreen();
    }
}

private void showValueScreen() {
    Form form = new Form("Input Value");
    form.append(txtBox.getString());  // 關鍵:獲取用戶輸入
    form.addCommand(exitCommand);
    form.setCommandListener(this);
    display.setCurrent(form);
}
import java.util.Date;
Date date = new Date();
props.append("Time Millis: " + date.getTime() + "\n");
返回自 1970-01-01 00:00:00 UTC 的毫秒數,適合簡單計時或傳遞時間戳。
import java.util.TimeZone;
TimeZone zone = TimeZone.getDefault();
String[] ids = zone.getAvailableIDs();
for (String id : ids) {
    props.append(id + "\n");
}
props.append("Current Zone: " + zone.getID() + "\n");
常用於國際化應用顯示本地時間或轉換時區。
import java.util.Calendar;
Calendar now = Calendar.getInstance();
props.append("YEAR: " + now.get(Calendar.YEAR) + "\n");
props.append("MONTH: " + now.get(Calendar.MONTH) + "\n"); // 0-based
props.append("DAY: " + now.get(Calendar.DAY_OF_MONTH) + "\n");
props.append("HOUR: " + now.get(Calendar.HOUR_OF_DAY) + "\n");
props.append("MINUTE: " + now.get(Calendar.MINUTE) + "\n");
props.append("SECOND: " + now.get(Calendar.SECOND) + "\n");
Calendar 提供年、月、日、時、分、秒、毫秒等細顆粒字段,是構建日曆、鬧鐘、定時任務的基礎。
J2ME 通過 javax.microedition.io.Connector.open(url) 獲取連接,強轉為 HttpConnection 即可調用豐富的 HTTP 元數據方法。
try {
    HttpConnection conn = (HttpConnection) Connector.open("https://example.com/api");
    // 可選:設置請求頭 conn.setRequestProperty("User-Agent", "J2ME Client");

    // 讀取響應元數據
    props.append("Response Code: " + conn.getResponseCode() + "\n");
    props.append("Content-Type: " + conn.getType() + "\n");
    props.append("Content-Length: " + conn.getLength() + "\n");
    props.append("Encoding: " + conn.getEncoding() + "\n");
    props.append("Date: " + conn.getDate() + "\n");
    props.append("Last-Modified: " + conn.getLastModified() + "\n");

    // 讀取響應體
    InputStream is = conn.openInputStream();
    // ... 讀取數據 ...
    conn.close();
} catch (IOException e) {
    props.append("Error: " + e.getMessage());
}
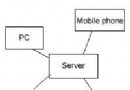
架構:J2ME 客戶端 → HTTP 請求 → Tomcat (JSP) → JavaMail API → SMTP 服務器 → 郵箱。
<%
String content = request.getParameter("content");
Properties props = System.getProperties();
props.put("mail.smtp.auth", "true");
props.put("mail.smtp.host", "smtp.example.com");
Session session = Session.getInstance(props, new Authenticator() {
    protected PasswordAuthentication getPasswordAuthentication() {
        return new PasswordAuthentication("user", "pass");
    }
});
Message msg = new MimeMessage(session);
msg.setFrom(new InternetAddress("from@example.com"));
msg.setRecipients(Message.RecipientType.TO, InternetAddress.parse("to@example.com"));
msg.setSubject("J2ME Mail Test");
msg.setText(content);
Transport.send(msg);
%>
Send Message OK!
public class SendMail extends MIDlet implements CommandListener {
    // ... 初始化代碼 ...
    public void startApp() {
        try {
            HttpConnection conn = (HttpConnection) Connector.open(
                "https://server:8080/post.jsp?content=Hello+World");
            int code = conn.getResponseCode();
            if (code == HttpConnection.HTTP_OK) {
                props.append("Send Mail OK!\n");
            }
        } catch (Exception e) {
            props.append("Error: " + e.getMessage());
        }
    }
}
post.jsp 至 ROOT 目錄同理可構建:
conn.openInputStream() 獲取 DataInputStream 解析服務端返回的業務數據本文串聯了從界面交互(Ticker、輸入獲取)到本地時間處理,再到網絡通信與服務端集成的完整鏈路。掌握 HttpConnection 與服務端腳本協作模式,是 J2ME 應用實現雲端業務的關鍵技能。