NetBeans 平台提供完整的模組化架構,讓開發者能輕鬆擴充 IDE 功能。本文將引導您從零建立一個具備工具列按鈕、對話框互動的完整外掛。
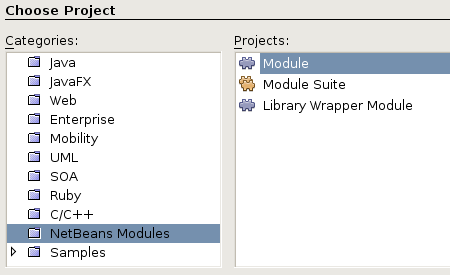
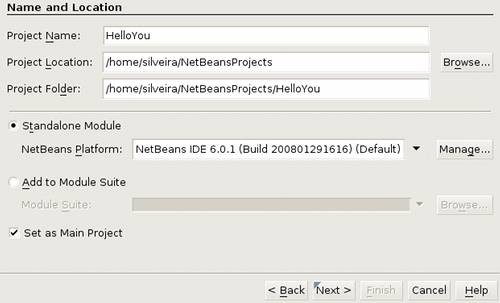
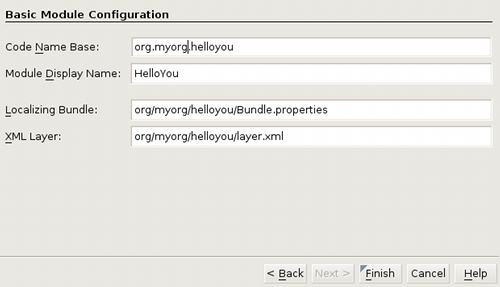
File → New Project,分類選 NetBeans Modules,專案選 ModuleHelloYou,其他保持預設org.yourorg.helloyou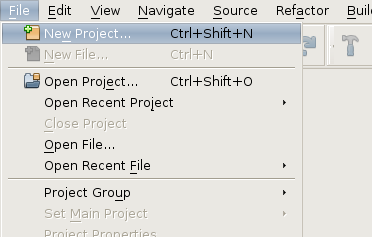
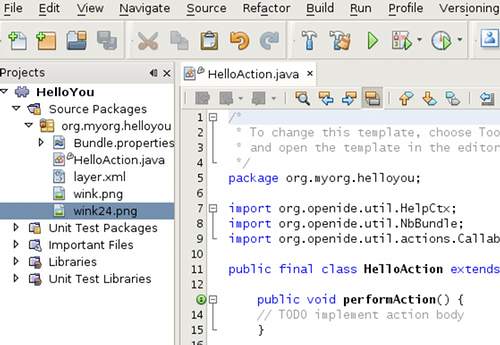
New → ActionHelloAction,顯示名稱自訂,圖示需 16×16 與 24×24 兩種尺寸(命名慣例:icon.png / icon24.png)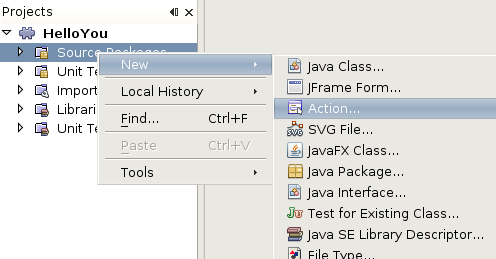
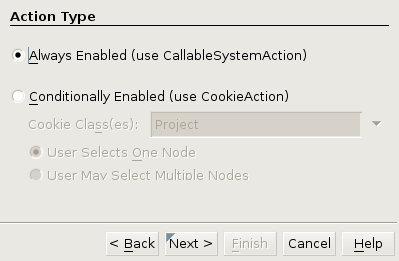
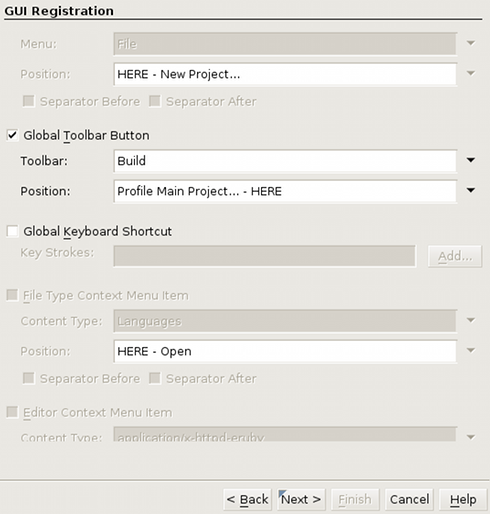
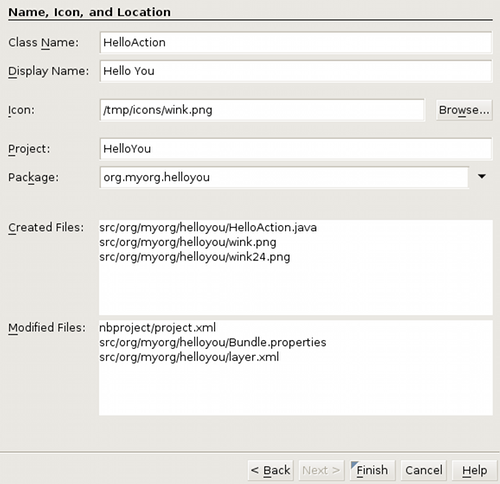


專案結構如下:
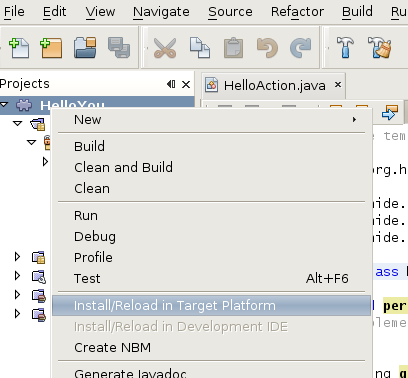
右鍵專案節點(拼圖圖示)選 Install/Reload in Target Platform,將啟動新 NetBeans 實例並載入模組:

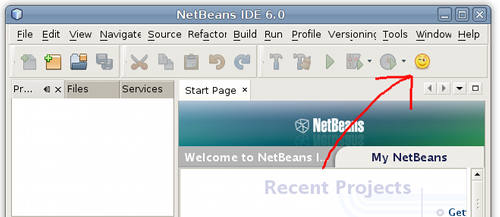
工具列將出現自訂按鈕(此時點擊無反應):
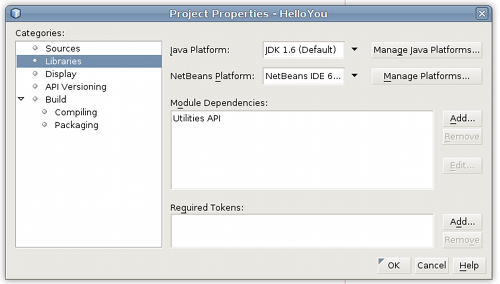
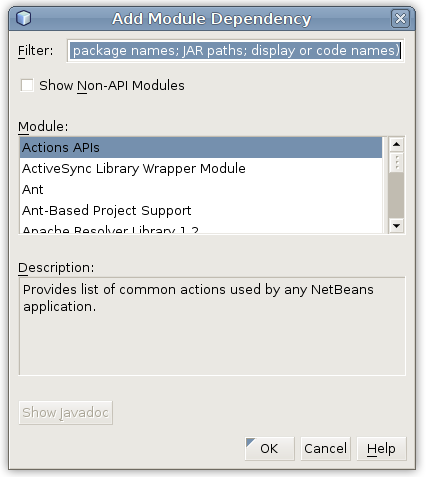
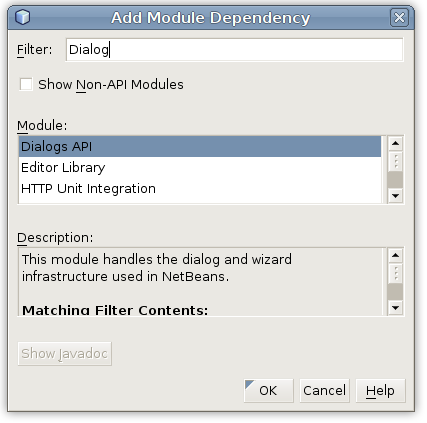
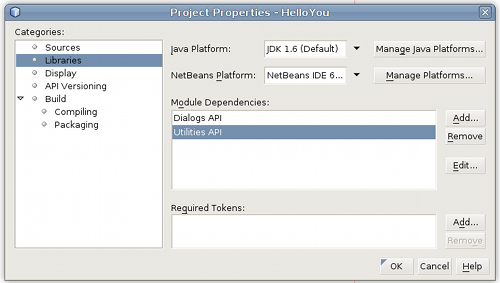
需使用 Dialogs API 顯示對話框,需加入相依:
Properties → Librariesdialogs,選擇 Dialogs API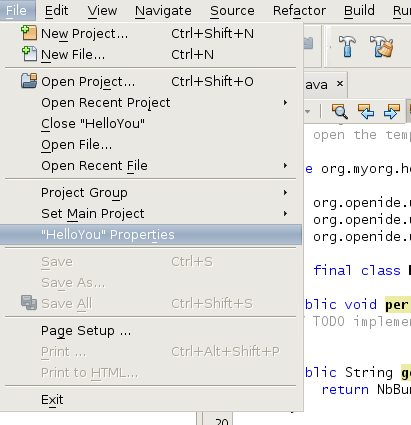
修改 HelloAction.java 的 performAction():
public void performAction() {
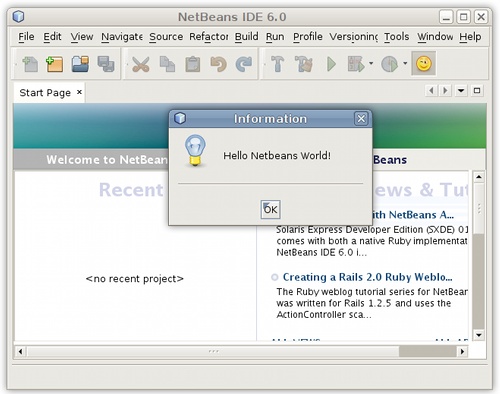
    String msg = "Hello NetBeans World!";
    int msgType = NotifyDescriptor.INFORMATION_MESSAGE;
    NotifyDescriptor d = new NotifyDescriptor.Message(msg, msgType);
    DialogDisplayer.getDefault().notify(d);
}
重新 Install/Reload 後點擊按鈕:
public void performAction() {
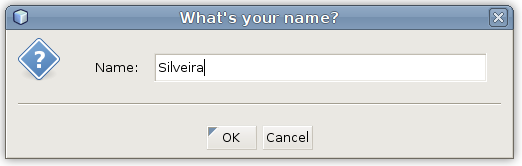
    NotifyDescriptor.InputLine question = new NotifyDescriptor.InputLine(
        "Name:", "What's your name?",
        NotifyDescriptor.OK_CANCEL_OPTION,
        NotifyDescriptor.QUESTION_MESSAGE
    );
    if (DialogDisplayer.getDefault().notify(question) == NotifyDescriptor.OK_OPTION) {
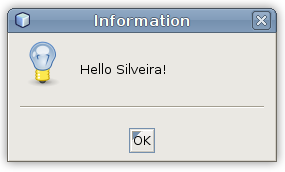
        String msg = "Hello " + question.getInputText() + "!";
        NotifyDescriptor d = new NotifyDescriptor.Message(msg, NotifyDescriptor.INFORMATION_MESSAGE);
        DialogDisplayer.getDefault().notify(d);
    }
}
執行結果:
您已完成第一個 NetBeans 外掛!核心流程:建立模組 → 定義 Action → 設定 GUI 註冊 → 管理相依性 → 實作邏輯。後續可探索 Explorer API、DataSystems API 等進階主題,打造功能豐富的 IDE 擴充套件。