首頁
編程語言
C語言|JAVA編程
Python編程
網頁編程
ASP編程|PHP編程
JSP編程
數據庫
MYSQL數據庫|SqlServer數據庫
Oracle數據庫|DB2數據庫
您现在的位置: 程式碼之家 >> 編程語言 >  >> Java 程式設計 >> Java 相關知識

Eclipse 實戰技巧(二):一鍵生成介面與 JUnit 測試類

     編輯:Java 相關知識

Spring 開發中常見「介面 + 實作類」模式,手寫介面既繁瑣又易出錯。Eclipse 提供強大的重構與程式碼生成功能,能秒級完成介面抽取與測試類建立。本文實戰示範兩大高頻操作。

一、從實作類自動抽取介面

場景

已有 PersonServiceImpl 實作類,需抽取 PersonService 介面。

public class PersonServiceImpl {
    public void addPerson(Person p) { ... }
    public List<Person> queryPerson() { ... }
}
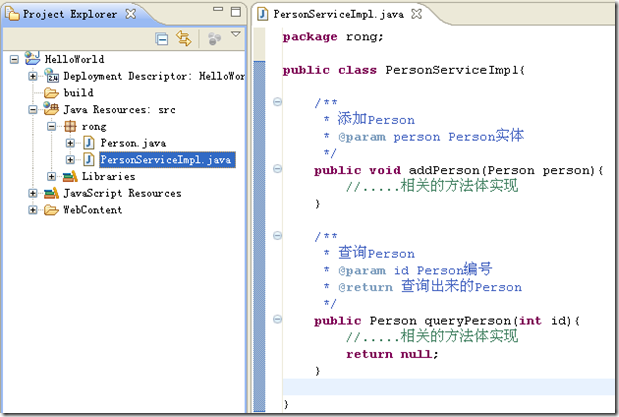
原始 PersonServiceImpl 程式碼

操作步驟

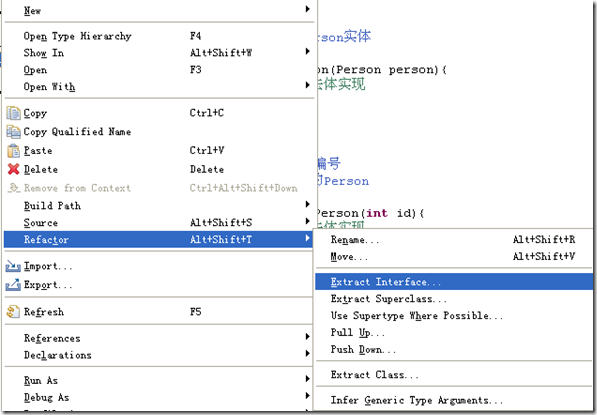
  1. 在程式碼編輯區空白處或類名上 右鍵 → Refactor → Extract Interface...。
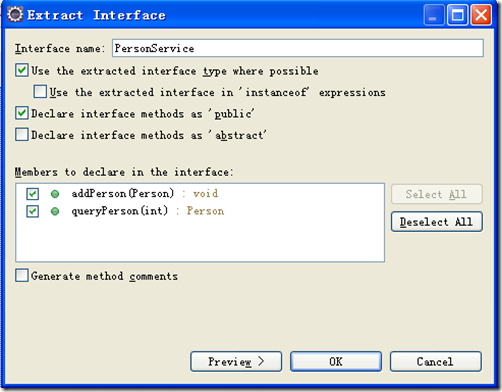
  2. 在彈出對話框中:
    - Interface name:輸入 PersonService
    - 勾選需公開的方法(如 addPerson、queryPerson)
    - 點擊 OK

右鍵選單 Extract Interface Extract Interface 對話框設定

結果

  • 自動生成 PersonService.java 介面檔
  • 原 PersonServiceImpl 自動加上 implements PersonService
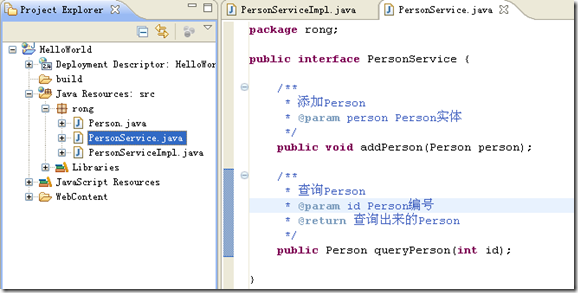

生成的 PersonService 介面 修改後的 PersonServiceImpl

二、自動生成 JUnit 測試類

操作步驟

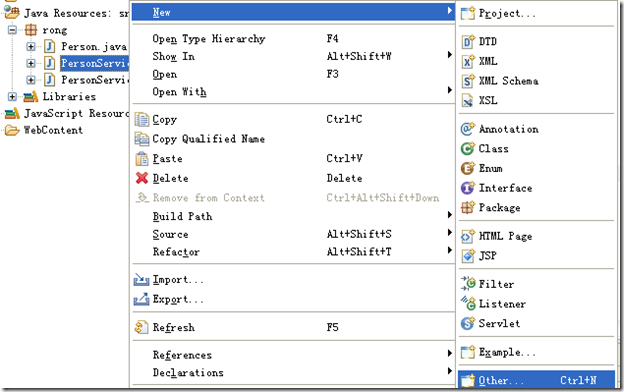
  1. 在目標類(如 PersonService)類名上 右鍵 → New → Other...。
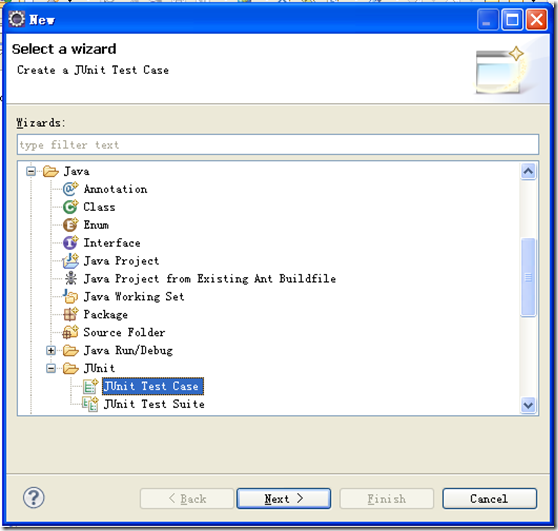
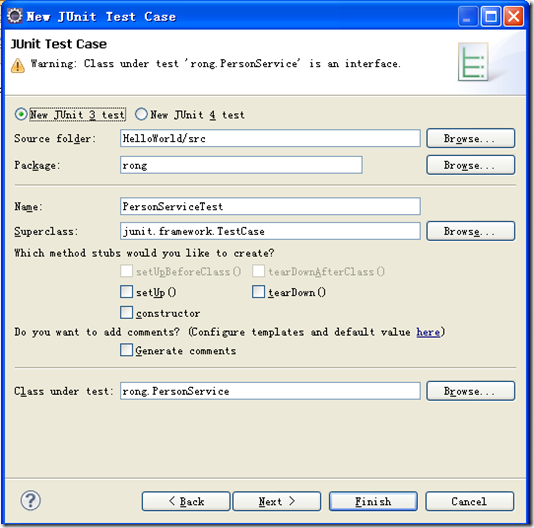
  2. 展開 Java → JUnit → JUnit Test Case,點擊 Next。
  3. 設定測試類:
    - Test class name:預設 PersonServiceTest 即可
    - Package:可指定測試專用 package(如 test)
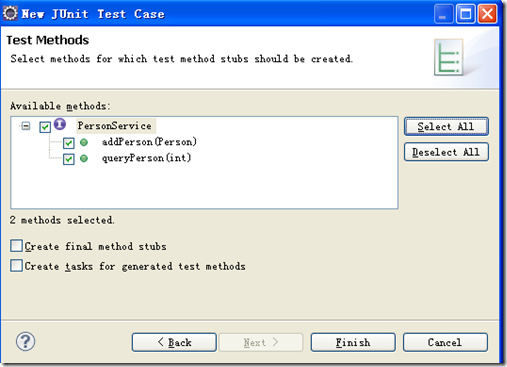
    - 勾選需測試的方法
    - 點擊 Finish

右鍵 New Other 選單 選擇 JUnit Test Case New JUnit Test Case 設定 選擇測試方法

首次建立需加入 JUnit Library

若專案未引入 JUnit,Eclipse 會提示 「Add JUnit 4 library to the build path?」,點擊 OK 自動完成。
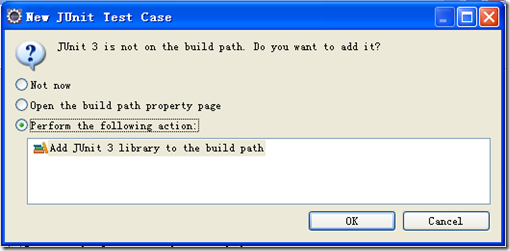
提示加入 JUnit Library

生成結果

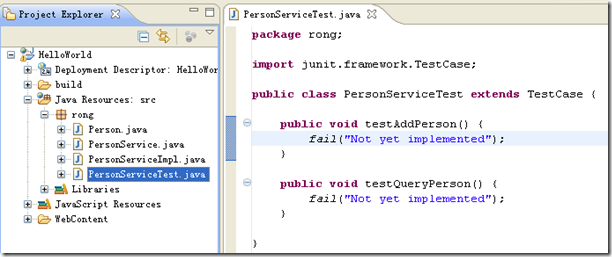
自動產生包含 @Test 註解的測試方法框架,僅需補齊測試邏輯即可執行。

生成的 PersonServiceTest 測試類

效率提升總結

操作傳統耗時Eclipse 自動生成
抽取介面(5-10 方法)10-15 分鐘< 30 秒
建立測試類骨架(8 方法)5-8 分鐘< 10 秒

善用 Refactor → Extract Interface 與 New → JUnit Test Case,讓你專注於業務邏輯與測試案例設計,而非機械性敲碼。

  1. 上一篇文章:
  2. 下一篇文章:
Copyright © 程式碼之家 All Rights Reserved