在前五篇奠定基礎架構(Ribbon、AvalonDock、主題切換)後,本文引入 Microsoft Prism Library,徹底落地 MVVM 模式:將視圖邏輯從 Code-behind 移至 ViewModel,實現「視圖與邏輯零耦合」,支援單元測試、設計時體驗與團隊並行開發。
傳統 Code-behind 痛點:
MVVM 三大核心優勢:
Install-Package Prism.Wpf(或從 CodePlex 下載 Microsoft.Practices.Prism.dll)。Models、ViewModels。MainWindow.xaml 建立 MainWindowViewModel.cs。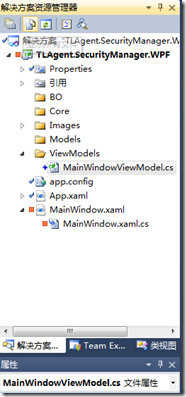
using Microsoft.Practices.Prism.ViewModel;
using Microsoft.Practices.Prism.Commands;
using System.Windows;

namespace TLAgent.SecurityManager.WPF.ViewModels
{
    public class MainWindowViewModel : NotificationObject
    {
        // 1. 宣告委托命令
        public DelegateCommand ExitSystemCommand { get; private set; }

        public MainWindowViewModel()
        {
            // 2. 實例化命令並綁定執行方法
            ExitSystemCommand = new DelegateCommand(this.OnExit);
        }

        private void OnExit()
        {
            var result = MessageBox.Show("確定要退出系統嗎?", "確認訊息",
                                         MessageBoxButton.OKCancel, MessageBoxImage.Question);
            if (result == MessageBoxResult.OK)
                Application.Current.Shutdown();
        }
    }
}
關鍵點**:
NotificationObject(實作 INotifyPropertyChanged),支援屬性變更通知。DelegateCommand 封裝 ICommand,支援 CanExecute 自動評估。<Fluent:Ribbon.Menu>
<Fluent:Backstage Background="RoyalBlue">
<Fluent:BackstageTabControl>
<!-- Command 綁定 ViewModel 中的 DelegateCommand -->
<Fluent:Button Header="退出系統"
Command="{Binding ExitSystemCommand}"
Icon="Images\close.png" />
</Fluent:BackstageTabControl>
</Fluent:Backstage>
</Fluent:Ribbon.Menu>
方式 A:Code-behind 指定(推薦,便於 DI 容器注入)
using System.Windows;
using Fluent;
using TLAgent.SecurityManager.WPF.ViewModels;

namespace TLAgent.SecurityManager.WPF
{
    public partial class MainWindow : RibbonWindow
    {
        public MainWindow()
        {
            InitializeComponent();
            this.DataContext = new MainWindowViewModel(); // 關鍵一行
        }
    }
}
方式 B:XAML 宣告式指定
<Fluent:RibbonWindow ...
        xmlns:vm="clr-namespace:TLAgent.SecurityManager.WPF.ViewModels">
    <Fluent:RibbonWindow.DataContext>
        <vm:MainWindowViewModel />
    </Fluent:RibbonWindow.DataContext>
    ...
</Fluent:RibbonWindow>
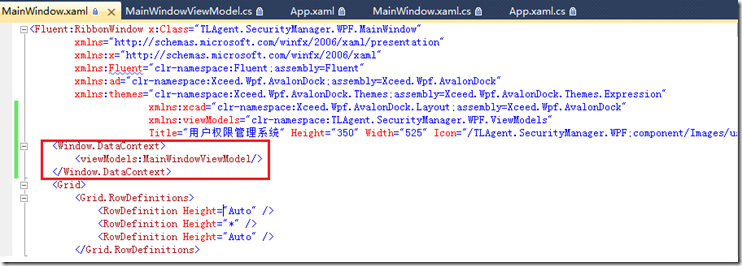
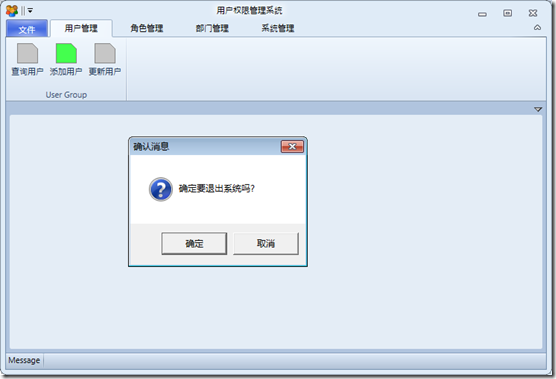
點擊「退出系統」按鈕,彈出確認對話框,確認後應用程式正常關閉。View 完全不知情退出邏輯,僅透過 Command 綁定觸發 VM 方法。