自訂屬性能讓 Web Part 擁有額外的設定選項,使用者可在屬性窗格中調整行為,無需修改程式碼。本文示範如何用 Visual Studio 建立包含自訂屬性的 Web Part。
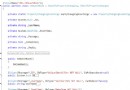
CustomWPProperties,部署為 場方案。WPPropertyExample。WPPropertyExample.cs 選擇 檢視程式碼。using System;
using System.ComponentModel;
using System.Web.UI.WebControls.WebParts;
using Microsoft.SharePoint;
namespace CustomWPProperties.WPPropertyExample
{
public class WPPropertyExample : WebPart
{
Label lblTitle = new Label();
public enum SharePointLists { Stats, Products, Customers }
protected SharePointLists listOfList;
[Personalizable(PersonalizationScope.User),
WebBrowsable,
WebDisplayName("可用清單"),
WebDescription("SharePoint 站點中的可用清單。")]
public SharePointLists MySticks
{
get { return listOfList; }
set { listOfList = value; }
}
protected override void CreateChildControls()
{
lblTitle.Text = "擁有自訂屬性的 Web Part";
this.Controls.Add(lblTitle);
}
}
}
WPPropertyExample 加入。Stats、Products、Customers 三個選項。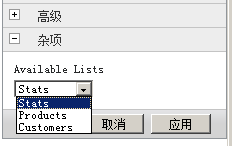
Personalizable:讓屬性值能依使用者個人化儲存。WebBrowsable:使屬性出現在屬性窗格中。WebDisplayName / WebDescription:提供友善的顯示名稱與說明。透過這樣的方式,您可以輕鬆為 Web Part 增加靈活的設定選項,提升使用者體驗。