Java 的 I/O 體系龐大且複雜,初學者常因為眾多流類別而感到困惑。本文作為系列第三篇,重點講解 Scanner、PrintWriter 以及 System.in/out 的實用技巧,幫助開發者掌握更高效的輸入輸出操作。
java.util.Scanner 是 JDK 1.5 引入的簡易文本掃描器,支援從標準輸入、字串、檔案等多種來源解析基本類型與字串,內建正則表達式分隔符支援,極適合處理結構化文本輸入。
import java.util.Scanner;

public class Demo {
    public static void main(String[] args) {
        Scanner input = new Scanner(System.in);
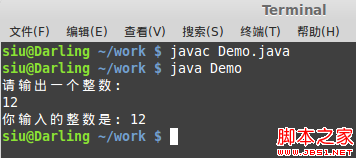
        System.out.print("請輸入一個整數:");
        int i = input.nextInt();
        System.out.println("你輸入的整數是:" + i);
    }
}
除 nextInt() 外,還提供 nextDouble()、nextBoolean() 等對應方法,詳見 API 文檔。
import java.util.Scanner;

public class Demo {
    public static void main(String[] args) {
        // Windows 換行符為 \r\n,Linux 僅需 \n
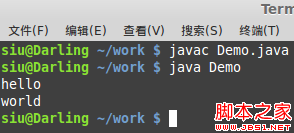
        Scanner input = new Scanner("hello\r\nworld\r\n");
        while (input.hasNext()) {
            String line = input.nextLine();
            System.out.println(line);
        }
    }
}
hasNext() 與集合框架的迭代器用法一致,nextLine() 逐行讀取,另有 next() 按分隔符讀取單詞。
import java.io.File;
import java.io.FileNotFoundException;
import java.util.Scanner;

public class Demo {
    public static void main(String[] args) {
        String path = File.separator + "home" + File.separator + "siu" +
                      File.separator + "work" + File.separator + "demo.txt";
        File file = new File(path);
        Scanner input = null;
        try {
            input = new Scanner(file);
            while (input.hasNext()) {
                System.out.println(input.nextLine());
            }
        } catch (FileNotFoundException e) {
            e.printStackTrace();
        } finally {
            if (input != null) input.close();
        }
    }
}
注意事項:
Scanner 需先有 File 物件,可使用匿名物件簡化代碼FileNotFoundExceptionfinally 區塊關閉流,防止資源洩漏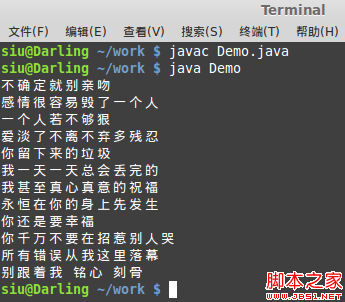
PrintWriter 提供 print()、println()、printf() 等豐富格式化輸出方法,且不拋出 IOException(需自行檢查 checkError()),極適合文本檔案寫入。
import java.io.File;
import java.io.FileNotFoundException;
import java.io.PrintWriter;

public class Demo {
    public static void main(String[] args) {
        String path = File.separator + "home" + File.separator + "siu" +
                      File.separator + "work" + File.separator + "demo.txt";
        File file = new File(path);
        PrintWriter pw = null;
        try {
            pw = new PrintWriter(file);
            pw.println("如果有一天我回到從前");
            pw.println("回到最原始的我");
            pw.println("你是否會覺得我不錯");
            pw.flush(); // 強制刷新緩衝區
        } catch (FileNotFoundException e) {
            e.printStackTrace();
        } finally {
            if (pw != null) pw.close();
        }
    }
}
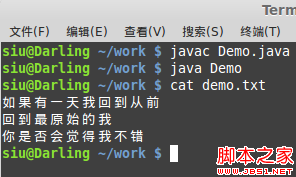
FileWriter/FileOutputStream 僅提供基本寫入,處理細節(如換行、格式化)極不方便。PrintWriter/PrintStream 不僅提供豐富 print 系列方法,還能自動建立不存在的檔案(覆蓋模式)。
預設構造函數會覆蓋舊檔案,若需追加,可透過裝飾模式傳入 FileWriter(true):
import java.io.File;
import java.io.FileWriter;
import java.io.IOException;
import java.io.PrintWriter;

public class Demo {
    public static void main(String[] args) {
        String path = File.separator + "home" + File.separator + "siu" +
                      File.separator + "work" + File.separator + "demo.txt";
        File file = new File(path);
        PrintWriter pw = null;
        try {
            // true 表示開啟追加模式
            pw = new PrintWriter(new FileWriter(file, true));
            pw.println("這一句就是追加的內容");
            pw.flush();
        } catch (IOException e) {
            e.printStackTrace();
        } finally {
            if (pw != null) pw.close();
        }
    }
}
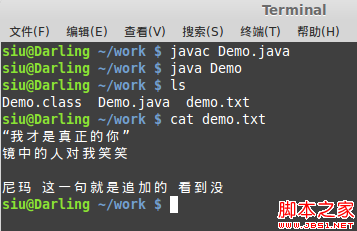
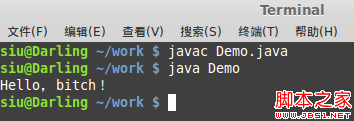
System.in、System.out、System.err 分別代表標準輸入、輸出、錯誤流,本質上是 InputStream、PrintStream 物件,體現了 IO 體系的多態設計。
import java.io.IOException;
import java.io.OutputStream;

public class Demo {
    public static void main(String[] args) {
        OutputStream out = System.out;
        try {
            out.write("Hello,World!\r\n".getBytes());
        } catch (IOException e) {
            e.printStackTrace();
        }
    }
}
import java.io.IOException;
import java.io.InputStream;

public class Demo {
    public static void main(String[] args) {
        InputStream in = System.in;
        System.out.print("請輸入文字:");
        byte[] buf = new byte[1024];
        int len = 0;
        try {
            len = in.read(buf);
        } catch (IOException e) {
            e.printStackTrace();
        }
        System.out.println("你的輸入是:" + new String(buf, 0, len));
    }
}
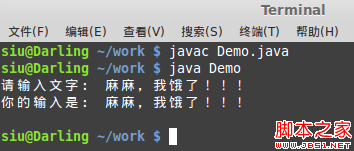
局限性: 緩衝區固定 1024 位元組,超長輸入會被截斷;中文字符佔 2 位元組,易導致半個字符被截斷產生亂碼。
import java.io.BufferedReader;
import java.io.IOException;
import java.io.InputStreamReader;

public class Demo {
    public static void main(String[] args) {
        BufferedReader br = new BufferedReader(new InputStreamReader(System.in));
        System.out.print("請輸入文本:");
        try {
            String line = br.readLine();
            System.out.println("你輸入的是:" + line);

            // 循環讀取範例
            /*
            while (true) {
                System.out.print("請輸入文本(輸入 over 結束):");
                String str = br.readLine();
                if ("over".equals(str)) break;
                System.out.println("你輸入的是:" + str);
            }
            */
        } catch (IOException e) {
            e.printStackTrace();
        } finally {
            try { br.close(); } catch (IOException e) { e.printStackTrace(); }
        }
    }
}
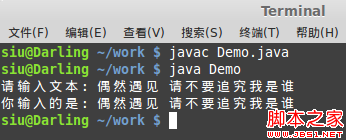
優勢: 無需擔心緩衝區大小,readLine() 自動處理換行,支援任意長度輸入,且字符編碼轉換由 InputStreamReader 處理,避免中文亂碼。
FileWriter(true) 實現追加模式BufferedReader/PrintWritertry-finally 或 Java 7+ 的 try-with-resources 確保流正確關閉