J2ME 界面導航核心是 Display.setCurrent(Displayable next)。每個 MIDlet 擁有唯一 Display 實例 (由 Display.getDisplay(this) 獲取),所有顯示對象 (Form、List、TextBox、Alert、Canvas) 均實現 Displayable 接口。
關鍵思想:**子屏幕構造時接收父屏幕的 Displayable 引用,返回時直接 setCurrent(parent)**。
package fancy.test;

import javax.microedition.midlet.*;
import javax.microedition.lcdui.*;

public class MainMIDlet extends MIDlet implements CommandListener {
    private Display display;
    private Form mainForm;
    private Command okCommand = new Command("OK", Command.OK, 1);
    private StringItem welcomeItem = new StringItem("Main Screen", "Welcome!! ~_~");
    private Form nextScreen;  // 子屏幕實例引用

    public MainMIDlet() {
        mainForm = new Form("Welcome!!");
        mainForm.append(welcomeItem);
        mainForm.addCommand(okCommand);
    }

    protected void startApp() throws MIDletStateChangeException {
        display = Display.getDisplay(this);
        mainForm.setCommandListener(this);
        display.setCurrent(mainForm);
    }

    protected void pauseApp() {}
    protected void destroyApp(boolean unconditional) throws MIDletStateChangeException {}

    public void commandAction(Command c, Displayable d) {
        if (c == okCommand) {
            // 關鍵:將當前 Display 和 父屏幕 Form 傳給子屏幕
            nextScreen = new NextScreen(display, mainForm);
            display.setCurrent(nextScreen);
        }
    }
}
package fancy.test;

import javax.microedition.lcdui.*;

public class NextScreen extends Form implements CommandListener {
    private Display display;
    private Displayable parentScreen;  // 父屏幕引用
    private Command backCommand = new Command("BACK", Command.BACK, 1);
    private StringItem infoItem = new StringItem("Second Screen", "~_~");

    public NextScreen(Display d, Displayable parent) {
        super("Next Screen");
        this.display = d;
        this.parentScreen = parent;
        append(infoItem);
        addCommand(backCommand);
        setCommandListener(this);
    }

    public void commandAction(Command c, Displayable d) {
        if (c == backCommand) {
            // 一鍵返回父屏幕
            display.setCurrent(parentScreen);
        }
    }
}
| 代碼行 | 作用 |
|---|---|
nextScreen = new NextScreen(display, mainForm); | 子屏幕持有 Display (用於 setCurrent) 和父屏幕引用 (用於返回) |
display.setCurrent(nextScreen); | 切換顯示到子屏幕 |
display.setCurrent(parentScreen); | 在子屏幕 BACK 命令中返回父屏幕 |
為支持「主菜單 → 子菜單 → 詳情 → 返回子菜單 → 返回主菜單」任意深度導航,建議在 MIDlet 中維護一個 Vector 棧:
private Vector screenStack = new Vector();  // 存儲 Displayable

// 進入新屏幕
public void pushScreen(Displayable screen) {
    Displayable current = display.getCurrent();
    if (current != null) screenStack.addElement(current);
    display.setCurrent(screen);
}

// 返回上一屏幕
public void popScreen() {
    if (screenStack.size() > 0) {
        Displayable prev = (Displayable) screenStack.lastElement();
        screenStack.removeElementAt(screenStack.size() - 1);
        display.setCurrent(prev);
    }
}
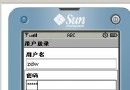
display = Display.getDisplay(this) 已執行主屏幕:顯示「Welcome!! ~_~」,軟鍵「OK」

子屏幕:顯示「Second Screen ~_~」,軟鍵「BACK」

掌握 Display.setCurrent() + 父屏幕引用傳遞 + Command 導航 這一核心模式,即可構建任意深度的 J2ME 應用界面流程。配合導航棧模式,可實現類似 Android Activity/Fragment 的完整頁面管理體驗。