本文詳細記錄基於 JBuilder 6.0 與 WebLogic 6.0 的 EJB 1.1 開發部署完整實踐,涵蓋環境搭建、Session Bean 開發、客戶端測試及常見問題排查,為維護 legacy 系統的開發者提供寶貴參考。
classes12.zip (Oracle Thin Driver) 至 %WL_HOME%\config\mydomain\lib\setenv.cmd:set CLASSPATH=...;%WL_HOME%\config\mydomain\lib\classes12.zipTestConnectionPool
jdbc:oracle:thin:@127.0.0.1:1521:oracleoracle.jdbc.driver.OracleDriveruser=scott; password=tiger; dll=ocijdbc8; protocol=thinCRMDBSourceTestConnectionPoolset APPLICATIONS=.\applications
set CLIENT_CLASSES=.\applications\testfile
set EX_WEBAPP_CLASSES=%WL_HOME%\config\mydomain\applications\testfile
set CLASSPATH=...;%CLIENT_CLASSES%;%EX_WEBAPP_CLASSES%WebLogic 6.x Client、j2ee.jarWebLogic Application Server 6.xTEMP=TMP=D:\temp,解決 JAR 生成報錯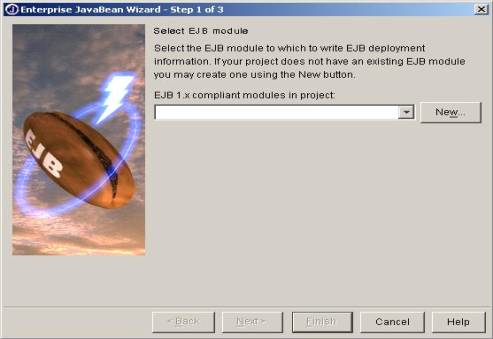
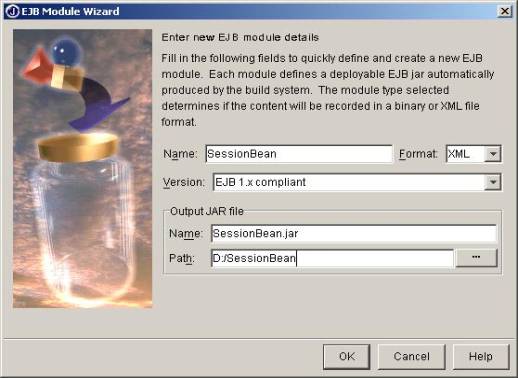
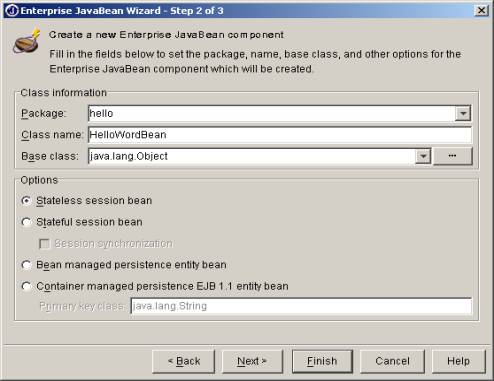
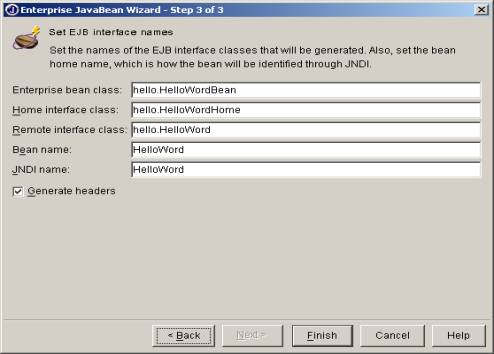
自動生成:Remote/Home 接口、Bean 類、ejb-jar.xml、weblogic-ejb-jar.xml,支持可視化編輯。
public interface DefaultSQLContext {
    String getSQL();
    String[] getParameterType();
    int getType(); // 0=查詢, 1=更新
}public class TestSQL implements DefaultSQLContext {
public String getSQL() {
return "select baseitemid,datasource,baseitemname,maxlength,description from ctm_baseitem where businesstypeid=?";
}
public String[] getParameterType() { return new String[]{"varchar"}; }
public int getType() { return 0; }
}public interface HelloWorld extends EJBObject {
void execute() throws RemoteException;
Vector getQueryResult() throws RemoteException;
}public class HelloWorldBean implements SessionBean {
private SessionContext sessionContext;
private DefaultSQLContext sql;
private String sqlContext = "";
private Connection con = null;
private Context initCtx = null;
private Vector vResult, vColumnName;
private int iReturn = 1;
String[] paraValue;
public void init() {
try {
initCtx = new InitialContext();
DataSource ds = (DataSource) initCtx.lookup("DBSource");
con = ds.getConnection();
} catch (Exception e) { System.out.println(e); }
}
private void initSQLContext() {
init();
try {
Class clazz = Class.forName(sqlContext);
sql = (DefaultSQLContext) clazz.newInstance();
} catch (Exception e) { System.out.println("cannot initialize instance" + sqlContext); }
}
public void execute() {
initSQLContext();
try {
PreparedStatement ps = con.prepareStatement(sql.getSQL());
// 參數綁定邏輯:根據類型設置 varchar/int/long/date/boolean/double
if (sql.getType() == 0) { // 查詢
ResultSet rs = ps.executeQuery();
ResultSetMetaData rsm = rs.getMetaData();
int colCount = rsm.getColumnCount();
vResult = new Vector();
while (rs.next()) {
Vector row = new Vector();
for (int j = 1; j <= colCount; j++) {
Object o = rs.getObject(j);
row.addElement(o == null ? "" : o.toString());
}
vResult.addElement(row);
}
vColumnName = new Vector();
for (int i = 1; i <= colCount; i++) vColumnName.addElement(rsm.getColumnName(i));
} else { // 更新
iReturn = ps.executeUpdate();
con.commit();
}
ps.close();
} catch (Exception e) { con.rollback(); System.out.println(e); }
}
// ejbCreate 注入 SQL 類名與參數
public void ejbCreate(String sqlContext, String[] paraValue) {
this.sqlContext = sqlContext;
this.paraValue = paraValue;
}
// 其他生命週期方法...
}public interface HelloWorldHome extends EJBHome {
HelloWorld create(String sqlContext, String[] paraValue) throws RemoteException, CreateException;
}public class HelloWorldBeanClient1 {
private static HelloWorldHome helloWorldHome;
private static HelloWorld hello;
static {
Hashtable ht = new Hashtable();
ht.put(Context.INITIAL_CONTEXT_FACTORY, "weblogic.jndi.WLInitialContextFactory");
ht.put(Context.PROVIDER_URL, "t3://localhost:7001");
Context ctx = new InitialContext(ht);
Object ref = ctx.lookup("testBean");
helloWorldHome = (HelloWorldHome) PortableRemoteObject.narrow(ref, HelloWorldHome.class);
String[] paraValue = new String[]{"16"};
hello = helloWorldHome.create("hello.TestSQL", paraValue);
}
public static void main(String[] args) {
HelloWorldBeanClient1 client = new HelloWorldBeanClient1();
Vector colNames = hello.getColumnName();
Vector result = hello.getQueryResult();
// 遍歷輸出結果...
}
}lookup 完全一致commit/rollback,查詢無需事務TEMP/TMP 設置對 JBuilder 生成部署包至關重要雖然技術棧已過時,但其中分層設計、配置管理、異常處理、資源清理等工程實踐原理仍具普遍指導意義。