不少朋友問如何將既有 Eclipse 外掛轉換為 RCP 應用程式,其實不複雜,因 RCP 也是基於外掛結構,可說 RCP 就是精簡後的 Eclipse 平台,只需對平台做些定製。轉換分兩步驟,本篇介紹第一步:建立應用程式。
應用程式透過擴展 org.eclipse.core.runtime.applications 擴展點建立,告知 Eclipse RCP 需何種功能:介面有哪些視圖、選單、工具列、應用程式視窗初始大小等。在 plugin.xml 新增應用程式定義簡單,指定 id 與類別名即可:
<extension id="myapplication" point="org.eclipse.core.runtime.applications">
 <application><run class="com.example.application.MyApplication"/></application>
</extension>MyApplication 必須實作 org.eclipse.core.runtime.IPlatformRunnable 介面,僅定義 run() 方法,對 Eclipse Platform 相當於傳統 Java 程式的 main() 入口方法。所有 RCP 應用此方法實作幾乎相同:啟動 Workbench,傳入 WorkbenchAdvisor 實例:
public class MyApplication implements IPlatformRunnable {
 public Object run(Object args) throws Exception {
   Display display = PlatformUI.createDisplay();
   try {
     int returnCode = PlatformUI.createAndRunWorkbench(display, new MyWorkbenchAdvisor());
     if (returnCode == PlatformUI.RETURN_RESTART) return IPlatformRunnable.EXIT_RESTART;
     return IPlatformRunnable.EXIT_OK;
   } finally { display.dispose(); }
 }
}應用程式定製透過 WorkbenchAdvisor 實例實現。建立 org.eclipse.ui.application.WorkbenchAdvisor 子類別 MyWorkbenchAdvisor,覆寫關鍵方法:createWorkbenchWindowAdvisor() 回傳 WorkbenchWindowAdvisor 實例 (定製應用程式視窗、選單、工具列);getInitialWindowPerspectiveId() 回傳透視圖 ID 字串 (定義 RCP 介面佈局,若原外掛無透視圖必須新定義) (程式碼 1)。
public class MyWorkbenchAdvisor extends WorkbenchAdvisor {
 private static final String PERSPECTIVE_ID = "com.example.ui.MyPerspective";
 public WorkbenchWindowAdvisor createWorkbenchWindowAdvisor(IWorkbenchWindowConfigurer configurer) {
   return new MyWorkbenchWindowAdvisor(configurer);
 }
 public String getInitialWindowPerspectiveId() { return PERSPECTIVE_ID; }
 public void initialize(IWorkbenchConfigurer configurer) {
   super.initialize(configurer);
   WorkbenchAdapterBuilder.registerAdapters(); // 因用 Resource 視圖需手動註冊 Adapter
 }
}MyWorkbenchWindowAdvisor 繼承 WorkbenchWindowAdvisor,覆寫 preWindowOpen() 定義視窗大小、標題、隱藏工具列/狀態列;覆寫 createActionBarAdvisor() 回傳 ActionBarAdvisor 實例 (定義選單、工具列) (程式碼 2)。
public class MyWorkbenchWindowAdvisor extends WorkbenchWindowAdvisor {
 public MyWorkbenchWindowAdvisor(IWorkbenchWindowConfigurer configurer) { super(configurer); }
 public ActionBarAdvisor createActionBarAdvisor(IActionBarConfigurer configurer) {
   return new MyActionBarAdvisor(configurer);
 }
 public void preWindowOpen() {
   IWorkbenchWindowConfigurer configurer = getWindowConfigurer();
   configurer.setInitialSize(new Point(700, 500));
   configurer.setShowCoolBar(false);
   configurer.setShowStatusLine(false);
   configurer.setTitle("My RCP Application");
 }
}MyActionBarAdvisor 繼承 ActionBarAdvisor。makeActions() 建構選單/工具列命令,調用 register() 註冊 (釋放資源、支援快捷鍵);fillMenuBar() 將命令加入主選單;因隱藏工具列未覆寫 fillCoolBar();可覆寫 fillStatusLine() 定義狀態列。範例僅實作退出程式選單項 (程式碼 3)。
public class MyActionBarAdvisor extends ActionBarAdvisor {
 private IWorkbenchAction exitAction;
 public MyActionBarAdvisor(IActionBarConfigurer configurer) { super(configurer); }
 protected void makeActions(final IWorkbenchWindow window) {
   exitAction = ActionFactory.QUIT.create(window);
   register(exitAction);
 }
 protected void fillMenuBar(IMenuManager menuBar) {
   MenuManager fileMenu = new MenuManager("&File", IWorkbenchActionConstants.M_FILE);
   menuBar.add(fileMenu);
   fileMenu.add(exitAction);
 }
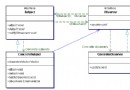
}MyApplication → MyWorkbenchAdvisor → MyWorkbenchWindowAdvisor → MyActionBarAdvisor。3.1M5 前無 ActionBarAdvisor,大部分定製在 WorkbenchWindowAdvisor 導致程式碼冗長、復用度低;現方式方便定義多個 ActionBarAdvisor 依需求選擇,獲得不同功能應用程式。
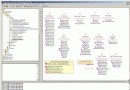
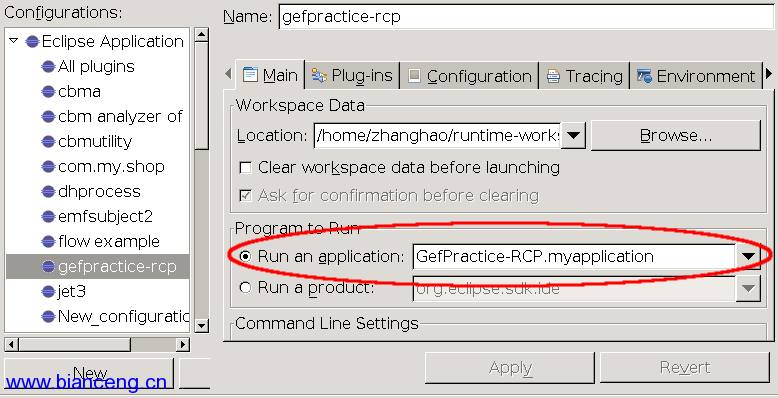
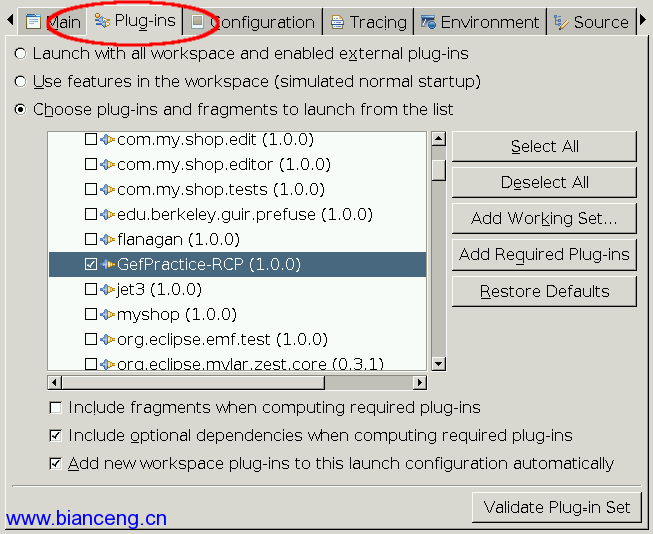
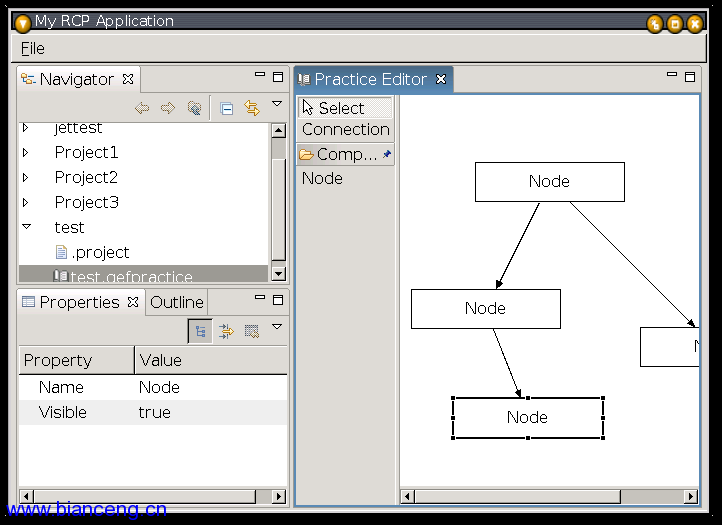
Run > Debug,新建 "Eclipse Application" 運行項 "gefpractice-rcp","Program to Run" 選 "Run an application",下拉列表選擇應用程式 id (擴展點 id "myapplication" 變為 "GefPractice-RCP.myapplication") (圖 1)。Plug-ins 頁面選 "Choose plug-ins and fragments to launch from the list","Deselect All" 勾選我們外掛,"Add Required Plug-ins" 自動添加依賴 (圖 2)。啟動獲得乾淨介面 (圖 3),對比原外掛版本運行截圖。
建立應用程式程式碼部分完成,但要得完整可獨立運行產品還不夠,下篇介紹第二步:將應用程式封裝為產品。可參考 Branding Your Application,下篇將寫使用 .product 配置產品。更多內容參考 Rich Client Tutorial (三部分),隨 RCP API 發展及時更新,難得入門教材。