OpenID 是去中心化身份驗證協定,三大核心角色:
https://openid.jstevenperry.com/steve),代表使用者身份。前往 myOpenID 註冊,幾分鐘即可擁有專屬 OpenID。若已有 Google、Yahoo、WordPress 帳號,多半已具備 OpenID,直接以該帳號登入支援 OpenID 的網站即可。
採用 Wicket 框架構建 UI,核心驗證邏輯封裝於 RegistrationService(com.makotogroup.sample.model),五大關鍵方法:
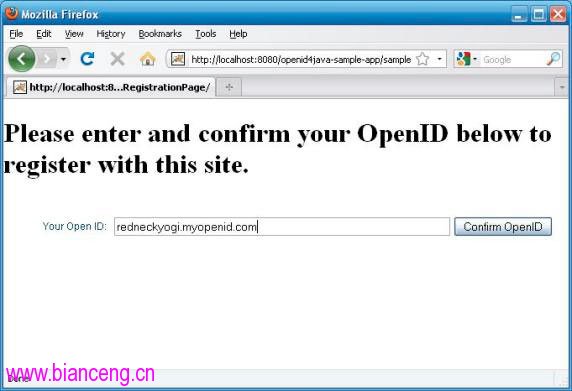
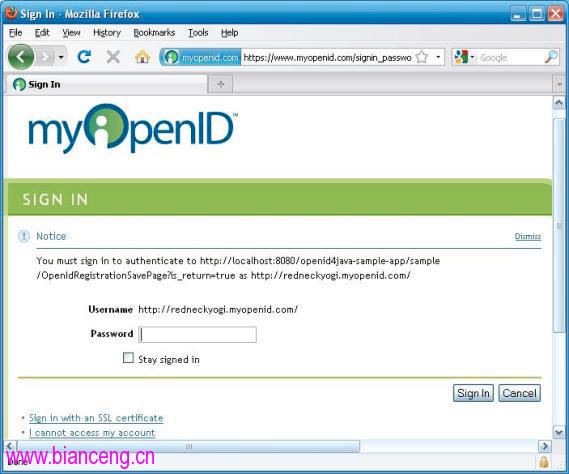
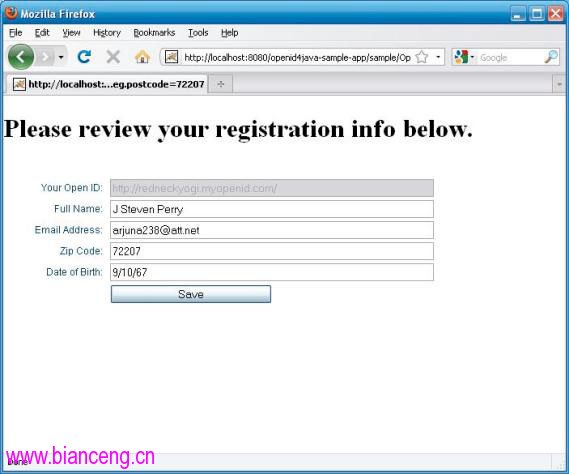
getConsumerManager():取得 openid4java 核心 ConsumerManager 實例(單例模式)。performDiscoveryOnUserSuppliedIdentifier():執行發現與關聯,回傳 DiscoveryInformation。createOpenIdAuthRequest():建構 AuthRequest,附加 SReg 請求(email、fullname、dob 等)。processReturn():驗證 OP 回傳的回應,解析 SReg 屬性填充 RegistrationModel。getReturnToUrl():定義驗證成功後的回調 URL。redneckyogi.myopenid.com),點擊確認(圖 1)。https://),呼叫 ConsumerManager.discover() 定位 OP(myOpenID),並執行 associate() 建立共享密鑰(Diffie-Hellman)。AuthRequest,附加 SReg 請求,重導瀏覽器至 OP 登入頁(圖 2)。return-to URL,RP 呼叫 processReturn() 驗證簽名、解析屬性(圖 3)。List<DiscoveryInformation> discoveries = consumerManager.discover(userSuppliedIdentifier);
DiscoveryInformation ret = consumerManager.associate(discoveries);AuthRequest authRequest = consumerManager.authenticate(discoveryInformation, returnToUrl);
SRegRequest sRegRequest = SRegRequest.createFetchRequest();
sRegRequest.addAttribute("email", false);
sRegRequest.addAttribute("fullname", false);
authRequest.addExtension(sRegRequest);RegistrationModel model = RegistrationService.processReturn(
discoveryInformation, pageParameters, returnToUrl);專案打包為 WAR,放入 Tomcat webapps 目錄啟動。訪問 https://localhost:8080/openid4java-sample-app/ 即可測試完整流程。原始碼下載見文末。