XML Schema 定義是許多資料交換類型(包含大多數 Web 服務形式)的基礎。但 XML Schema 是極複雜標準,且用於建立和修改 Schema 定義的大多數工具在功能性和易用性上遜於處理 Java 代碼的工具。本教學——共兩部分系列的第一部分——將介紹 JiBX 1.2 新功能,允許您從 Java 代碼著手輕鬆產生優秀的 Schema 定義匹配資料結構。然後無論是否使用 JiBX 資料綁定,都可直接使用這些 Schema。
JiBX 是 XML 資料與 Java 物件綁定工具,一直被公認為綁定 Java 代碼與 XML 的最快且最靈活方法。但綁定定義複雜性及對 XML Schema 定義有限支援常讓使用者失望。幸運的是,JiBX 1.2 版致力消除這些問題。本教學示範如何使用 JiBX 1.2 新功能從現有 Java 代碼輕鬆產生 XML Schema 定義,並讀寫符合產生 Schema 定義的 XML 文件,所有這一切不需要詳細了解 JiBX 綁定定義。第二部分介紹相反方向:從 XML Schema 定義產生 Java 代碼。
本教學引導您完成使用 JiBX 從 Java 代碼產生 XML Schema 定義的過程:先看如何從簡單 Java 資料模型著手,產生匹配該模型的預設 Schema;在此基礎上了解如何透過套用一系列自訂控制 Java 類別使用的實際值及其存取方法、必要性、XML 中使用的名稱及命名空間、甚至產生 Schema 定義結構。過程中將見到 JiBX 如何利用 Javadoc 成果自動歸檔 Schema 定義,使產生 Schema 更有價值。閱讀本教學並實踐提供範例後,您可使用 JiBX 從自己的 Java 資料結構類別產生優秀 XML Schema 定義。
理解本教學至少需要 Java 代碼和 XML 基礎知識。不需要詳細了解 XML Schema 定義,但略微熟悉 Schema 將幫助更好理解範例。
執行範例需要安裝:Sun's JDK 1.5.0_09(或更高)、IBM Developer Kit for Java technology 1.5.0 SR3、最新版 Apache Ant 建構工具。本教學包含 JiBX 下載及安裝說明。
本節初步了解 JiBX,並安裝 JiBX 及教學範例代碼。
JiBX 是轉換 Java 資料結構與 XML 文件的工具之一。性能與靈活功能使其脫穎而出:性能領先,在多項參數上優於其他常見工具(如 JAXB 2.0);比幾乎所有其他 Java-XML 工具靈活,使用綁定定義解除 Java 結構與 XML 表示綁定,使兩者可獨立更改。
1.2 版新增主要功能支援 XML Schema 定義。可使用 JiBX 發行版附帶工具產生匹配 Java 代碼的 Schema 定義,或匹配 Schema 定義的 Java 代碼。無論哪種方式,都會得到一個綁定定義,允許使用 JiBX 轉換 Java 代碼與符合 Schema 定義的 XML 文件。本教學展示第一類產生:從 Java 代碼產生 Schema 定義。
繼續學習前需先安裝 JiBX。下載最新 1.2.x 發行版 ZIP 並解壓縮到便於存取位置,得到名為 jibx 目錄,包含所有 JiBX JAR、文件、範例、甚至原始碼。
下載教學範例代碼(ZIP 形式)。最簡單安裝方式是在 JiBX 安裝根目錄解壓縮 ZIP(或 Windows 將 dwcode1 目錄從 ZIP 複製到 JiBX 安裝根目錄)。這會在 jibx 目錄建立 dwcode1 子目錄,包含範例文件(含 build.xml、custom1.xml 等)。
範例代碼包含自動執行 JiBX 工具並處理範例涉及其他步驟的 Apache Ant 建構文件。若直接安裝到 JiBX 安裝目錄,建構可存取 JiBX JAR 而無需額外配置。若安裝在其他位置,仍可使用 Ant 建構,只需設定 JIBX_HOME 環境變數為 JiBX 安裝路徑,或編輯範例代碼目錄 build.xml 取消靠近頂部直接設定 jibx-home 屬性的程式碼行註釋。
透過一些 Java 類別產生 JiBX 綁定和 XML Schema 非常容易。本節說明具體操作。
作為範例,使用表示線上商店訂單的一組 bean 風格(私有欄位、公共 get/set 存取方法)類別的 Java 代碼。程式碼清單 1 顯示簡短版本代碼,大多數 get/set 方法已省略。完整範例代碼位於範例代碼 src 目錄。
package org.jibx.starter;
/**
 * Order information.
 */
public class Order {
    private long orderNumber;
    private Customer customer;
    /** Billing address information. */
    private Address billTo;
    private Shipping shipping;
    /** Shipping address information. If missing, the billing address is also used as the shipping address. */
    private Address shipTo;
    private List<Item> items;
    /** Date order was placed with server. */
    private Date orderDate;
    /** Date order was shipped. This will be <code>null</code> if the order has not yet shipped. */
    private Date shipDate;
    private Float total;
    public long getOrderNumber() { return orderNumber; }
    ...
}
/**
 * Customer information.
 */
public class Customer {
    private long customerNumber;
    /** Personal name. */
    private String firstName;
    /** Family name. */
    private String lastName;
    /** Middle name(s), if any. */
    private List<String> middleNames;
    ...
}
/**
 * Address information.
 */
public class Address {
    /** First line of street information (required). */
    private String street1;
    /** Second line of street information (optional). */
    private String street2;
    private String city;
    /** State abbreviation (required for the U.S. and Canada, optional otherwise). */
    private String state;
    /** Postal code (required for the U.S. and Canada, optional otherwise). */
    private String postCode;
    /** Country name (optional, U.S. assumed if not supplied). */
    private String country;
    ...
}
/**
 * Order line item information.
 */
public class Item {
    /** Stock identifier. This is expected to be 12 characters in length, with two leading alpha characters followed by ten decimal digits. */
    private String id;
    /** Text description of item. */
    private String description;
    /** Number of units ordered. */
    private int quantity;
    /** Price per unit. */
    private float price;
    ...
}
/**
 * Supported shipment methods. The "INTERNATIONAL" shipment methods can only be used for
 * orders with shipping addresses outside the U.S., and one of these methods is required
 * in this case.
 */
public enum Shipping {
    STANDARD_MAIL, PRIORITY_MAIL, INTERNATIONAL_MAIL, DOMESTIC_EXPRESS, INTERNATIONAL_EXPRESS
}
透過一些 Java 類別產生 JiBX 綁定和 XML Schema,首先需編譯這些類別,然後執行 JiBX 發行版 jibx-tools.jar 附帶的 org.jibx.binding.generator.BindGen 工具。可直接從命令列執行,或透過 Ant 等建構工具間接執行。
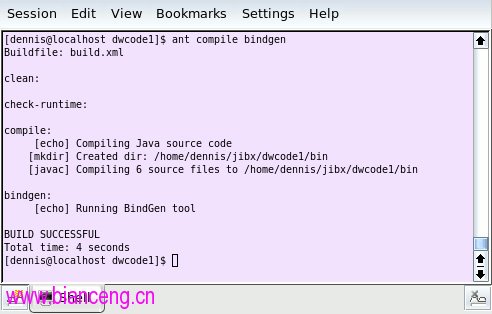
本教學下載部分包含 Ant build.xml 腳本,compile 目標編譯範例代碼,bindgen 目標在編譯後代碼上執行 BindGen 程式。在已安裝下載的 dwcode1 目錄開啟控制台,輸入 ant compile bindgen。若系統安裝 Ant 並按說明安裝下載代碼,應見到類似圖 1 輸出。
也可直接從控制台執行 BindGen:在 Java 類路徑包含 jibx-tools.jar 及作為產生輸入的編譯後類別文件路徑。若需複製 Ant bindgen 目標效果,命令列還需傳遞類別源文件根目錄。最後列出希望用於產生的根類別。UNIX/Linux 系統中,在 dwcode1 目錄(假設遵循建議安裝說明)透過控制台複製 Ant bindgen 目標的 Java 命令列(包含單行代碼,即使顯示為多行):
java -cp ../lib/jibx-tools.jar:bin org.jibx.binding.generator.BindGen -s src org.jibx.starter.Order
Windows 版本:
java -cp ..\lib\jibx-tools.jar;bin org.jibx.binding.generator.BindGen -s src org.jibx.starter.Order
許多其他選項可透過命令列傳遞給 BindGen,稍後教學將介紹。現在看看產生的 Schema。
程式碼清單 2 顯示透過 BindGen 產生的 Schema 輸出(即 starter.xsd),略微調整適應頁面寬度,刪除部分細節。匹配各個 Java 類別的 Schema 定義開始標記用粗體顯示強調結構。
<xs:schema xmlns:xs="https://www.w3.org/2001/XMLSchema" xmlns:tns="https://jibx.org/starter" elementFormDefault="qualified" targetNamespace="https://jibx.org/starter">
<xs:complexType name="address">
<xs:annotation>
<xs:documentation>Address information.</xs:documentation>
</xs:annotation>
<xs:sequence>
<xs:element type="xs:string" name="street1" minOccurs="0">
<xs:annotation>
<xs:documentation>First line of street information (required).</xs:documentation>
</xs:annotation>
</xs:element>
...
</xs:sequence>
</xs:complexType>
<xs:element type="tns:order" name="order"/>
<xs:complexType name="order">
<xs:annotation>
<xs:documentation>Order information.</xs:documentation>
</xs:annotation>
<xs:sequence>
<xs:element name="customer" minOccurs="0">
<xs:complexType>
...
</xs:complexType>
</xs:element>
<xs:element type="tns:address" name="billTo" minOccurs="0">
<xs:annotation>
<xs:documentation>Billing address information.</xs:documentation>
</xs:annotation>
</xs:element>
<xs:element name="shipping" minOccurs="0">
<xs:simpleType>
<xs:annotation>
<xs:documentation>Supported shipment methods. The "INTERNATIONAL" shipment methods can only be used for orders with shipping addresses outside the U.S., and one of these methods is required in this case.</xs:documentation>
</xs:annotation>
<xs:restriction base="xs:string">
<xs:enumeration value="STANDARD_MAIL"/>
...
</xs:restriction>
</xs:simpleType>
</xs:element>
<xs:element type="tns:address" name="shipTo" minOccurs="0">
<xs:annotation>
<xs:documentation>Shipping address information. If missing, the billing address is also used as the shipping address.</xs:documentation>
</xs:annotation>
</xs:element>
<xs:element name="item" minOccurs="0" maxOccurs="unbounded">
<xs:complexType>
<xs:sequence>
<xs:element type="xs:string" name="id" minOccurs="0">
<xs:annotation>
<xs:documentation>Stock identifier. This is expected to be 12 characters in length, with two leading alpha characters followed by ten decimal digits.</xs:documentation>
</xs:annotation>
</xs:element>
<xs:element type="xs:string" name="description" minOccurs="0">
<xs:annotation>
<xs:documentation>Text description of item.</xs:documentation>
</xs:annotation>
</xs:element>
</xs:sequence>
<xs:attribute type="xs:int" use="required" name="quantity">
<xs:annotation>
<xs:documentation>Number of units ordered.</xs:documentation>
</xs:annotation>
</xs:attribute>
<xs:attribute type="xs:float" use="required" name="price">
<xs:annotation>
<xs:documentation>Price per unit.</xs:documentation>
</xs:annotation>
</xs:attribute>
</xs:complexType>
</xs:element>
</xs:sequence>
<xs:attribute type="xs:long" use="required" name="orderNumber"/>
<xs:attribute type="xs:date" name="orderDate">
<xs:annotation>
<xs:documentation>Date order was placed with server.</xs:documentation>
</xs:annotation>
</xs:attribute>
<xs:attribute type="xs:date" name="shipDate">
<xs:annotation>
<xs:documentation>
<![CDATA[Date order was shipped. This will be <code>null</code> if the order has not yet shipped.]]>
</xs:documentation>
</xs:annotation>
</xs:attribute>
</xs:complexType>
</xs:schema>
預設情況下,BindGen 為僅使用一次的型別產生帶巢狀 complexType 和 simpleType 定義的 Schema,為使用多次的型別產生帶各種定義的 Schema。此例巢狀風格得到只有 3 個全域定義的 Schema:address 和 order 複雜型別以及 order 元素。Order 類別在兩位置使用 Address 類別(帳單和送貨地址),故該類別在 Schema 中由單獨全域定義表示(僅當定義為全域定義時,Schema 才允許重用定義)。Java 資料結構中其他類別(Customer、Item、Shipping)僅在 Order 類別被參考一次,故對應型別定義直接嵌入 order Schema 型別定義中。
可透過輸入類別 Javadoc 產生 Schema 文件,是 BindGen 不錯功能之一。清單 2 可見清單 1 帶 Javadoc 各欄位的 Schema 文件,及對應帶 Javadoc 類別的各全域型別 Schema 文件。BindGen 預設處理並非使所有 Javadoc 形式與 Schema 組件匹配——某些 Javadoc(如關於 "get" 存取方法的 Javadoc)轉換成 Schema 文件後可能看起來奇怪——但產生的 Schema 文件對闡明 XML 表示正確用法極有用。若需在轉換過程對文本進行更改(如從 "get" 方法 Javadoc 移除 "Get the ..." 開頭陳述),甚至可為作為 Schema 文件的 Javadoc 定義自己的 formatter 類別。
僅當可獲得類別源代碼並為 BindGen 提供實參告訴根目錄路徑時,才可使用 Javadoc 轉換功能。我先前提供的命令列範例中,提供源代碼路徑為 -s src。
除了 Schema 定義,BindGen 還產生 JiBX 綁定定義(本例為 binding.xml),告訴 JiBX 綁定編譯器如何在 Java 類別與 XML 間轉換。實際上綁定定義是 BindGen 主要輸出,同時透過綁定產生 Schema。綁定定義包含 JiBX 完成轉換的完整資訊,必然複雜。幸運的是,使用 BindGen 綁定和 Schema 產生,無需了解綁定定義即可使用 JiBX,本教學不介紹此部分細節。
本節說明如何在執行時執行 JiBX 綁定編譯器和使用 JiBX 處理 XML 文件。
使用產生綁定定義處理 XML 文件前,需先執行 JiBX 綁定編譯器工具。依綁定定義指定,編譯器將位元組碼添加到編譯後類別文件,實際實現與 XML 雙向轉換。每次重新編譯 Java 類別或修改綁定定義都必須執行編譯器,通常最好將編譯器步驟加入專案標準建構流程。
jibx-bind.jar 中的 JiBX 發行版附帶綁定編譯器。JiBX 文件提供透過各種方法執行編譯器的完整資訊,包含如何在執行時而非建構時執行編譯器。JiBX 還提供 Eclipse 和 IntelliJ IDEA 外掛,使用這些 IDE 時自動執行編譯器。
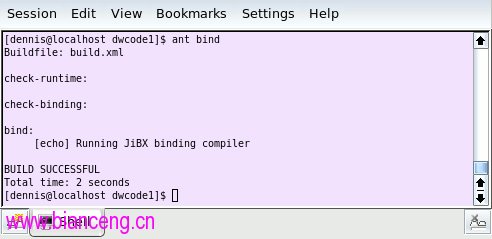
本教學簡化處理,僅透過 Ant 使用 build.xml 的 bind 目標執行綁定編譯器。假設已執行 compile 和 bindgen 目標,圖 2 顯示執行此目標應見到的輸出(也可在命令列依序列出目標執行全部三個:ant compile bindgen bind)。
程式碼清單 3 顯示匹配產生 Schema 的簡單測試文件,包含在教學代碼下載中,名為 data.xml:
<order orderNumber="12345678" orderDate="2008-10-18" shipDate="2008-10-22" xmlns="https://jibx.org/starter">
<customer customerNumber="5678">
<firstName>John</firstName>
<lastName>Smith</lastName>
</customer>
<billTo>
<street1>12345 Happy Lane</street1>
<city>Plunk</city>
<state>WA</state>
<postCode>98059</postCode>
<country>USA</country>
</billTo>
<shipping>PRIORITY_MAIL</shipping>
<shipTo>
<street1>333 River Avenue</street1>
<city>Kirkland</city>
<state>WA</state>
<postCode>98034</postCode>
<country>USA</country>
</shipTo>
<item quantity="1" price="5.99">
<id>AC4983498512</id>
<description>Left-handed widget</description>
</item>
<item quantity="2" price="9.50">
<id>IW2349050499</id>
<description>Right-handed widget</description>
</item>
<item quantity="1" price="8.95">
<id>RC3000488209</id>
<description>High-speed MP3 rewinder</description>
</item>
</order>
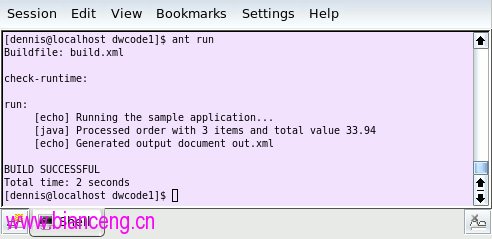
下載包含簡單測試程式(清單 4),示範如何使用 JiBX 解組及編組文件(編組是在記憶體中產生物件 XML 表示的過程,可能包含從初始物件鏈結的物件;解組是編組反向過程,透過 XML 表示在記憶體中建構物件(可能包含鏈結物件)。Ant run 目標執行此測試程式,使用清單 3 文件為輸入並將編組後文件副本寫入 out.xml。
public class Test {
    /**
     * Unmarshal the sample document from a file, compute and set order total, then
     * marshal it back out to another file.
     *
     * @param args
     */
    public static void main(String[] args) {
        if (args.length < 2) {
            System.out.println("Usage: java -cp ... " + "org.jibx.starter.Test in-file out-file");
            System.exit(0);
        }
        try {
            // unmarshal customer information from file
            IBindingFactory bfact = BindingDirectory.getFactory(Order.class);
            IUnmarshallingContext uctx = bfact.createUnmarshallingContext();
            FileInputStream in = new FileInputStream(args[0]);
            Order order = (Order)uctx.unmarshalDocument(in, null);
            // compute the total amount of the order
            float total = 0.0f;
            for (Iterator<Item> iter = order.getItems().iterator(); iter.hasNext();) {
                Item item = iter.next();
                total += item.getPrice() * item.getQuantity();
            }
            order.setTotal(new Float(total));
            // marshal object back out to file (with nice indentation, as UTF-8)
            IMarshallingContext mctx = bfact.createMarshallingContext();
            mctx.setIndent(2);
            FileOutputStream out = new FileOutputStream(args[1]);
            mctx.setOutput(out, null);
            mctx.marshalDocument(order);
            System.out.println("Processed order with " + order.getItems().size() + " items and total value " + total);
        } catch (FileNotFoundException e) {
            e.printStackTrace();
            System.exit(1);
        } catch (JiBXException e) {
            e.printStackTrace();
            System.exit(1);
        }
    }
}
可檢查產生的 out.xml 文件,查看與清單 3 初始輸入匹配程度。除命名空間宣告、屬性順序、輸出中新增的 total 屬性(測試程式計算設定)外,兩文件應完全相同。情況不會永遠如此!像大多數資料綁定形式,JiBX 僅處理文件中「重要」資料(意指應用程式使用的值)。解組文件時,文件不重要部分(如開始結束標記內空白、元素間文本及註釋)將遺失。本例輸入輸出文件如此相似,部分原因是清單 4 代碼將輸出格式設為每個元素巢狀層級兩空格縮進,匹配輸入文件。
細心讀者會注意到,輸出文件項目清單部分(清單 5 所示)輸入與輸出間似乎存在巨大差異:
<item quantity="1" price="5.99">
<id>AC4983498512</id>
<description>Left-handed widget</description>
</item>
<item quantity="2" price="9.5">
<id>IW2349050499</id>
<description>Right-handed widget</description>
</item>
<item quantity="1" price="8.95">
<id>RC3000488209</id>
<description>High-speed MP3 rewinder</description>
</item>
比較清單 5 粗體顯示行與清單 3 初始文件對應行,價格從 9.50 變為 9.5,小數點最後位零被去掉。但這不是錯誤。價格值使用表示為 float,依 Java 和 XML Schema,小數點前後零對 float 並不重要。
本節介紹如何自訂 BindGen 操作以控制資料 XML 表示、更改名稱及命名空間風格、控制 Schema 結構某些面向。
BindGen 支援綁定和 Schema 產生各面向大量自訂。要套用的自訂集作為 XML 文件傳遞給 BindGen,文件擁有與 Java 代碼結構對應的巢狀元素。程式碼清單 6 給出簡單範例:
<custom>
<package name="org.jibx.starter" property-access="true">
<class name="Address" includes="street1 street2 city state postCode country"/>
<class name="Item" excludes="description"/>
</package>
</custom>
本例處理單個 Java 代碼套件,故清單 6 僅用 <custom> 根元素一個 <package> 子元素。<package> 和 <class> 自訂元素使用與所有被包含 <package> 元素相關的名稱屬性,故清單 6 範例中每個 <class> 元素僅需簡單類別名稱。<package> 元素可相互巢狀,故若跨越套件層次結構處理類別,使用巢狀 <package> 元素處理所有選項將輕鬆。巢狀結構特別便利,因許多自訂屬性透過元素巢狀繼承。但使用巢狀為可選——若需要可完全跳過 <package> 元素,直接使用擁有完整限定類別名稱的 <class> 元素。
使用 -c file-path 命令格式,將自訂文件作為命令列參數傳遞給 BindGen。自訂永遠可選,永遠不需使用自訂文件,除非需更改預設 BindGen 行為。
BindGen 透過對 Java 類別預設處理可完成一定程度工作,但無使用者指導下可完成工作有限。例如預設處理在 XML 表示包含除 static、transient 或 final 欄位外所有欄位。此法對表示簡單資料物件類別沒問題;但若類別包含狀態資訊或計算值,最終 XML 表示可能包含不想公開到類別外的值。
自訂允許透過兩種方式控制 BindGen 在 XML 表示使用的內容。首先,可輕鬆使用 bean 風格 getXXX()、setXXX() 和 isXXX() 存取方法,而非直接存取欄位。其次,可選擇列出需在類別 XML 表示包含的值,或列出需排除的值。清單 6 自訂示範這兩個技巧。
本教學使用 JiBX 進行 Java 資料結構與 XML 文件雙向轉換。BindGen 還支援產生單向轉換,某些情況下更方便。例如值物件類別通常不可修改,僅定義 final 欄位和讀取("get")存取方法。這使值物件類別難用於 BindGen 雙向轉換。若改告訴 BindGen 產生僅執行輸出轉換,將輕鬆處理所需欄位或屬性。要產生單向轉換,在自訂根 <custom> 元素使用 direction="output" 或 direction="input"。
清單 6 <package> 元素使用 property-access="true" 屬性告訴 BindGen,確定 XML 表示包含哪些值時,查找公共非靜態存取方法定義的 bean 風格屬性,而非欄位定義的 bean 風格屬性。此屬性為繼承自訂設定範例,繼承自訂設定套用到帶該屬性元素內巢狀所有內容。清單 6 範例中設定套用到兩個巢狀 <class> 元素,也套用到套件中所有其他類別,即使其他類別無 <class> 自訂元素。除了確定如何從類別表示找到值,property-access 設定還控制如何透過產生 JiBX 代碼存取值——直接透過欄位或呼叫存取方法。
清單 6 第一個 <class> 元素使用 includes="street1 street2 city state postCode country" 列出 BindGen 需包含在 XML 表示的類別特定值。第二個 <class> 元素使用 excludes="description" 列出要從 XML 表示排除的值。因使用屬性存取而非欄位存取,這些名稱匹配 get/set/is 存取方法定義屬性。若使用欄位,值名稱將匹配欄位名稱。
custgen1 Ant 目標使用清單 6 自訂執行 BindGen。此目標為先前所示 bindgen 目標替代目標,故執行完整建構最好用 Ant 命令列:ant compile custgen1 bind。程式碼清單 7 顯示此目標執行時產生 Schema 中項目型別定義:
<xs:element name="item" minOccurs="0" maxOccurs="unbounded">
<xs:complexType>
<xs:sequence>
<xs:element type="xs:string" name="id" minOccurs="0"/>
</xs:sequence>
<xs:attribute type="xs:int" use="required" name="quantity"/>
<xs:attribute type="xs:float" use="required" name="price"/>
</xs:complexType>
</xs:element>
清單 7 可見 Schema 表示現缺少描述值,如自訂指定。使用此自訂時需用其他 XML 文件為輸入,因不再使用初始 XML 提供的 <description> 元素。Ant run1 目標執行使用 data1.xml 輸入產生 out1.xml 輸出的測試程式。也可用 custom1 Ant 目標從編譯源代碼執行到運行測試程式整個過程。
還可用自訂控制解組期間實例建立。預設 JiBX 期望每個類別定義無參數(預設)建構函數(Java 編譯器若未定義其他建構函數自動產生)。解組過程需類別新實例時,JiBX 使用無參數建構函數建立實例。若某些類別僅定義帶參數建構函數,可用 BindGen 自訂將這些建構函數變成 JiBX 可用建構函數。實現一種方法定義建立類別實例使用的工廠方法,在 <class> 自訂元素用 factory="xxx" 屬性提供返回類別實例靜態方法完整限定名稱(帶前導套件和類別資訊)。也可在根 <custom> 元素加入 add-constructors="true",產生根據需要向類別添加無參數建構函數的綁定。此第二種方法對普通資料類別有效,但仍需提供所有實例或抽象類別工廠(因絕不可以直接建構)。當然若產生僅輸出綁定,實例建立不成問題,無需考慮建構函數。
BindGen 支援許多其他自訂類型,控制 BindGen 處理 Java 輸入類別方式。例如若對 Java 欄位名使用命名慣例,可透過 strip-prefixes 或 strip-suffixes 將 BindGen 配置為忽略特殊前綴或後綴字串(如忽略前導 m_ 和 s_ 前綴,用 strip-prefixes="m_ s_")。這些對欄位名修改需在將欄位匹配到其他自訂使用的值名稱前套用,透過欄位名產生 XML 名稱時也將套用修改。
也可用巢狀 <value> 元素自訂類別中各個欄位或 bean 屬性處理方式。後面範例將見如何使用這些值自訂元素。
除了控制 BindGen 解析 Java 代碼方法,還可用自訂控制資料 XML 表示。無論值可選或必要,XML 自訂包含值實際表示(作為元素或屬性)、元素和屬性順序和名稱等。
前面清單 6 自訂範例示範第一個 <class> 元素用 includes="street1 street2 city state postCode country" 屬性形式的一個 XML 自訂。我討論此自訂如何從類別選擇包含在 XML 表示的值。它還控制 XML 表示,因列出值順序將成為它們在 XML 表示中的順序。這對 XML 總視為無序的屬性不重要,但對元素很重要。
若無在 <class> 自訂用 includes 指定值順序,BindGen 對類別用 Java 反射,按值分發順序產生值。對大多數 Java 編譯器和 JVM,此反射順序匹配 Java 源代碼定義順序。但 Java 編譯器和 JVM 不必須保留源代碼此順序,故某些編譯器或 JVM 可能導致 BindGen 更改子元素順序。若希望無論用哪個 Java 編譯器和 JVM 都確保 XML 表示始終相同,用 includes 屬性可輕鬆固定順序。
也可用 includes 屬性控制值 XML 表示。BindGen 允許列表中各個名稱用前導標誌字符指名表示:@ 表示屬性,/ 表示元素。故若把清單 6 自訂改為 includes="street1 street2 city state @postCode country",郵政編碼值表示將從子元素變為屬性。
另一項輕鬆自訂是用 <class> 元素 requireds 和 optionals 屬性,控制值設為可選或必要。同用 includes,可在 requireds 和 optionals 列表名稱前加標誌字符,表示設為子元素或屬性。
預設 BindGen 將所有原生值和簡單物件值(帶直接 XML 等效型別而非 String 類別)處理為屬性,所有複雜物件值處理為子元素。所有原生值處理為必要值,所有物件值處理為可選值。除了透過在 <class> 自訂層級用 includes、requireds、optionals 元素覆蓋預設值,也可在任意自訂層級(<custom>、<package> 或 <class> 元素)設定 value-style="element" 將預設表示改為所有值使用元素。也可用 require 屬性控制:XML 中哪些型別應處理為必要值:
require="none":所有內容處理為可選值require="primitives"(預設):僅原生值處理為必要值require="objects":與預設相反,原生值設為可選,物件型別處理為必要值require="all":所有值預設處理為必要值程式碼清單 8 顯示教學下載 dwcode1 目錄中 custom2.xml 自訂文件,示範本節討論幾項功能:
<custom property-access="true">
<package name="org.jibx.starter">
<class name="Address" includes="street1 street2 city @state @postCode country" requireds="street1 city"/>
<class name="Customer" includes="customerNumber firstName lastName" requireds="lastName firstName /customerNumber"/>
<class name="Item" excludes="description" requireds="@id quantity price"/>
<class name="Order" requireds="/orderNumber customer billTo shipping orderDate"/>
</package>
</custom>
可透過 Ant custgen2 目標(ant compile custgen2 bind 執行完整建構)嘗試此組自訂。程式碼清單 9 顯示使用這些自訂產生 Schema 部分,顯示結果順序、必要狀態(minOccurs="0" Schema 中預設為必要,表示可選元素;use="required" Schema 中預設為可選,表示必要屬性)和元素或屬性表示:
<xs:complexType name="order">
<xs:annotation>
<xs:documentation>Order information.</xs:documentation>
</xs:annotation>
<xs:sequence>
<xs:element type="xs:long" name="orderNumber">
<xs:annotation>
<xs:documentation>Get the order number.</xs:documentation>
</xs:annotation>
</xs:element>
<xs:element name="customer">
<xs:complexType>
<xs:sequence>
<xs:element type="xs:long" name="customerNumber"/>
<xs:element type="xs:string" name="firstName"/>
<xs:element type="xs:string" name="lastName"/>
</xs:sequence>
</xs:complexType>
</xs:element>
...
</xs:sequence>
<xs:attribute type="xs:date" use="required" name="orderDate"/>
<xs:attribute type="xs:date" name="shipDate"/>
<xs:attribute type="xs:float" name="total"/>
</xs:complexType>
<xs:element type="tns:order" name="order"/>
<xs:complexType name="address">
<xs:annotation>
<xs:documentation>Address information.</xs:documentation>
</xs:annotation>
<xs:sequence>
<xs:element type="xs:string" name="street1"/>
<xs:element type="xs:string" name="street2" minOccurs="0"/>
<xs:element type="xs:string" name="city"/>
<xs:element type="xs:string" name="country" minOccurs="0"/>
</xs:sequence>
<xs:attribute type="xs:string" name="state"/>
<xs:attribute type="xs:string" name="postCode"/>
</xs:complexType>
使用 bind Ant 任務編譯綁定後,可用 data2.xml 測試文件輸入產生 out2.xml 輸出的 run2 任務測試此 Schema。也可從編譯開始用 custom2 目標執行整個過程測試。程式碼清單 10 顯示測試文件:
<order orderDate="2008-10-18" shipDate="2008-10-22" xmlns="https://jibx.org/starter">
<orderNumber>12345678</orderNumber>
<customer>
<customerNumber>5678</customerNumber>
<firstName>John</firstName>
<lastName>Smith</lastName>
</customer>
<billTo state="WA" postCode="98059">
<street1>12345 Happy Lane</street1>
<city>Plunk</city>
<country>USA</country>
</billTo>
<shipping>PRIORITY_MAIL</shipping>
<shipTo state="WA" postCode="98034">
<street1>333 River Avenue</street1>
<city>Kirkland</city>
</shipTo>
<item quantity="1" price="5.99" id="8394983498512"/>
<item quantity="2" price="9.50" id="9912349050499"/>
<item quantity="1" price="8.95" id="1293000488209"/>
</order>
比較清單 10 與清單 3 初始測試文件,看自訂如何改變資料 XML 表示(包含將排列項表示改為空元素,比原來更緊湊表示)。
Java 名稱通常用「大小寫混合」風格:名稱大部分小寫,但每個單詞首字母大寫。對欄位或屬性名稱,首字母大寫僅適用第一個單詞之後單詞(得到如 postCode、customerNumber 名稱)。XML 名稱無標準化,通常用幾種不同風格:首字母小寫大小寫混合(Java 欄位屬性名稱風格)、首字母大寫大小寫混合(Java 類別名稱風格)、連字符分隔符(用連字符分隔單詞)風格、點分隔符(用點分隔單詞)風格、底線分隔符(用底線分隔單詞)風格。
預設 BindGen 對 XML 名稱採大小寫混合風格,但可在任意自訂層級(<custom>、<package> 或 <class> 元素)設定 name-style 屬性輕鬆更改。此屬性允許值與上述各種 XML 風格匹配:camel-case(預設)、upper-camel-case、hyphenated、dotted、underscored。
也可用專門針對值的自訂設定該值 XML 名稱。使用單獨值自訂可完全控制該值存取方法及 XML 表示方法。基於前面範例相同示範代碼,清單 11 給出若干將自訂元素用於單獨值的範例:
<custom property-access="true" name-style="hyphenated" namespace="https://jibx.org/custom" namespace-style="fixed">
<package name="org.jibx.starter">
<class name="Address" includes="street1 street2 city @state @postCode country" requireds="street1 city"/>
<class name="Customer" includes="customerNumber firstName lastName" requireds="lastName firstName /customerNumber"/>
<class name="Item" excludes="description" requireds="@id quantity price"/>
<class name="Order" requireds="orderNumber customer billTo shipping orderDate">
<value property-name="orderNumber" element="order-num"/>
<value property-name="items" item-name="line-item" element="order-items"/>
</class>
</package>
</custom>
清單 11 第一個值自訂用於 <class name="Order"...> 元素中 orderNumber 屬性。用 element="order-num",orderNumber 自訂告訴 BindGen 將值表示為元素,而非原生值預設屬性形式。第二個自訂用於 items 集合屬性。此自訂用 item-name 和 element 屬性。item-name 控制集合表示各個值使用名稱,element 強制用提供名稱作為集合中值封裝元素。
所有教學範例用 XML 命名空間,因通常視使用命名空間為資料交換最佳實踐。若需用無命名空間 XML,可在任意自訂層級用 namespace-style="none" 徹底關閉所有巢狀組件命名空間。
清單 11 自訂還定義 XML 文件中使用的命名空間。前面範例依賴 BindGen 對命名空間預設處理:從 Java 套件衍生 Java 代碼 XML 表示使用的命名空間 URI。此預設處理將 org.jibx.starter 套件轉換成命名空間 URI https://jibx.org/starter。清單 11 中命名空間透過在根 <custom> 元素加一對屬性——namespace="https://jibx.org/custom" 和 namespace-style="fixed"——自訂。第一屬性定義基本命名空間,第二屬性防止依 Java 套件修改命名空間一般行為。這些屬性透過巢狀自訂元素繼承,故可輕鬆放入 <package> 元素而非 <custom> 元素。
可透過 Ant custgen3 目標產生綁定和 Schema,用 run3 目標執行測試(在用標準 bind 目標執行 JiBX 綁定編譯器後——或用 full3 目標執行整個過程),嘗試執行清單 11 自訂。程式碼清單 12 顯示測試代碼輸入文件:
<order order-date="2008-10-18" ship-date="2008-10-22" xmlns="https://jibx.org/custom">
<order-num>12345678</order-num>
<customer>
<customer-number>5678</customer-number>
<first-name>John</first-name>
<last-name>Smith</last-name>
</customer>
<bill-to state="WA" post-code="98059">
<street1>12345 Happy Lane</street1>
<city>Plunk</city>
<country>USA</country>
</bill-to>
<shipping>PRIORITY_MAIL</shipping>
<ship-to state="WA" postCode="98034">
<street1>333 River Avenue</street1>
<city>Kirkland</city>
</ship-to>
<order-items>
<line-item quantity="1" price="5.99" id="AC4983498512"/>
<line-item quantity="2" price="9.50" id="IW2349050499"/>
<line-item quantity="1" price="8.95" id="RC3000488209"/>
</order-items>
</order>
比較清單 12 與清單 10 樣本,將見最新自訂如何更改表示。
現在您已了解 BindGen 自訂如何更改 Java 資料 XML 表示。自訂還可用於控制實際 Schema 結構某些面向。
回想 BindGen 預設對全域型別和元素優先使用巢狀定義。回顧清單 9 產生 Schema,將見此巢狀結構。Schema 僅用三個全域定義:address 和 order 複雜型別以及 order 元素。Java 資料結構中其他類別(Customer、Item、Shipping)僅在 Order 類別參考一次,故對應型別定義直接嵌入 order Schema 型別定義中。
可在任意巢狀自訂元素用 force-mapping="true" 更改 Schema 風格。程式碼清單 13 顯示 custom4.xml 自訂文件,將此更改添加到匹配清單 9 產生 Schema 的 custom2.xml 自訂中:
<custom property-access="true" force-mapping="true">
<package name="org.jibx.starter">
<class name="Address" includes="street1 street2 city @state @postCode country"
requireds="street1 city"/>
<class name="Customer" includes="customerNumber firstName lastName"
requireds="lastName firstName /customerNumber"/>
<class name="Item" excludes="description" requireds="@id quantity price"/>
<class name="Order" requireds="/orderNumber customer billTo shipping orderDate"/>
</package>
</custom>
程式碼清單 14 顯示得到 Schema 結構(透過執行 custgen4 Ant 目標產生為 starter.xsd)。此版 Schema 表示 XML 文件結構與清單 9 Schema 相同,但包含匹配每個 Java 類別的單獨型別定義。
<xs:schema xmlns:xs="https://www.w3.org/2001/XMLSchema"
xmlns:tns="https://jibx.org/starter" elementFormDefault="qualified"
targetNamespace="https://jibx.org/starter">
<xs:simpleType name="shipping">
<xs:annotation>
<xs:documentation>Supported shipment methods. The "INTERNATIONAL" shipment
methods can only be used for orders with shipping addresses outside the U.S., and
one of these methods is required in this case.</xs:documentation>
</xs:annotation>
<xs:restriction base="xs:string">
...
</xs:restriction>
</xs:simpleType>
<xs:complexType name="item">
<xs:annotation>
<xs:documentation>Order line item information.</xs:documentation>
</xs:annotation>
<xs:sequence/>
<xs:attribute type="xs:string" use="required" name="id"/>
<xs:attribute type="xs:int" use="required" name="quantity"/>
<xs:attribute type="xs:float" use="required" name="price"/>
</xs:complexType>
<xs:element type="tns:order" name="order"/>
<xs:complexType name="address">
<xs:annotation>
<xs:documentation>Address information.</xs:documentation>
</xs:annotation>
<xs:sequence>
<xs:element type="xs:string" name="street1"/>
<xs:element type="xs:string" name="street2" minOccurs="0"/>
<xs:element type="xs:string" name="city"/>
<xs:element type="xs:string" name="country" minOccurs="0"/>
</xs:sequence>
<xs:attribute type="xs:string" name="state"/>
<xs:attribute type="xs:string" name="postCode"/>
</xs:complexType>
<xs:complexType name="customer">
<xs:annotation>
<xs:documentation>Customer information.</xs:documentation>
</xs:annotation>
<xs:sequence>
<xs:element type="xs:long" name="customerNumber"/>
<xs:element type="xs:string" name="firstName"/>
<xs:element type="xs:string" name="lastName"/>
</xs:sequence>
</xs:complexType>
<xs:complexType name="order">
<xs:annotation>
<xs:documentation>Order information.</xs:documentation>
</xs:annotation>
<xs:sequence>
<xs:element type="xs:long" name="orderNumber">
<xs:annotation>
<xs:documentation>Get the order number.</xs:documentation>
</xs:annotation>
</xs:element>
<xs:element type="tns:customer" name="customer"/>
<xs:element type="tns:address" name="billTo"/>
<xs:element type="tns:shipping" name="shipping"/>
<xs:element type="tns:address" name="shipTo" minOccurs="0"/>
<xs:element type="tns:item" name="item" minOccurs="0" maxOccurs="unbounded"/>
</xs:sequence>
<xs:attribute type="xs:date" use="required" name="orderDate"/>
<xs:attribute type="xs:date" name="shipDate"/>
<xs:attribute type="xs:float" name="total"/>
</xs:complexType>
</xs:schema>
清單 14 所示型別 Schema 稱為「Venetian Blind」風格 Schema,常用於複雜 XML 結構定義。透過分隔各個型別定義,此 Schema 風格使您在修改或擴展 Schema 時輕鬆重用組件結構。若只是計劃用 Java 代碼作為進一步更改基礎(每次代碼更改重新執行 BindGen),Venetian Blind 風格彈性可能不重要,但若想用 Schema 作為以後開發基礎,非常適合使用 Venetian Blind。
除教學代碼使用的參數外,BindGen 還支援若干命令列參數。表 1 列出最重要選項:
| 命令 | 用途 |
|---|---|
| -b name | 產生根綁定定義文件名(預設 binding.xml) |
| -c path | 輸入自訂文件路徑 |
| -n uri=name,... | 提供 Schema 命名空間 URI 和文件名對(預設透過 Schema 命名空間 URI 產生文件名) |
| -p path,... | 載入 Java 類別文件路徑(預設為執行 BindGen 使用的類路徑) |
| -s path,... | 載入 Java 源文件路徑(預設不使用源代碼) |
| -t path | 產生輸出目標目錄路徑(預設當前目錄) |
| -w | 產生輸出前從目標目錄刪除所有文件(若目標目錄為當前目錄則忽略) |
用 -- 作為自訂屬性值特殊前綴,可將全域定義作為命令列參數傳遞給 BindGen,無需建立自訂文件。故要設定清單 13 自訂使用的全域選項,向 BindGen 命令列加入 --property-access=true --force-mapping=true。使用此技巧時無需引號。若需設定獲取多值列表自訂,僅用逗號而非空格分隔各值(如忽略欄位名 m_ 和 s_ 前綴,用命令列參數 --strip-prefixes=m_,s_)。
本教學介紹使用 JiBX 透過 Java 代碼產生 XML Schema 定義,然後將匹配該 Schema 文件與 Java 資料結構雙向轉換。除本教學介紹自訂外,還有許多其他自訂可用於控制 Schema 產生。JiBX 文件提供所有自訂選項完整資訊及透過代碼產生 Schema 更多範例。
透過使用實際綁定定義,可進一步使用 JiBX,控制轉換過程每一步驟。使用綁定定義中建構的使用者擴展鉤,可輕鬆將自己的代碼添加到轉換過程中作為其中一部分執行。甚至可建立自己的自訂編組和解組代碼,選擇性地從 JiBX 產生代碼處接管控制權,處理獨特 XML 或 Java 資料結構。JiBX 文件包含示範使用綁定定義各面向教學,包含擴展功能及所有詳細資訊參考文件。
當您需快速為資料交換開發 Schema 定義,不想了解大量 Schema 資訊時,使用 JiBX 特別方便。XML Schema 標準極複雜,處理 Schema 定義工具對重構 Schema 提供支援很少。如本教學所示,透過使用 Java 代碼和 BindGen 作為 Schema 開發基礎,可應用 Java IDE 全部彈性快速輕鬆建立 Schema 定義,無需費心研究如何使用 JiBX。
JiBX 還提供基於 Java 代碼為 Web 服務產生完整 WSDL 和 Schema 定義工具,名為 Jibx2Wsdl,建構在 BindGen 之上。可將本文討論所有 BindGen 自訂用於資料類別,作為您自己服務方法輸入輸出,產生 Schema 將反映您偏好。JiBX 文件提供如何使用 Jibx2Wsdl 詳細資訊。
第二部分將介紹如何使用 JiBX 透過 XML Schema 定義產生 Java 代碼。