本文承接上一篇《Eclipse 快速上手 Hibernate(一):入門實例》,詳細示範如何透過 HBM 映射檔案自動產生 Java 實體類別與資料庫資料表。參考 Hibernate 官方文件第 15 章「工具箱指南」,本文以完整實例說明操作步驟,理論部分略過,相關環境配置請參考前文。
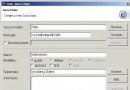
在 Eclipse 中新建 Java 專案 HibernateBegin_2,勾選「建立獨立的來源資料夾與輸出資料夾」,並加入使用者程式庫 hibernate。
於套件 javamxj.hibernate 下建立 User.hbm.xml,內容如下:
<hibernate-mapping>
  <class name="javamxj.hibernate.User" table="UserTable2">
    <!-- 類別層級的 Javadoc 註解 -->
    <id name="id" type="string" column="ID" length="32" unsaved-value="null">
      <generator class="uuid.hex"/>
    </id>
    <property name="username" type="string" length="24" not-null="true">
      <column name="用戶名"/>
    </property>
    <property name="password" type="string" not-null="true">
      <column name="密碼" length="24" not-null="true"/>
    </property>
  </class>
</hibernate-mapping>
與上篇比較,本範例新增了多項設定:
<class> 內文將寫入類別的 Javadoc。<id> 採用 uuid.hex 產生主鍵,結合 IP、JVM 啟動時間、系統時間與計數器。<property> 內的 <column> 直接對應資料表欄位定義。將上篇的 hibernate.cfg.xml 複製至 src 目錄。專案根目錄新增 build.xml,定義四個任務,本文使用 generate-code(產生 Java 類別)與 schemaexport(產生資料表)。注意類庫路徑 lib.dir 需依實際環境調整(如 D:/Java/Hibernate/lib)。
<project name="利用工具開發Hibernate" default="help" basedir=".">
  <property name="src.dir" value="./src"/>
  <property name="class.dir" value="./bin"/>
  <property name="lib.dir" value="D:/java/Hibernate/lib"/>
  <path id="project.class.path">
    <fileset dir="${lib.dir}"><include name="*.jar"/></fileset>
    <pathelement location="${class.dir}"/>
  </path>

  <target name="help"> ... </target>

  <target name="generate-code">
    <taskdef name="hbm2java" classname="net.sf.hibernate.tool.hbm2java.Hbm2JavaTask" classpathref="project.class.path"/>
    <hbm2java output="${src.dir}">
      <fileset dir="${src.dir}"><include name="**/*.hbm.xml"/></fileset>
    </hbm2java>
  </target>

  <target name="schemaexport">
    <taskdef name="schemaexport" classname="net.sf.hibernate.tool.hbm2ddl.SchemaExportTask" classpathref="project.class.path"/>
    <schemaexport output="schema-export.sql" drop="no" text="no" quiet="no" config="${src.dir}/hibernate.cfg.xml"/>
  </target>
</project>右鍵 build.xml → Run As → Ant Build… 選擇任務,或開啟 Eclipse 的 Ant 視圖(Window → Show View → Ant)載入建構檔,雙擊即可執行。
執行 generate-code,控制台輸出成功訊息。若 src 未顯示新檔,按 F5 重新整理。產生的 User.java 包含完整的 getter/setter、建構子與 toString(),並引用 org.apache.commons.lang.builder.ToStringBuilder。
確認 MySQL 已建立 HibernateTest 資料庫。執行 schemaexport,控制台顯示自動產生的 SQL,專案根目錄同時產生 schema-export.sql:
drop table if exists UserTable2;
create table UserTable2 (
  ID varchar(32) not null,
  用戶名 varchar(24) not null,
  密碼 varchar(24) not null,
  primary key (ID)
);
資料庫中即可看到 usertable2 資料表。
將上篇的 Test.java 複製至同套件並執行,主控台輸出寫入資料的記錄,驗證映射正確性。
專案結構中 User.java 與 schema-export.sql 均為自動產生,注意 generate-code 必須先於 schemaexport 執行。建議安裝 XMLBuddy 外掛編輯 XML。後續將介紹使用 XDoclet 開發 Hibernate。