在 MIX 09 大會上,Nikhil Kothari 發布了微軟的重量級作品 —— Microsoft .NET RIA Services。雖然當時僅推出 "March '09 Preview" 預覽版,但已足以讓開發者興奮不已。簡單來說,在這之前,若使用 Silverlight 等 RIA 技術,只能編寫大量 Web Services 或 WCF 來實現數據操作;而有了 .NET RIA Services,在 RIA 專案中操作數據將如同 ASP.NET 般便捷!
相關資源連結:
早期 Silverlight 2 Beta 發布時,開發者無法直接操作資料庫,必須透過大量 Web Services 或 WCF 間接存取數據層。這種「間接接觸」不僅不直觀,還浪費大量開發精力在客戶端、服務端、業務邏輯層編寫不同版本的數據代碼,並需考慮安全性、網路狀況等問題,堪稱高投入低產出。
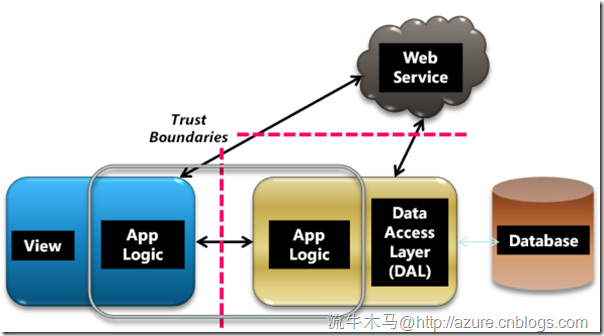
博客園大牛 Shareach 曾用 WCF Duplex Service 實現 Silverlight 聊天程式的雙向通訊,雖然成功但架構複雜,印證了傳統模式的痛點。
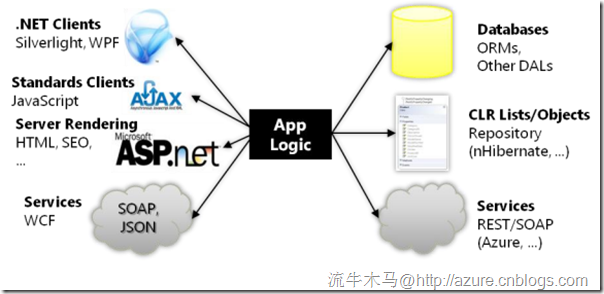
微軟的宏偉構想是:Silverlight、WPF、JavaScript、ASP.NET、WCF 等所有技術都能使用無差別的數據邏輯,直接存取數據層,無需經過「代理」式的數據服務。
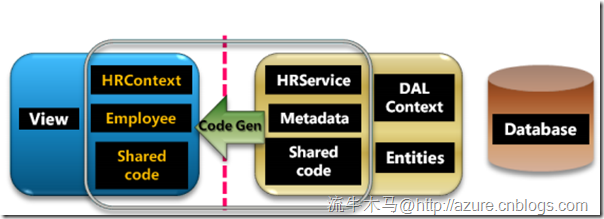
核心機制:開發者在 ASP.NET 端建立繼承自 DomainService 的數據處理類(如 HRService),實現數據操作方法。.NET RIA Services 會自動生成對應的客戶端類(如 HRContext),客戶端即可直接調用該類操作數據,實現無縫連接。
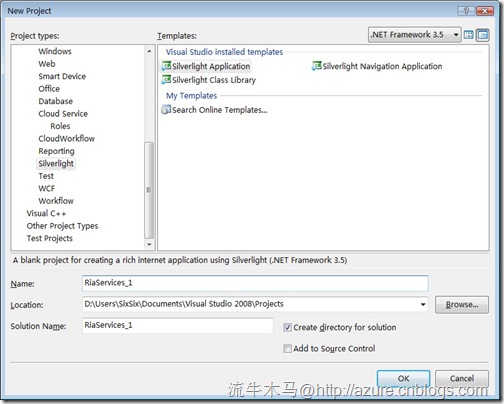
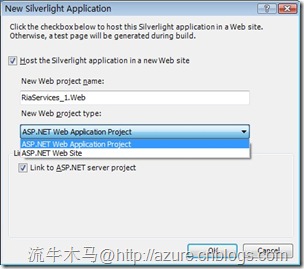
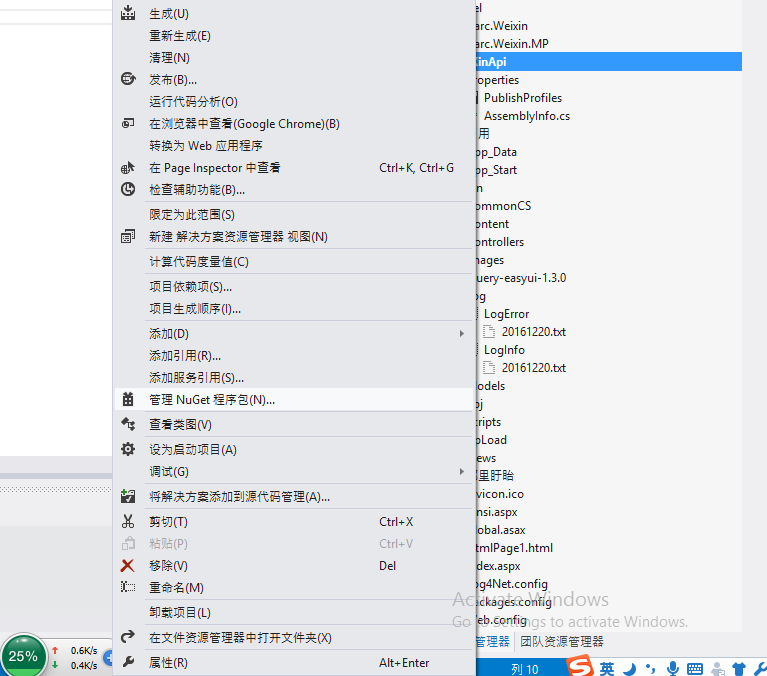
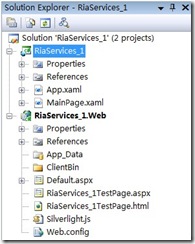
完成後的方案總管結構:
在 Web 專案右鍵新增項目,選擇 SQL Server 2005 資料庫與資料表,VS 會自動生成 .edmx 實體檔案。
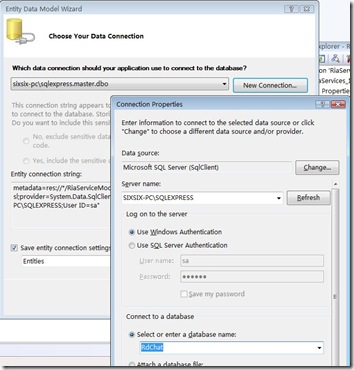
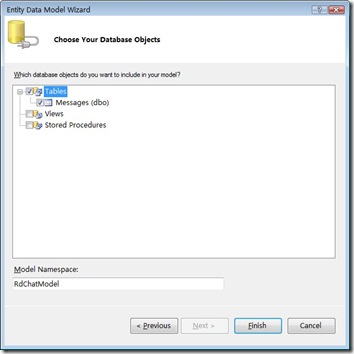
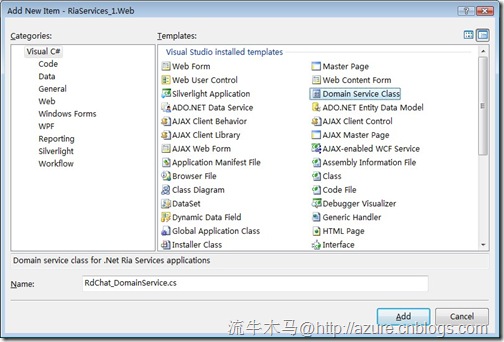
編譯整個方案後,在 Web 專案右鍵新增「Domain Service Class」,勾選 Messages 實體並啟用編輯,自動生成 Get、Insert、Update、Delete 四大基礎操作。

生成的 RdChat_DomainService.cs 繼承 LinqToEntitiesDomainService,標記 [EnableClientAccess()] 屬性,包含基本 CRUD 方法:
namespace RiaServices_1.Web
{
    using System;
    using System.Collections.Generic;
    using System.ComponentModel;
    using System.ComponentModel.DataAnnotations;
    using System.Linq;
    using System.Web.Ria;
    using System.Web.Ria.Data;
    using System.Web.DomainServices;
    using System.Data;
    using System.Web.DomainServices.LinqToEntities;

    [EnableClientAccess()]
    public class RdChat_DomainService : LinqToEntitiesDomainService<RdChatEntities>
    {
        public IQueryable<Messages> GetMessages()
        {
            return this.Context.Messages;
        }

        public void InsertMessages(Messages messages)
        {
            this.Context.AddToMessages(messages);
        }

        public void UpdateMessages(Messages currentMessages, Messages originalMessages)
        {
            this.Context.AttachAsModified(currentMessages, originalMessages);
        }

        public void DeleteMessages(Messages messages)
        {
            if ((messages.EntityState == EntityState.Detached))
            {
                this.Context.Attach(messages);
            }
            this.Context.DeleteObject(messages);
        }
    }
}
再次編譯方案,點擊「顯示所有檔案」,在 Generated_Code 目錄下找到 RiaServices_1.Web.g.cs,將其納入專案。此檔案包含伺服器端所有方法、實體的客戶端版本,可直接在 Silverlight 中調用。
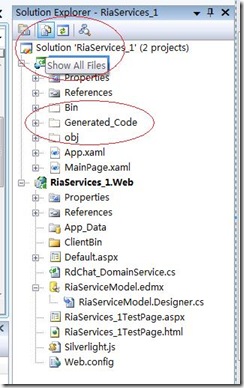
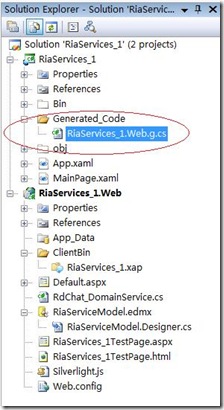
在 MainPage.xaml 放置 DataGrid、TextBox、Button,繫結按鈕點擊事件:
<UserControl xmlns:data="clr-namespace:System.Windows.Controls;assembly=System.Windows.Controls.Data" x:Class="RiaServices_1.MainPage"
    xmlns="https://schemas.microsoft.com/winfx/2006/xaml/presentation"
    xmlns:x="https://schemas.microsoft.com/winfx/2006/xaml"
    Width="640" Height="450">
    <Grid x:Name="LayoutRoot" Background="White">
        <StackPanel Orientation="Vertical" Height="420">
            <data:DataGrid x:Name="dataGrid" ></data:DataGrid>
            <StackPanel Orientation="Horizontal" Height="25">
                <TextBox x:Name="txtMsg" Text=" " Width="580" ></TextBox>
                <Button x:Name="btnSend" Content="發送消息" Click="btnSend_Click" ></Button>
            </StackPanel>
        </StackPanel>
    </Grid>
</UserControl>
在 MainPage.xaml.cs 中直接使用生成的 RdChat_DomainContext 操作數據:
using System;
using System.Collections.Generic;
using System.Linq;
using System.Net;
using System.Windows;
using System.Windows.Controls;
using System.Windows.Documents;
using System.Windows.Input;
using System.Windows.Media;
using System.Windows.Media.Animation;
using System.Windows.Shapes;
using RiaServices_1.Web;

namespace RiaServices_1
{
    public partial class MainPage : UserControl
    {
        public MainPage()
        {
            InitializeComponent();
            RdChat_DomainContext context = new RdChat_DomainContext();
            dataGrid.ItemsSource = context.Messages;
            context.LoadMessages();
        }

        private void btnSend_Click(object sender, RoutedEventArgs e)
        {
            Messages msg = new Messages();
            msg.Body = txtMsg.Text;
            msg.Name = "匿名用戶";
            msg.PartitionKey = Guid.NewGuid().ToString();
            msg.RowKey = "slChat";
            msg.Timestamp = DateTime.Now;
            RdChat_DomainContext context = new RdChat_DomainContext();
            context.Messages.Add(msg);
            context.SubmitChanges();
            dataGrid.ItemsSource = context.Messages;
            context.LoadMessages();
        }
    }
}
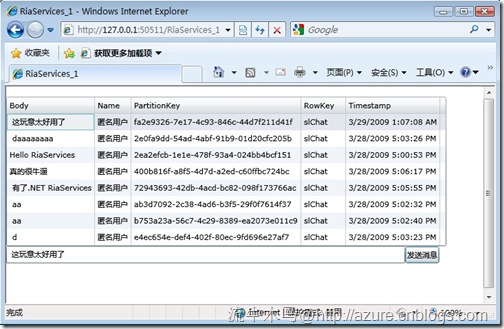
按 F5 執行,即可看到即時聊天效果:
這只是冰山一角,.NET RIA Services 還提供 metadata、shared code 等強大功能,建議深入研讀 SDK 文檔,定能獲益良多。