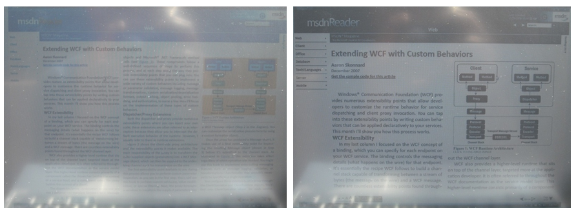
圖 1:使用環境光感應器調整對比度、尺寸與色彩飽和度的 MSDN 閱讀器
SensorHOLSensorViewModel 類別,實作 INotifyPropertyChanged:class SensorViewModel : INotifyPropertyChanged
{
public event PropertyChangedEventHandler PropertyChanged;
private void NotifyChange(string propertyName)
{
if (PropertyChanged != null)
PropertyChanged(this, new PropertyChangedEventArgs(propertyName));
}
}
MainWindow.xaml.cs 建構函式設定 DataContext:public MainWindow()
{
InitializeComponent();
DataContext = new SensorViewModel();
}
三區域設計:
<Grid>
    <Grid.RowDefinitions>
        <RowDefinition Height="65"/>
        <RowDefinition Height="*"/>
    </Grid.RowDefinitions>
    <Grid.ColumnDefinitions>
        <ColumnDefinition Width="150"/>
        <ColumnDefinition Width="*"/>
    </Grid.ColumnDefinitions>
    ...
</Grid>
<Grid x:Name="OverlayContent" Grid.Column="1" Grid.Row="1" HorizontalAlignment="Center" VerticalAlignment="Center">
    <Image Stretch="Uniform" Margin="10"/>
    <Image Stretch="Uniform" Margin="10"/>
    <Slider x:Name="OverlayAdjustmentSlider"
        Width="{Binding ElementName=OverlayContent, Path=ActualWidth}"
        Height="{Binding ElementName=OverlayContent, Path=ActualHeight}"
        Maximum="1" Minimum="0" Value="0.5"
        Template="{DynamicResource Slider_ControlTemplate}"/>
</Grid>
<Grid Width="150" Height="240" Grid.Row="1" HorizontalAlignment="Left" VerticalAlignment="Top">
    <Border Background="{DynamicResource Brush_PopupBackground}" ...>
        <Border.Effect>
            <DropShadowEffect BlurRadius="12" Direction="-90" ShadowDepth="3"/>
        </Border.Effect>
    </Border>
    <Border Background="{DynamicResource Brush_PopupBackground}" BorderBrush="{StaticResource Brush_PopupBorder}" BorderThickness="0,1,0,1" CornerRadius="3">
        <Grid TextElement.FontFamily="Segoe UI" TextElement.FontSize="10">
            <TextBlock HorizontalAlignment="Center" Margin="0,10" VerticalAlignment="Top" FontSize="13" Foreground="White" Text="Sensor Data"/>
        </Grid>
    </Border>
</Grid>
<Grid Grid.ColumnSpan="2" HorizontalAlignment="Stretch">
    <Button HorizontalAlignment="Left" Width="70" Margin="5" Height="40" Content="Browse..." Click="Button_Click"/>
    <TextBlock Foreground="White" HorizontalAlignment="Center" VerticalAlignment="Center" FontFamily="Segoe UI" Text="{Binding ImageName, Mode=OneWay}"/>
</Grid>
SensorViewModel 加入 ImagePath 與 ImageName 屬性:private string _imagePath;
public string ImagePath
{
get { return _imagePath; }
set {
_imagePath = value;
NotifyChange("ImagePath");
NotifyChange("ImageName");
}
}
public string ImageName
{
get { return System.IO.Path.GetFileNameWithoutExtension(ImagePath); }
}
<Image Source="{Binding ImagePath}" Stretch="Uniform" Margin="10"/>
<TextBlock Text="{Binding ImageName, Mode=OneWay}" .../>
MainWindow.xaml.cs 實作按鈕點擊開啟檔案對話框:private void Button_Click(object sender, RoutedEventArgs e)
{
var dlg = new Microsoft.Win32.OpenFileDialog {
Filter = "Image Files|*.jpg;*.png",
Title = "Find an Image"
};
if (dlg.ShowDialog() == true)
(DataContext as SensorViewModel).ImagePath = dlg.FileName;
}
Microsoft.WindowsAPICodePack.Sensors.dll 參考SensorHelper<SensorType, SensorPropertyType>:public class SensorHelper<SensorType, SensorPropertyType> : INotifyPropertyChanged
where SensorType : Sensor
where SensorPropertyType : class
{
private SensorPropertyType _value;
private SensorType _sensor;
private Guid _sensorGUID;
public void Initialize()
{
var list = SensorManager.GetSensorsByTypeId<SensorType>();
if (list != null)
{
var permList = new SensorList<Sensor>();
foreach (var s in list) permList.Add(s);
SensorManager.RequestPermission(IntPtr.Zero, true, permList);
foreach (var s in list)
if (HandleNewSensor(s) && _sensor != null) break;
}
SensorManager.SensorsChanged += OnSensorsChanged;
}
...
}
OnSensorsChanged:處理感應器新增/移除,新增時檢查類型並呼叫 HandleNewSensorHandleNewSensor:訂閱 StateChanged,若狀態為 Ready 呼叫 PrepareSensorOnSensorStateChanged:狀態變為 Ready 時準備感應器,非 Ready 時清理PrepareSensor:設定使用中感應器、呼叫 TryUpdateData() 取得初始資料、訂閱 DataReportChangedOnDataUpdated:依感應器型別擷取 CurrentLuminousIntensity 或 CurrentAcceleration,觸發 PropertyChanged("Value")public SensorPropertyType Value { get { return _value; } }
public event PropertyChangedEventHandler PropertyChanged;
protected void OnPropertyChanged(string name)
{
var ph = PropertyChanged;
if (ph != null) ph(this, new PropertyChangedEventArgs(name));
}
此架構封裝感應器發現、權限請求、狀態管理與資料更新,為 UI 資料繫結提供穩定基礎。下一階段將整合至 ViewModel 並建構互動介面。