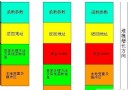
將原圖 每一列 的像素轉為目標圖 每一行 (順時針 90°),或將每一行轉為每一列 (逆時針)。本文示範順時針 90°:
(x, y) → 目標圖座標 (y, Width-1-x)。DstWidth = SrcHeight, DstHeight = SrcWidth。void __fastcall RotateBitmap90Clockwise(Graphics::TBitmap* Src, Graphics::TBitmap* Dst)
{
if (!Src || !Dst) return;
// 1. 調整目標位圖尺寸
Dst->Width = Src->Height;
Dst->Height = Src->Width;
Dst->PixelFormat = Src->PixelFormat; // 保持像素格式 (24/32-bit)
// 2. 逐像素搬移 (假設 24-bit RGB, 3 bytes/pixel)
// 若為 32-bit 需調整步進
for (int y = 0; y < Src->Height; ++y) {
BYTE* srcRow = (BYTE*)Src->ScanLine[y];
for (int x = 0; x < Src->Width; ++x) {
// 計算目標位置
int dstX = y;
int dstY = Src->Width - 1 - x;
BYTE* dstRow = (BYTE*)Dst->ScanLine[dstY];
// 複製 3 個位元組 (BGR 順序)
dstRow[dstX * 3 + 0] = srcRow[x * 3 + 0];
dstRow[dstX * 3 + 1] = srcRow[x * 3 + 1];
dstRow[dstX * 3 + 2] = srcRow[x * 3 + 2];
}
}
}
// 使用範例 (按鈕點擊)
void __fastcall TForm1::btnRotateClick(TObject *Sender)
{
Graphics::TBitmap* rotated = new Graphics::TBitmap();
try {
RotateBitmap90Clockwise(Image1->Picture->Bitmap, rotated);
Image1->Picture->Bitmap->Assign(rotated);
Image1->Width = rotated->Width;
Image1->Height = rotated->Height;
} __finally {
delete rotated;
}
}ScanLine[y]:直接存取第 y 行像素記憶體,**極快**,避免 Canvas->Pixels[x][y] 的巨大開銷。PixelFormat:旋轉前後必須一致,否則顏色會錯亂。常見 pf24bit (3 bytes)、pf32bit (4 bytes, 含 Alpha)。Width/Height,不越界。需用仿射變換矩陣 + 雙線性插值:
// 簡化版:使用 GDI+ Graphics::RotateTransform + DrawImage
#include
using namespace Gdiplus;

void RotateArbitrary(Gdiplus::Bitmap* src, Gdiplus::Bitmap* dst, float angleDeg) {
    Graphics g(dst);
    g.TranslateTransform(dst->GetWidth()/2.0f, dst->GetHeight()/2.0f);
    g.RotateTransform(angleDeg);
    g.TranslateTransform(-src->GetWidth()/2.0f, -src->GetHeight()/2.0f);
    g.DrawImage(src, 0, 0);
}
GDI+ 提供高品質插值、Alpha 混合,適合 UI 顯示;即時遊戲/影像處理仍建議手寫 SIMD 優化迴圈。