本文詳細記錄在 Eclipse IDE 中從零開始建立 Maven Web 專案的完整步驟,包含專案建立、目錄結構調整、JDK 設定、Tomcat 部署等實務操作,適合初學者參考。
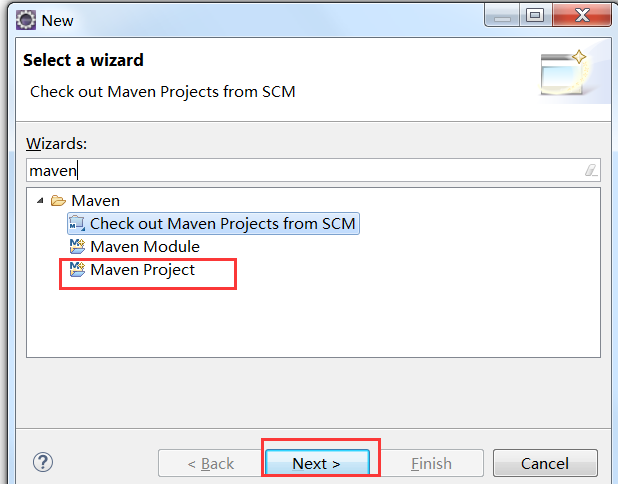
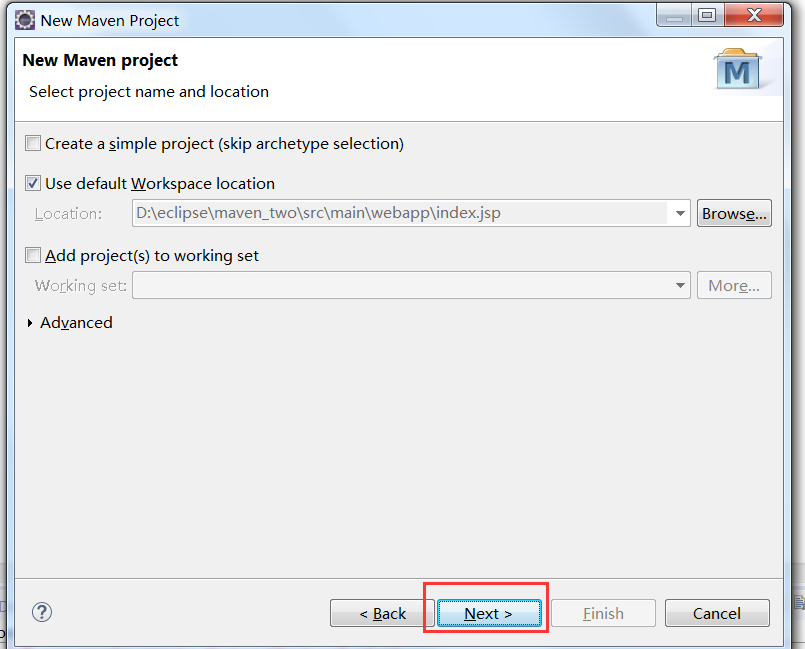
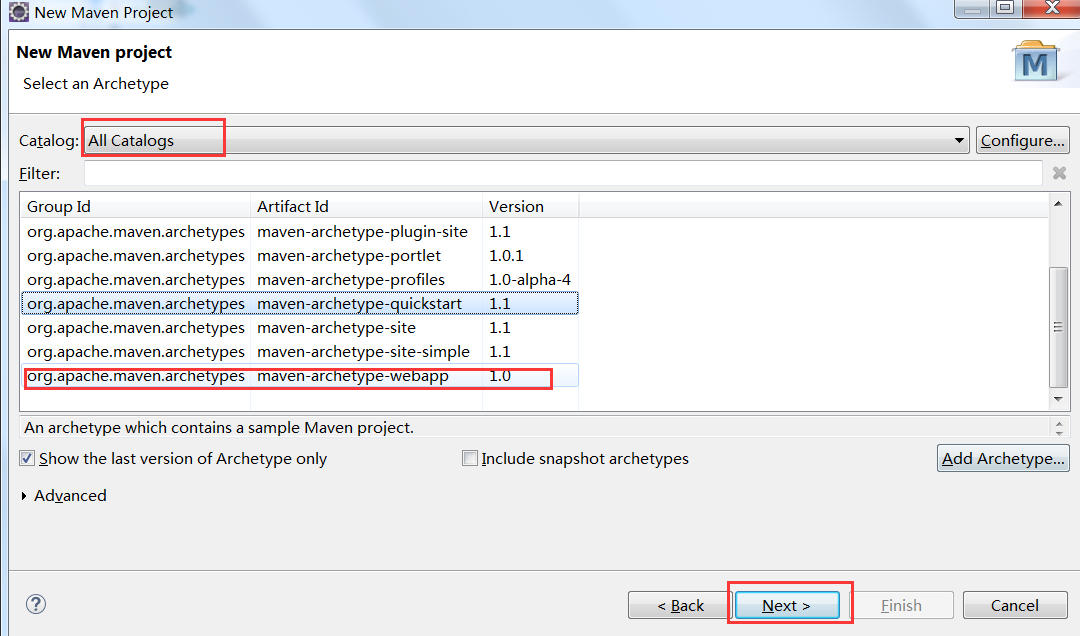
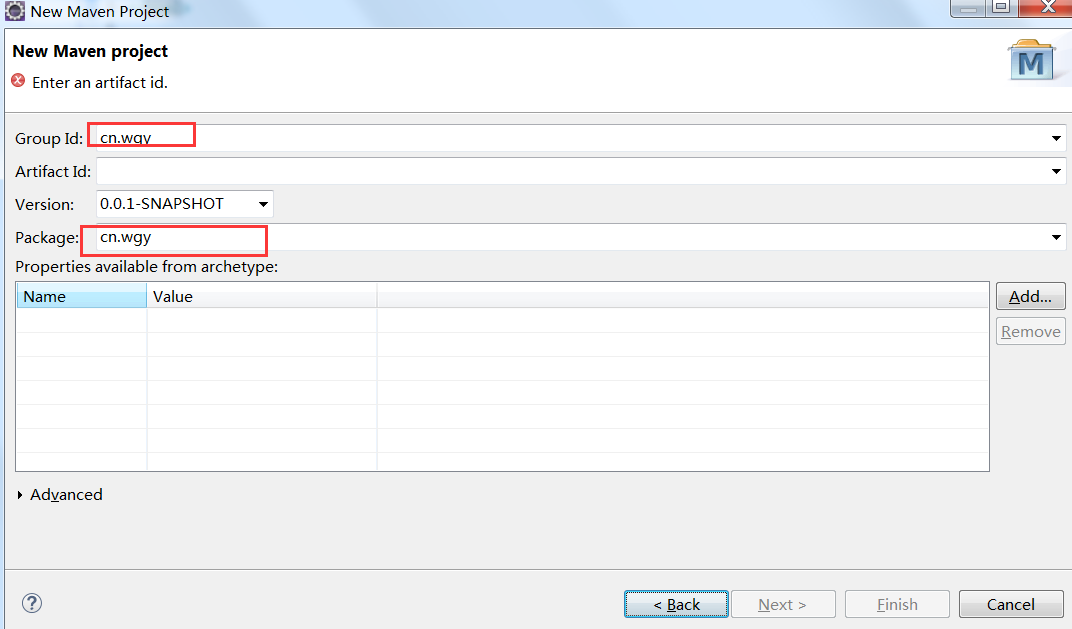
maven 選擇 Maven Project,點擊 Nextmaven-archetype-webapp

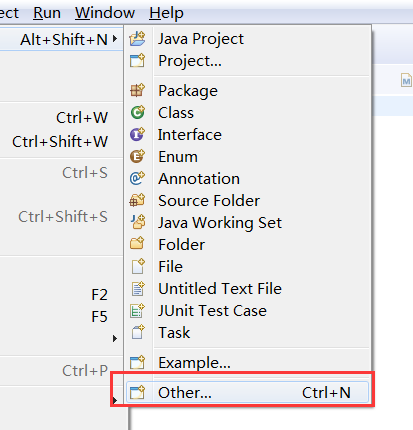

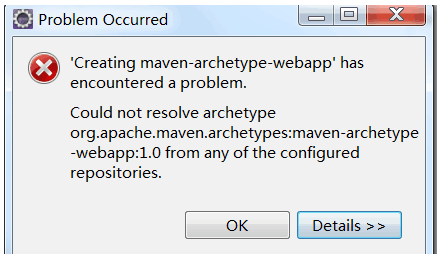
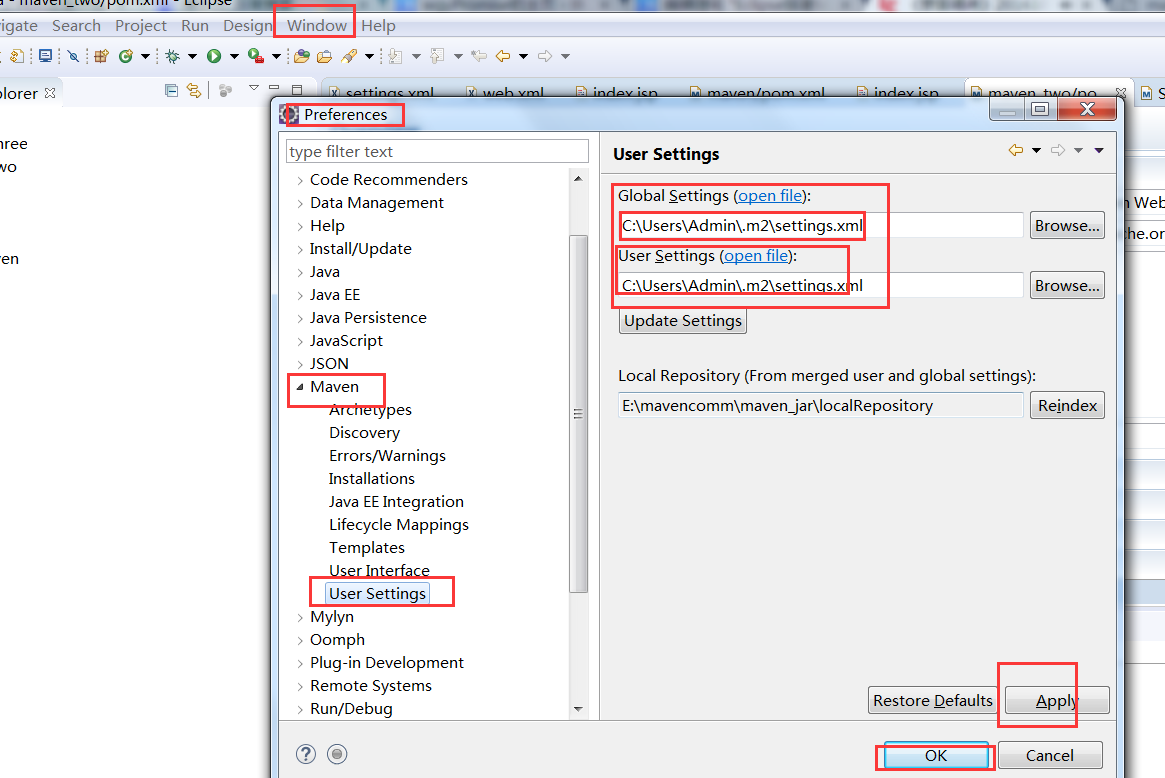
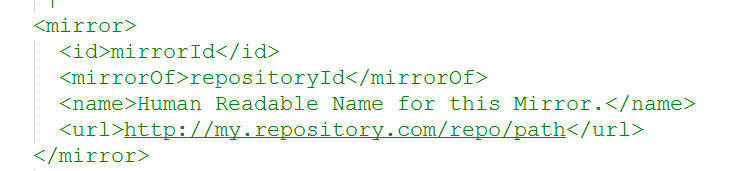
若出現「Could not resolve archetype」錯誤,通常是未指定 Maven settings.xml。解決方式:
settings.xml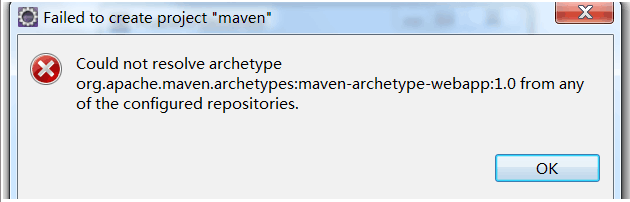
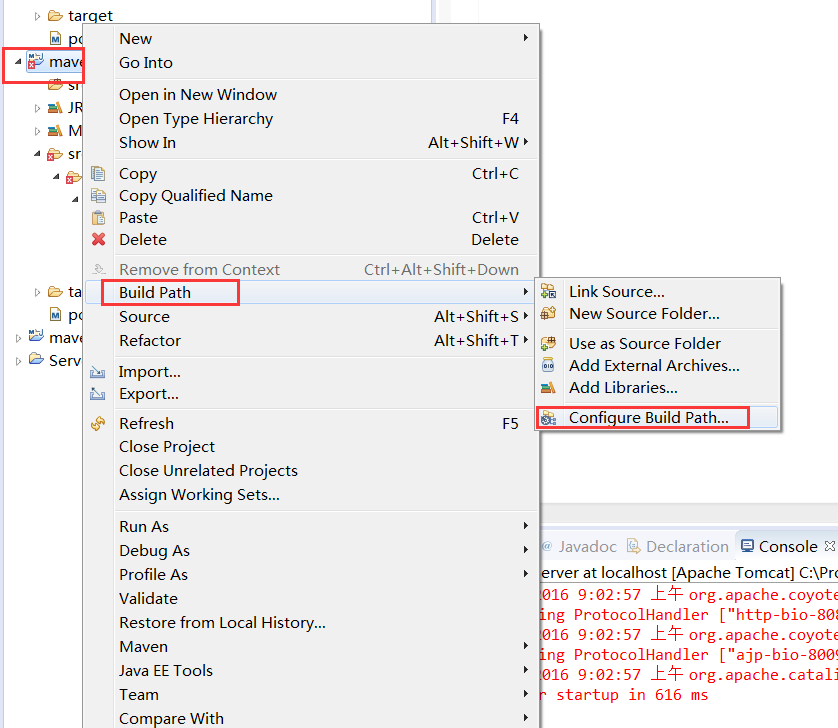
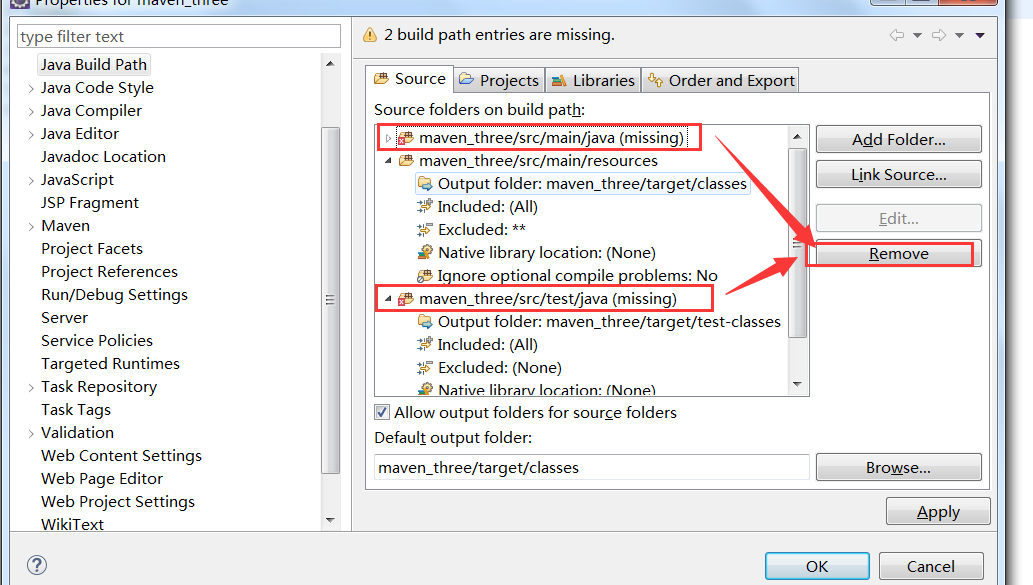
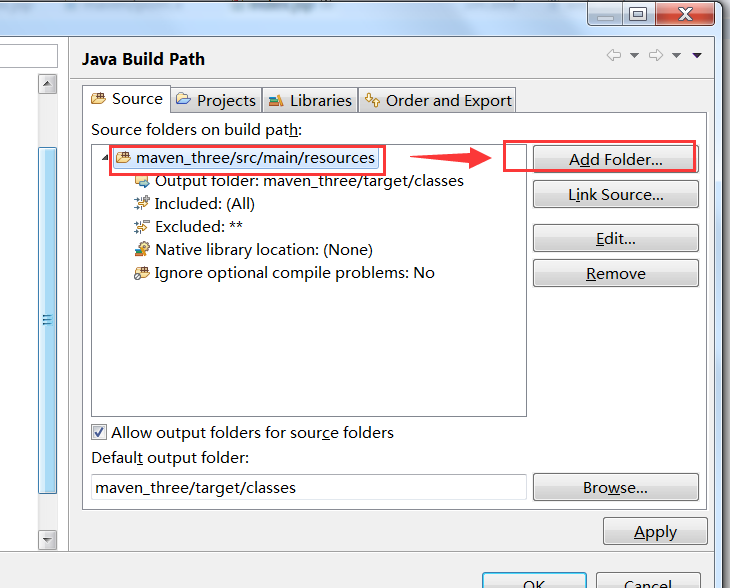
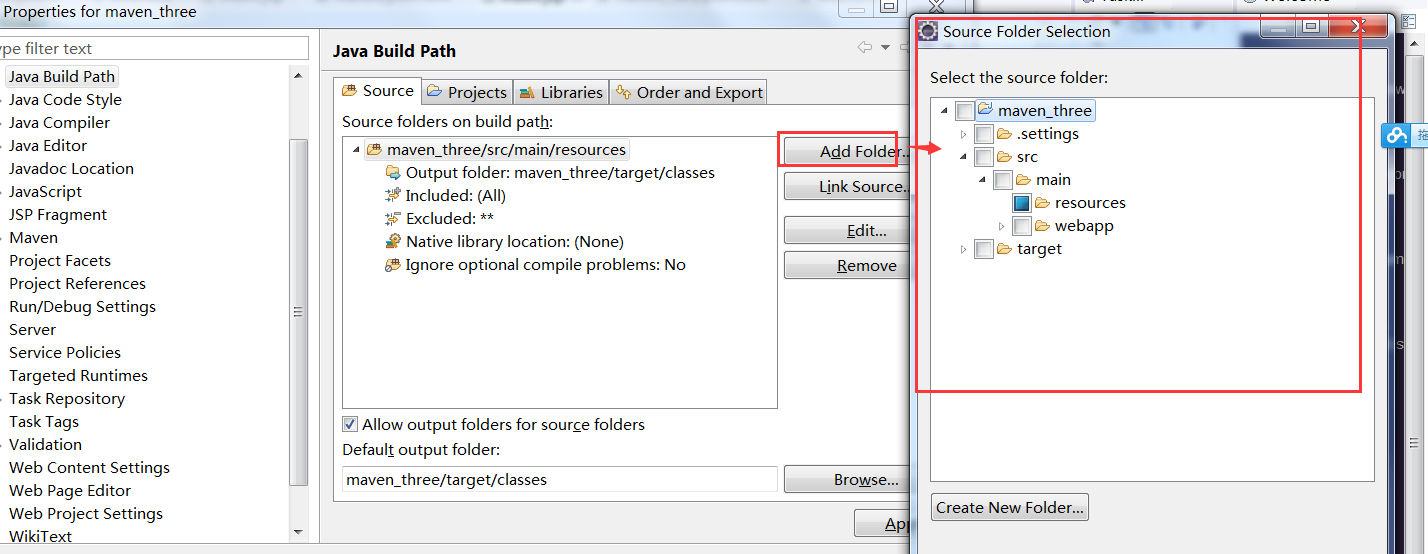
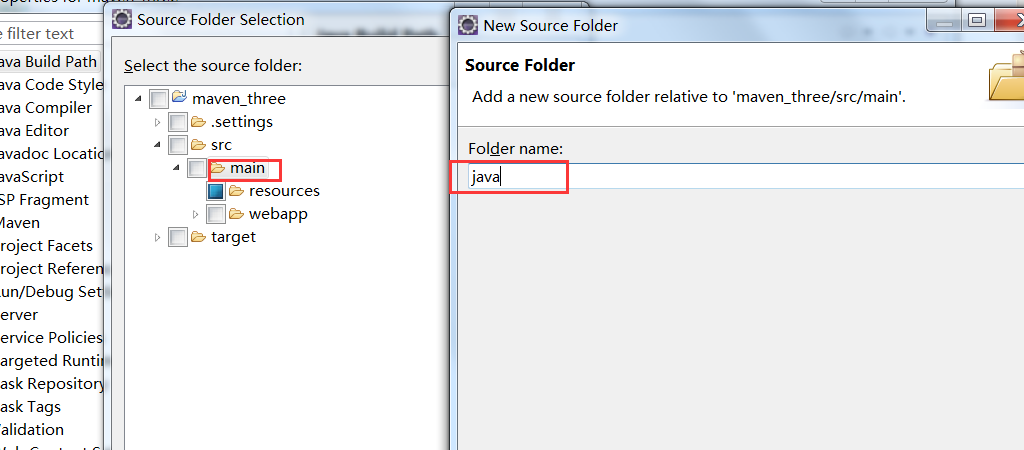
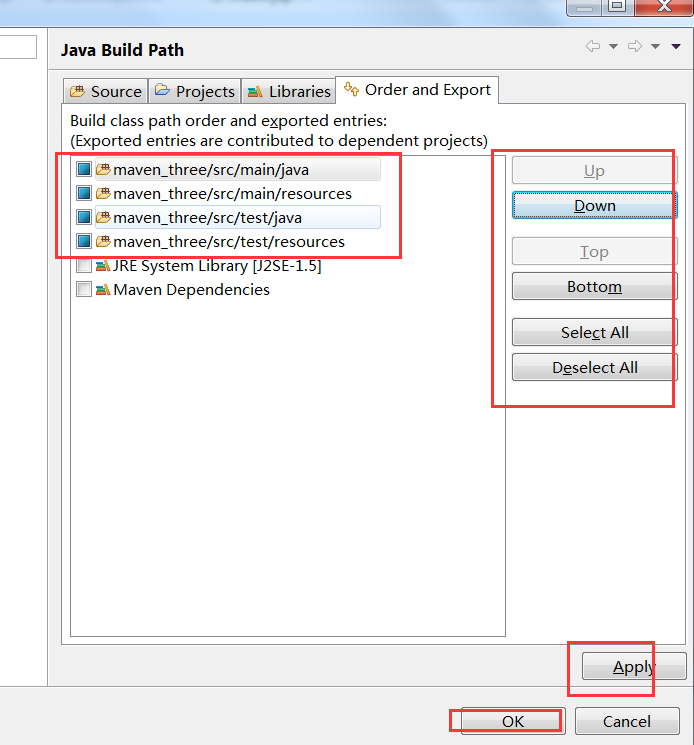
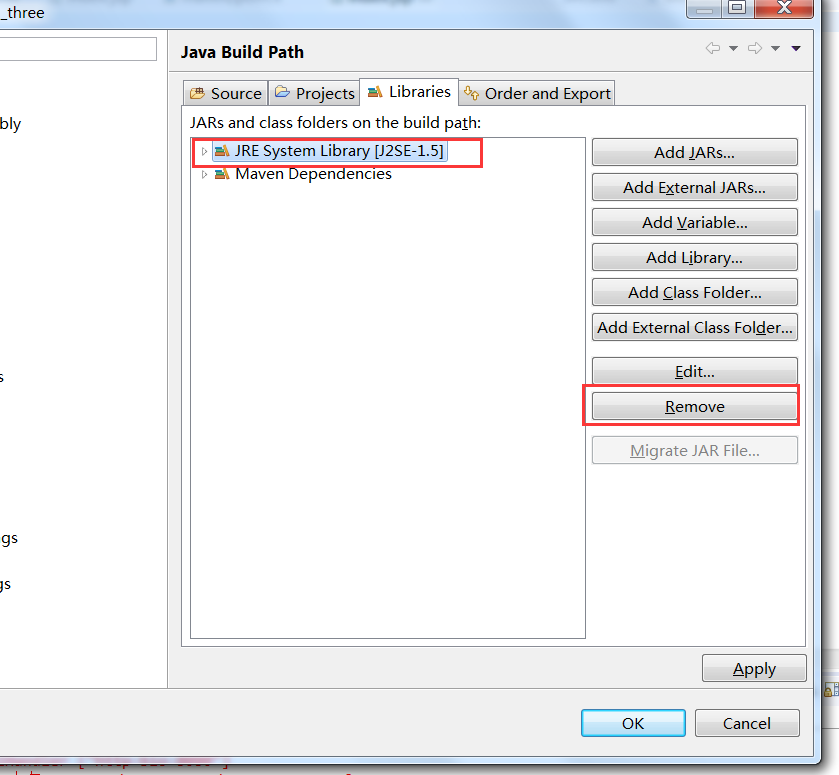
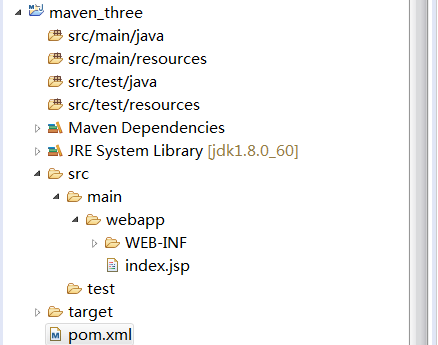
Maven Web 專案預設缺少 src/main/java、src/test/java、src/test/resources,需手動新增:
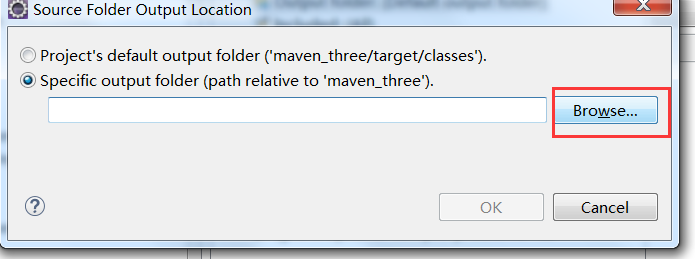
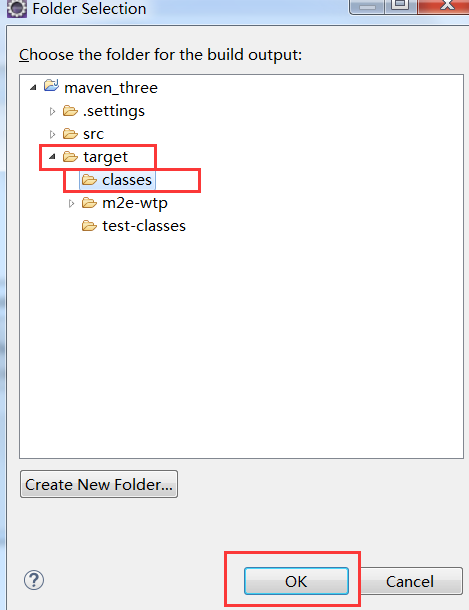
src/test/java、src/test/resources 的 Output folder 為 target/test-classes,避免與主程式 target/classes 混淆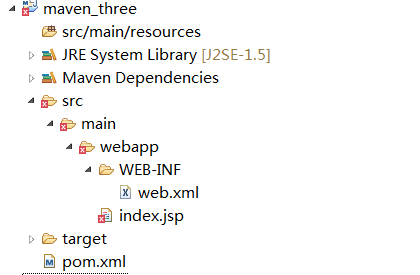
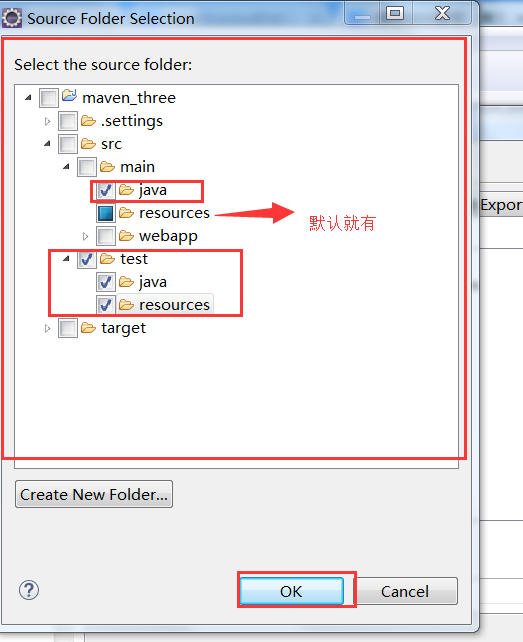
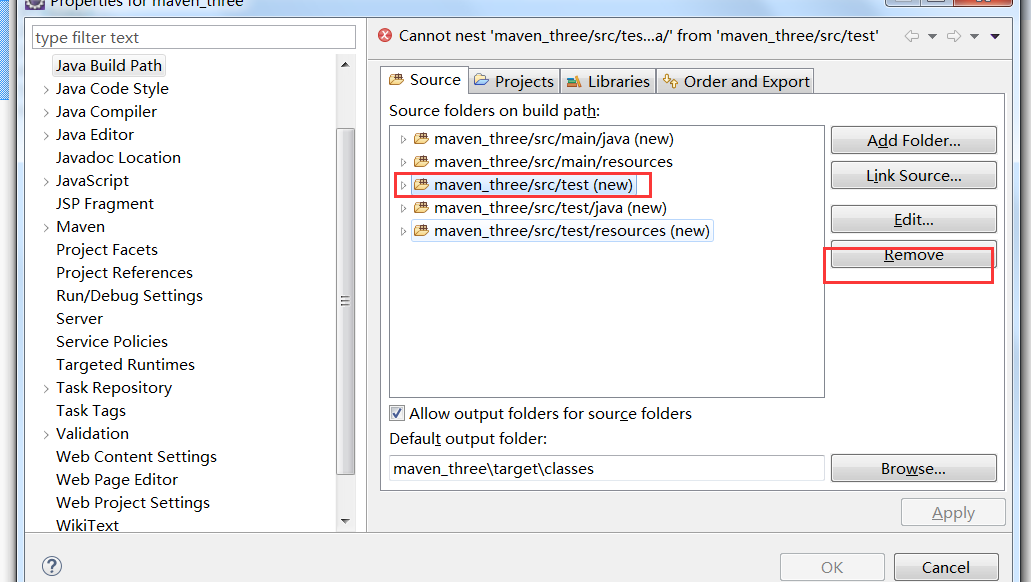
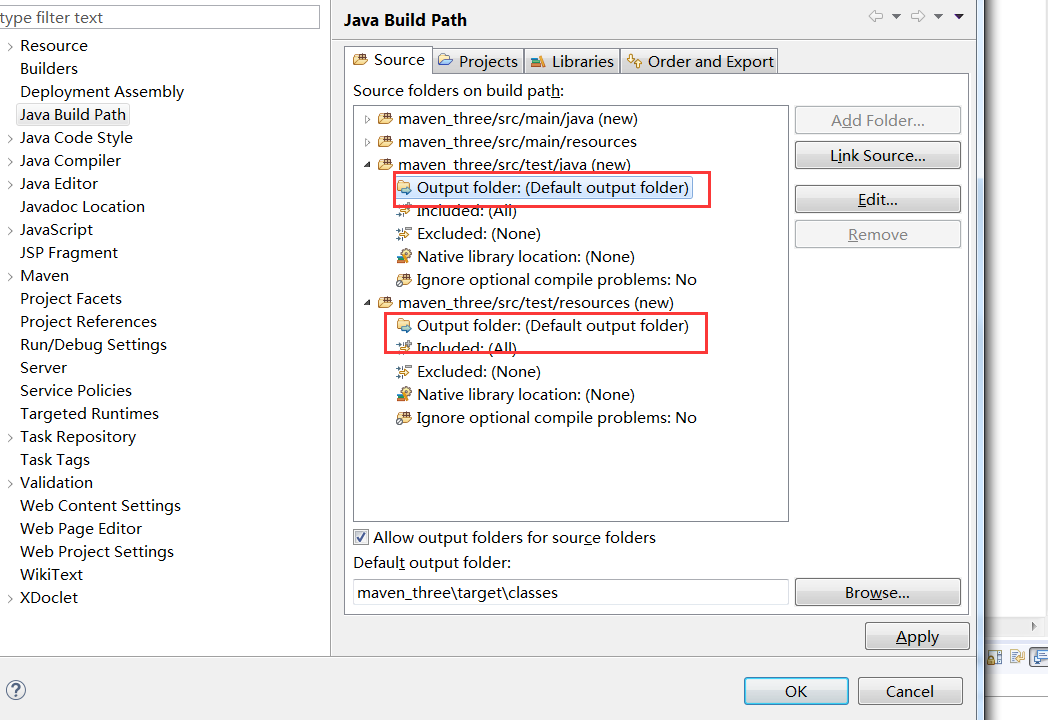
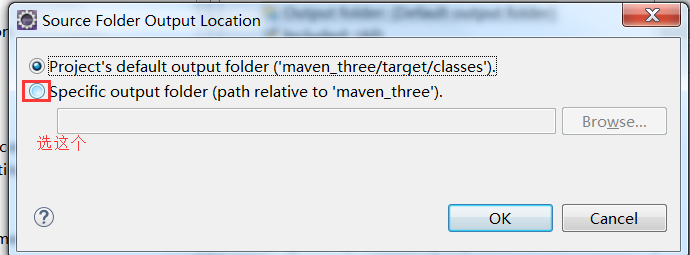
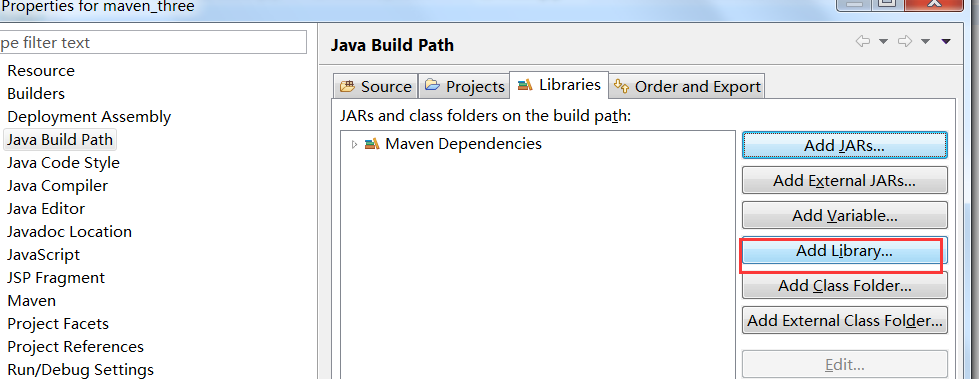
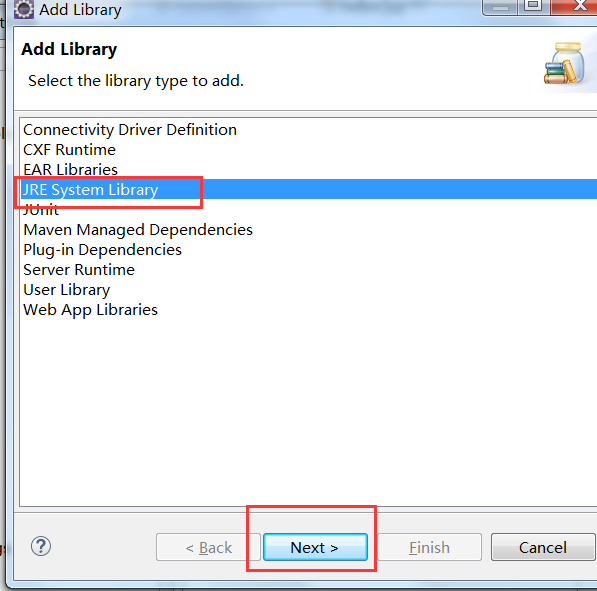
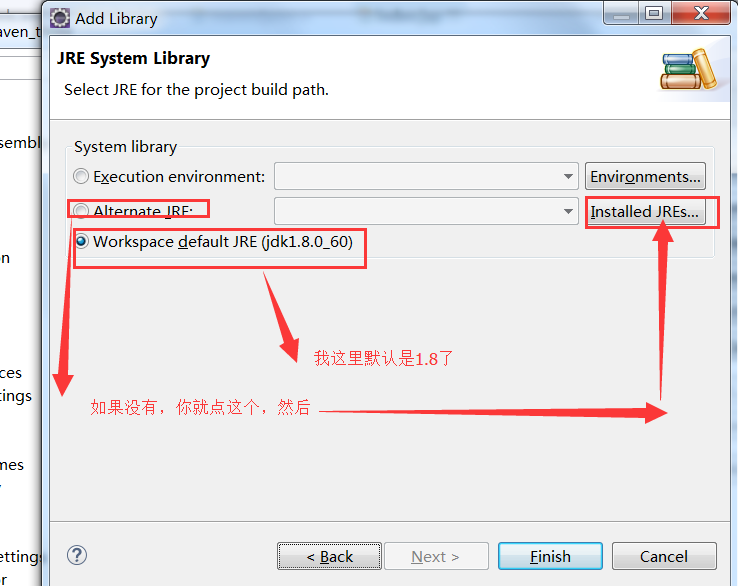
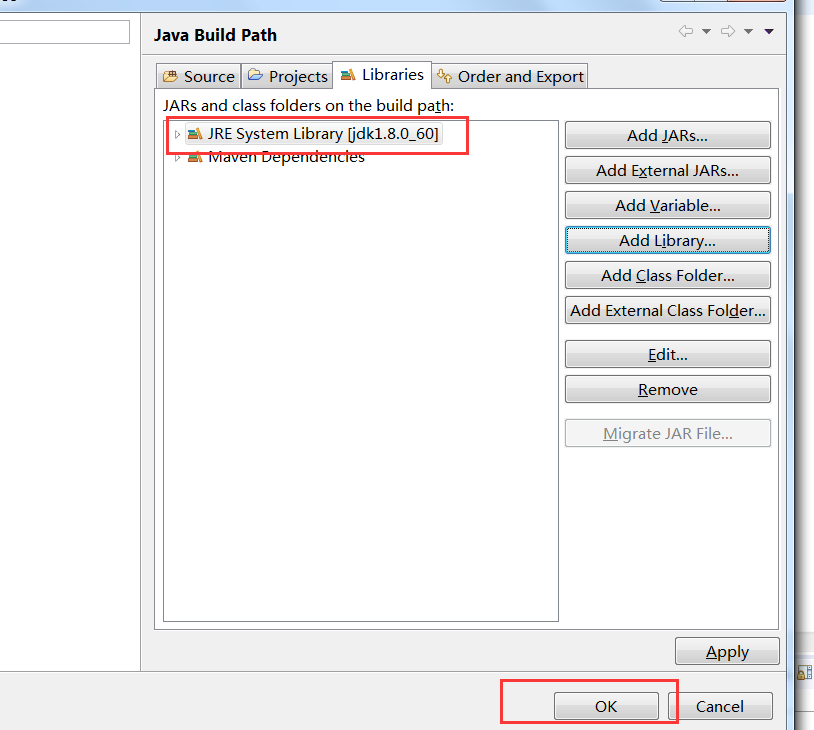
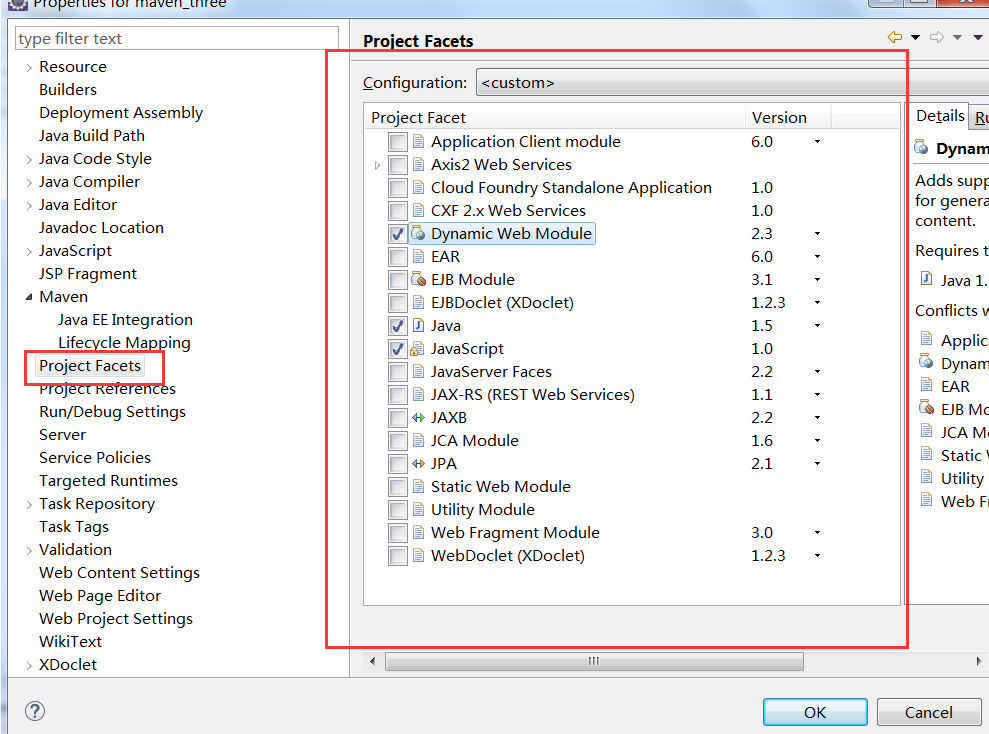
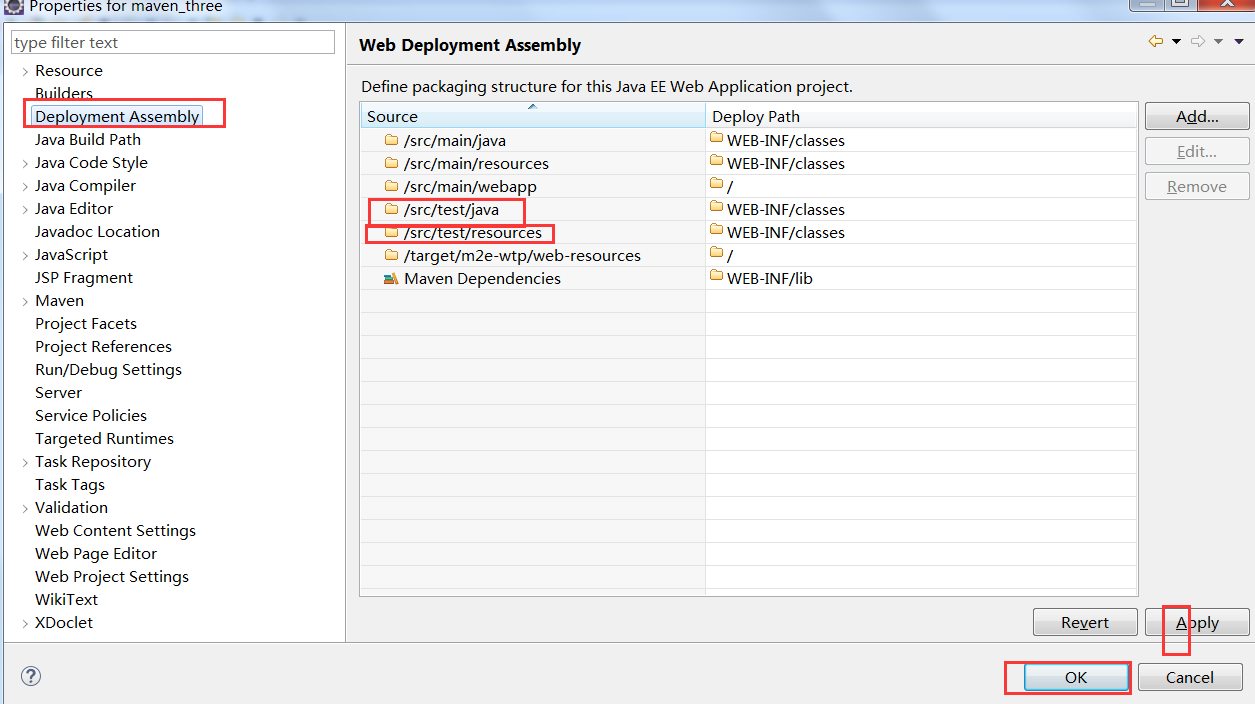
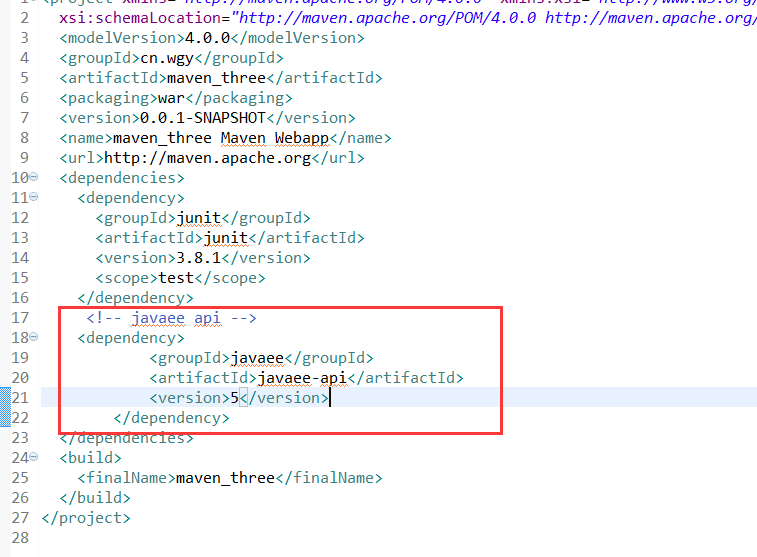
<dependencies>
  <!-- Java EE API -->
  <dependency>
    <groupId>javax</groupId>
    <artifactId>javaee-api</artifactId>
    <version>7.0</version>
    <scope>provided</scope>
  </dependency>
  <!-- 其他常用:JUnit, Log4j, Jackson, FileUpload 等 -->
</dependencies>

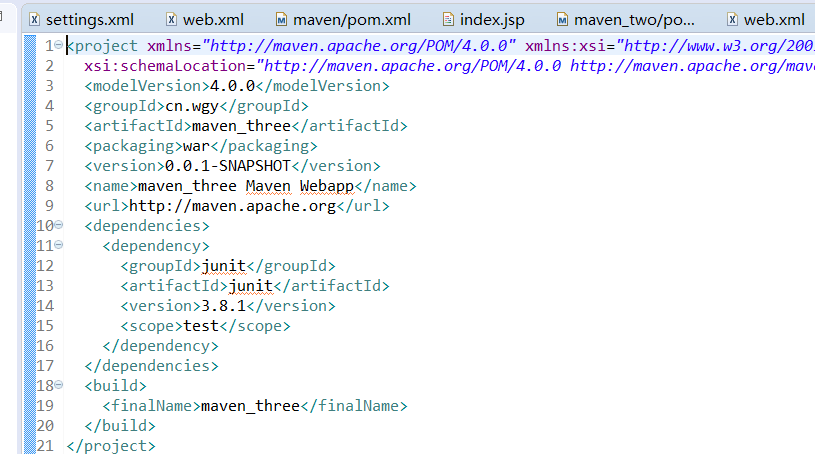
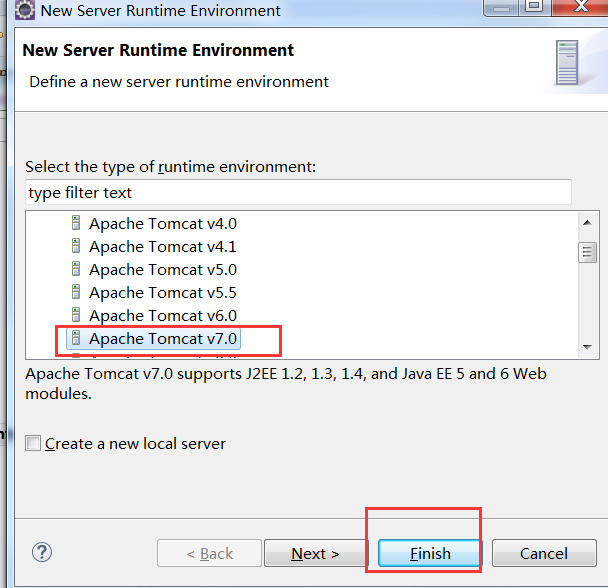
https://localhost:8080/專案名/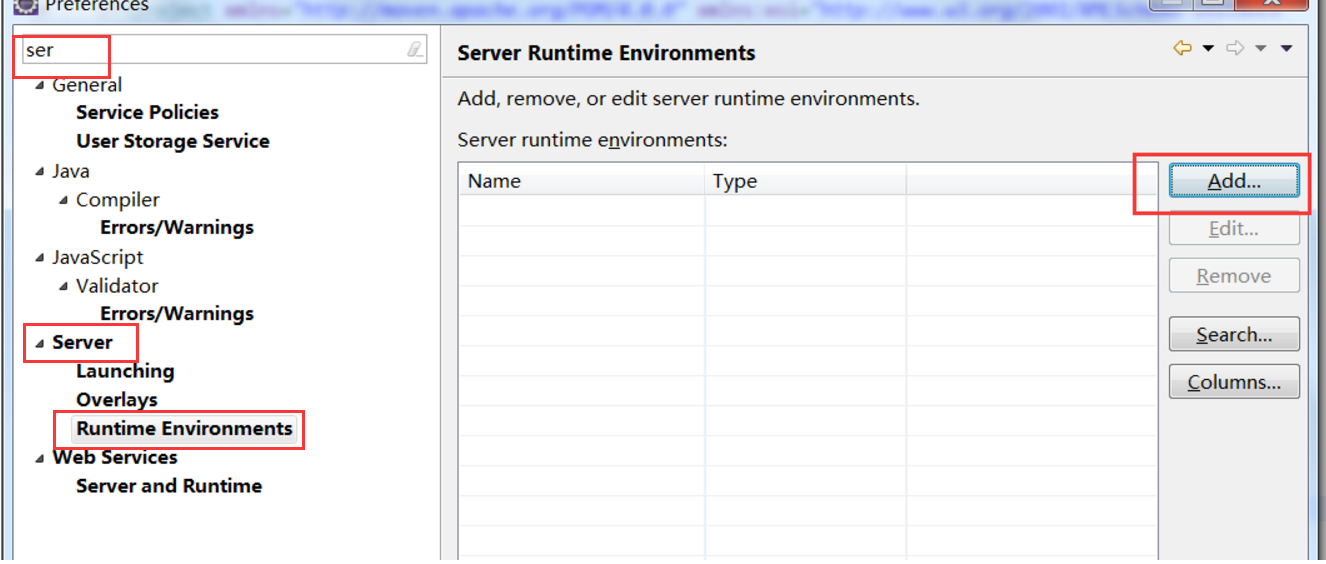
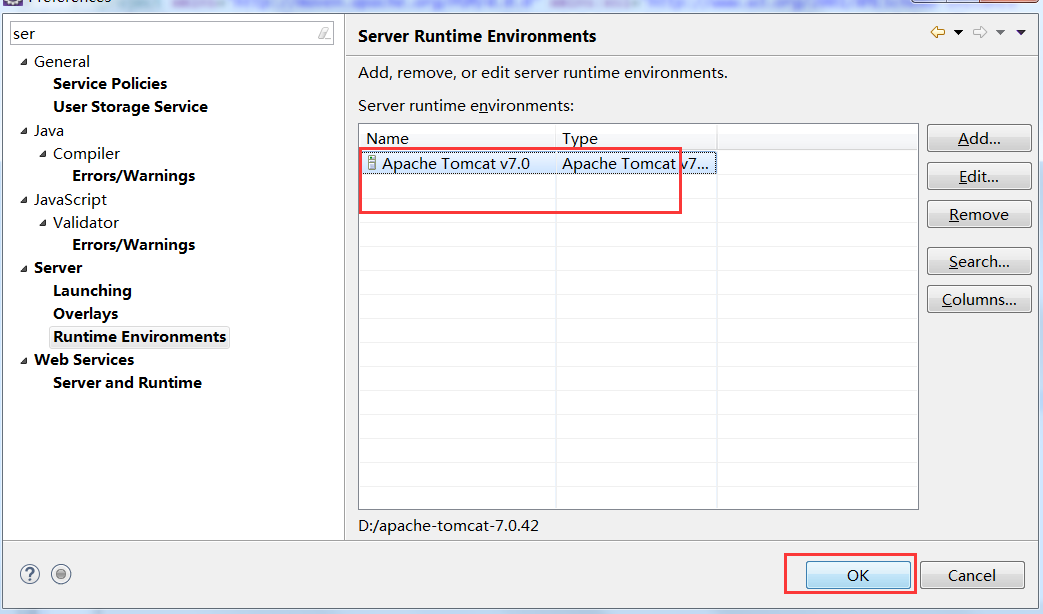
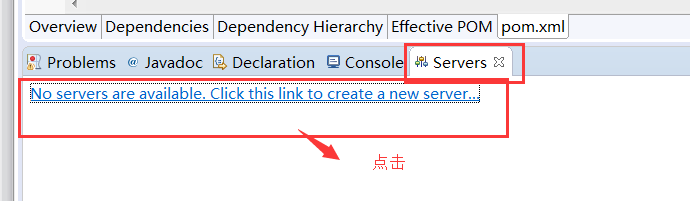
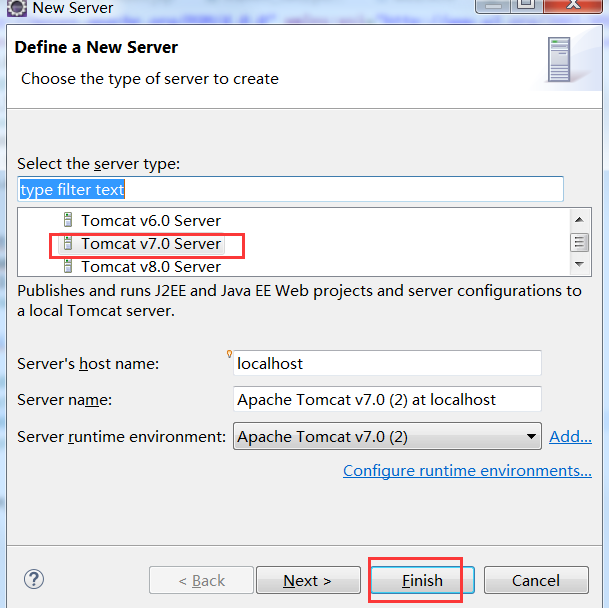
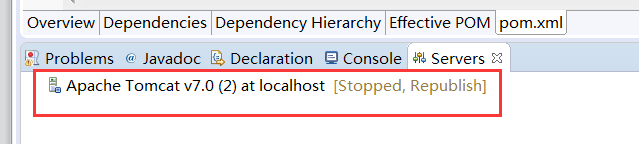
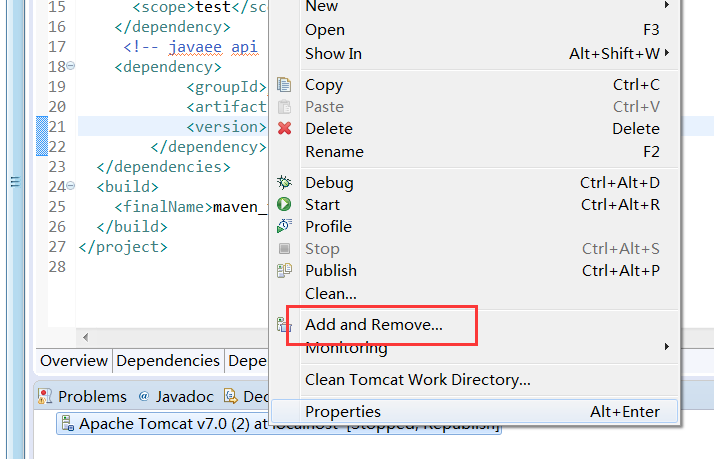
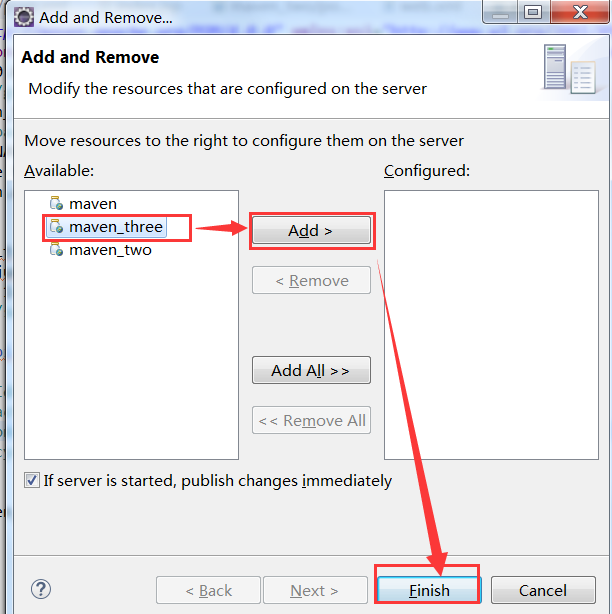
完成上述步驟,即可在 Eclipse 中擁有標準化的 Maven Web 專案環境,後續可整合 Spring、MyBatis 等框架進行企業級開發。