在 MFC 開發中,動態控件是指在程式執行期間透過 Create() 函數建立的控件,這與在對話框編輯器中預先放置的靜態控件有本質區別。本文將詳細說明動態控件的建立流程、訊息映射處理、資源回收機制,並以按鈕與單選按鈕群組為例進行實作演示。
靜態控件在對話框編輯器中拖放即可完成建立,屬性設定透過屬性視窗調整,對話框顯示時自動呈現,無需呼叫 Create()。動態控件則需在程式碼中手動完成 ID 定義、物件實例化、視窗建立等步驟。
開啟「字串表」,新增一筆記錄,ID 設為 IDC_MYBUTTON,Caption 欄位輸入按鈕顯示文字(如「動態按鈕」)。注意 Caption 不可為空,否則建立會失敗。
不同控件對應不同的 MFC 類別:
CButton(含一般按鈕、單選、核取方塊)CEditCStaticCTabCtrlCSpinButtonCtrl、CSliderCtrl、CRichEditCtrl 等關鍵點:不可直接定義 CButton m_MyBut;,這僅適用於靜態控件的控制變數。正確做法是使用 new 動態配置記憶體:
CButton* p_MyBut = new CButton();CButton::Create() 原型如下:
BOOL Create(
    LPCTSTR lpszCaption,
    DWORD dwStyle,
    const RECT& rect,
    CWnd* pParentWnd,
    UINT nID
);
參數說明:
lpszCaption:按鈕顯示文字dwStyle:視窗樣式與按鈕樣式的組合(必須包含 WS_CHILD、WS_VISIBLE 以及一種按鈕類型如 BS_PUSHBUTTON)rect:位置與大小pParentWnd:父視窗指標(不可為 NULL)nID:控件 ID範例程式碼:
p_MyBut->Create(
    _T("動態按鈕"),
    WS_CHILD | WS_VISIBLE | BS_PUSHBUTTON,
    CRect(20, 10, 80, 40),
    this,
    IDC_MYBUTTON
);CButton* CTextEditorView::NewMyButton(int nID, CRect rect, int nStyle)
{
CString m_Caption;
m_Caption.LoadString(nID); // 從字串表讀取標題
CButton* p_Button = new CButton();
ASSERT_VALID(p_Button);
p_Button->Create(
m_Caption,
WS_CHILD | WS_VISIBLE | BS_PUSHBUTTON | nStyle,
rect,
this,
nID
);
return p_Button;
}使用方式:
CButton* p_MyBut[3];
p_MyBut[0] = NewMyButton(ID_MYBUT1, CRect(10, 20, 50, 35), BS_DEFPUSHBUTTON);
p_MyBut[1] = NewMyButton(ID_MYBUT2, CRect(55, 20, 95, 35), 0);
p_MyBut[2] = NewMyButton(ID_MYBUT3, CRect(100, 20, 140, 35), 0);動態控件無法使用 ClassWizard 自動加入訊息映射,必須手動編輯。
在 BEGIN_MESSAGE_MAP 與 END_MESSAGE_MAP 之間,勿置於 //{{AFX_MSG_MAP 區塊內,以免影響 ClassWizard 運作:
BEGIN_MESSAGE_MAP(CTextEditorView, CFormView)
    //{{AFX_MSG_MAP(CTextEditorView)
    ON_BN_CLICKED(IDC_ICONBUT0, OnIconbut0)
    //}}AFX_MSG_MAP
    ON_BN_CLICKED(ID_MYBUT1, OnMybut1)
    ON_BN_CLICKED(ID_MYBUT2, OnMybut2)
    ON_BN_CLICKED(ID_MYBUT3, OnMybut3)
END_MESSAGE_MAP()同樣置於 //}}AFX_MSG 區塊之外:
protected:
    //{{AFX_MSG(CTextEditorView)
    afx_msg void OnIconbut0();
    //}}AFX_MSG
    afx_msg void OnMybut1();
    afx_msg void OnMybut2();
    afx_msg void OnMybut3();
DECLARE_MESSAGE_MAP()void CTextEditorView::OnMybut1()
{
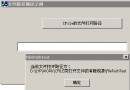
MessageBox(_T("哈!你單擊了動態按鈕。"));
}
void CTextEditorView::OnMybut2()
{
// 其他處理邏輯
}
void CTextEditorView::OnMybut3()
{
// 其他處理邏輯
}取得控件指標後,可進一步操作:
p_MyBut[0]->MoveWindow(...)p_MyBut[0]->SetWindowText(...)p_MyBut[0]->ShowWindow(...)動態配置的物件不會自動釋放,必須手動 delete:
if (p_MyBut[0])
delete p_MyBut[0];單選按鈕同屬 CButton 類別,但需成群運作,建立方式有所不同。
在字串表新增:
IDC_MYRADIO1,Caption:「單選1」IDC_MYRADIO2,Caption:「單選2」IDC_MYRADIO3,Caption:「單選3」CButton* CTextEditorView::NewMyRadio(int nID, CRect rect, int nStyle)
{
CString m_Caption;
m_Caption.LoadString(nID);
CButton* p_Radio = new CButton();
ASSERT_VALID(p_Radio);
p_Radio->Create(
m_Caption,
WS_CHILD | WS_VISIBLE | nStyle | WS_TABSTOP | BS_AUTORADIOBUTTON,
rect,
this,
nID
);
return p_Radio;
}建立群組(第一個必須指定 WS_GROUP):
CButton* p_MyRadio[3];
p_MyRadio[0] = NewMyRadio(IDC_MYRADIO1, CRect(15, 90, 60, 105), WS_GROUP);
p_MyRadio[1] = NewMyRadio(IDC_MYRADIO2, CRect(15, 108, 60, 123), 0);
p_MyRadio[2] = NewMyRadio(IDC_MYRADIO3, CRect(15, 126, 60, 141), 0);標頭檔宣告:int m_SelRadio;
建構函式初始化:m_SelRadio = 0;
建立後設定預設選中:
p_MyRadio[m_SelRadio]->SetCheck(1); // 1=選中,0=未選中訊息映射與標頭檔宣告同前節,處理函數僅更新控制變數:
void CTextEditorView::OnMyRadio1() { m_SelRadio = 0; }
void CTextEditorView::OnMyRadio2() { m_SelRadio = 1; }
void CTextEditorView::OnMyRadio3() { m_SelRadio = 2; }CTextEditorView::~CTextEditorView()
{
for (int i = 0; i < 3; i++)
{
if (p_MyRadio[i])
delete p_MyRadio[i];
}
}動態控件的建立與響應核心在於:new 配置物件 → Create() 建立視窗 → 手動維護訊息映射 → 適時 delete 釋放記憶體。掌握此流程,即可靈活應對各類動態介面需求。