Apache CXF 是新一代開源 Web Service 框架,支援 JAX-WS、JAX-RS 等標準,整合 Spring 架構,開發體驗優於舊版 Axis。本文透過完整範例示範從專案建立、服務實作、Spring 整合到客戶端測試的完整流程。
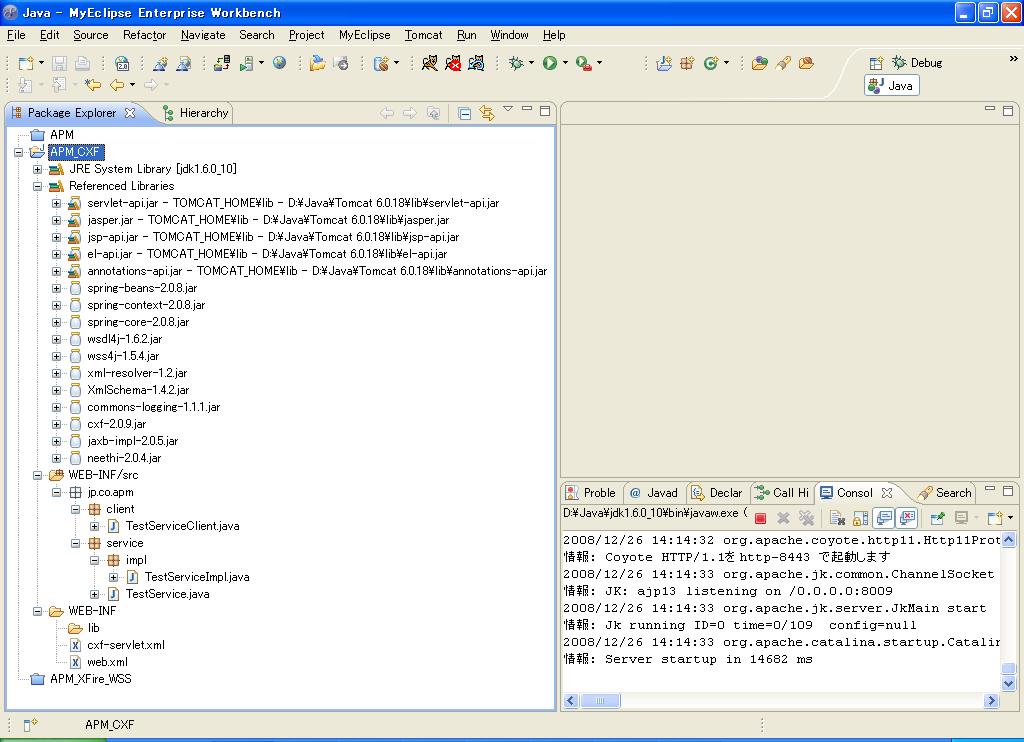
採用標準 Maven/Web 專案結構,核心包含服務介面、實作類、Spring 設定檔與 web.xml。
package jp.co.apm.service;

public interface TestService {
    String sayHello();
}package jp.co.apm.service.impl;
import jp.co.apm.service.TestService;
public class TestServiceImpl implements TestService {
@Override
public String sayHello() {
return "Hello, Shen Bin";
}
}<?xml version="1.0" encoding="UTF-8"?>
<beans xmlns="https://www.springframework.org/schema/beans"
xmlns:xsi="https://www.w3.org/2001/XMLSchema-instance"
xmlns:simple="https://cxf.apache.org/simple"
xmlns:soap="https://cxf.apache.org/bindings/soap"
xsi:schemaLocation="
https://www.springframework.org/schema/beans https://www.springframework.org/schema/beans/spring-beans-2.0.xsd
https://cxf.apache.org/bindings/soap https://cxf.apache.org/schemas/configuration/soap.xsd
https://cxf.apache.org/simple https://cxf.apache.org/schemas/simple.xsd">
<simple:server id="testservice" serviceClass="jp.co.apm.service.TestService" address="/test">
<simple:serviceBean>
<bean class="jp.co.apm.service.impl.TestServiceImpl" />
</simple:serviceBean>
</simple:server>
</beans><?xml version="1.0" encoding="UTF-8"?>
<web-app version="2.5" xmlns="https://java.sun.com/xml/ns/javaee"
xmlns:xsi="https://www.w3.org/2001/XMLSchema-instance"
xsi:schemaLocation="https://java.sun.com/xml/ns/javaee https://java.sun.com/xml/ns/javaee/web-app_2.5.xsd">
<display-name>APM</display-name>
<description>APM</description>
<servlet>
<servlet-name>APM</servlet-name>
<servlet-class>org.apache.cxf.transport.servlet.CXFServlet</servlet-class>
<load-on-startup>2</load-on-startup>
</servlet>
<servlet-mapping>
<servlet-name>APM</servlet-name>
<url-pattern>/services/*</url-pattern>
</servlet-mapping>
<session-config>
<session-timeout>60</session-timeout>
</session-config>
</web-app>package jp.co.apm.client;
import jp.co.apm.service.TestService;
import org.apache.cxf.frontend.ClientProxyFactoryBean;
public class TestServiceClient {
public static void main(String[] args) {
ClientProxyFactoryBean factory = new ClientProxyFactoryBean();
factory.setServiceClass(TestService.class);
factory.setAddress("https://localhost:8080/APM_CXF/services/test");
TestService service = (TestService) factory.create();
System.out.println("服務回應: " + service.sayHello());
}
}https://localhost:8080/APM_CXF/services/test?wsdl 驗證 WSDL 生成TestServiceClient.java 進行功能測試官方網站:Apache CXF 專案首頁