使用 Eclipse JEE + Axis2 1.4.1 快速建立 SOAP Web Service,從環境配置、服務實現、發布測試到客戶端驗證完整流程。
環境準備
- Eclipse IDE for Java EE Developers
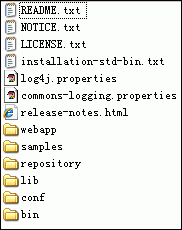
- Axis2 1.4.1 Standard Binary Distribution (
axis2-1.4.1-bin.zip)
- 解壓至任意目錄,記住路徑
Eclipse 配置 Axis2 Runtime
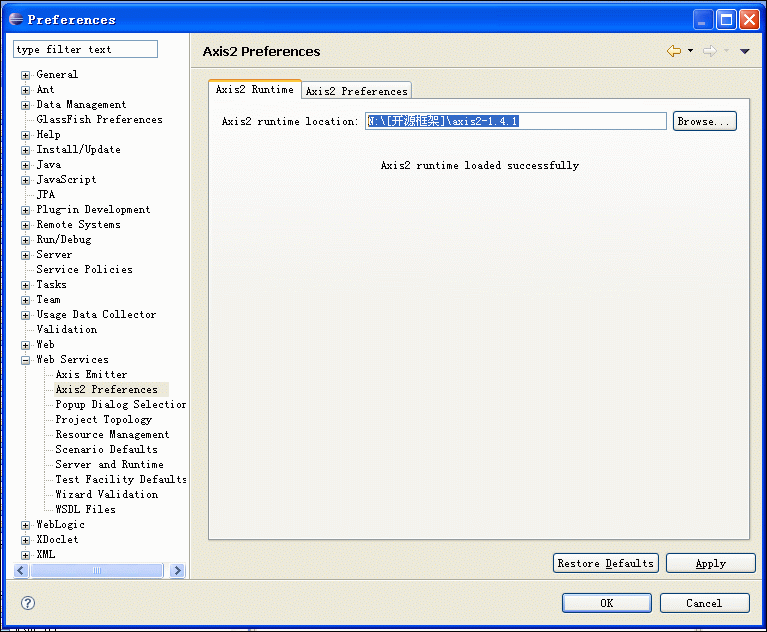
- Window → Preferences → Web Services → Axis2 Preferences
- Axis2 runtime location 選擇解壓目錄
- Apply & Close
建立計算器服務
1. 新建 Java Project: WS_01
2. 建立服務實現類
package rong.service;

public class CalculateService {
  public float plus(float x, float y) { return x + y; }
  public float minus(float x, float y) { return x - y; }
  public float multiply(float x, float y) { return x * y; }
  public float divide(float x, float y) { return x / y; }
}
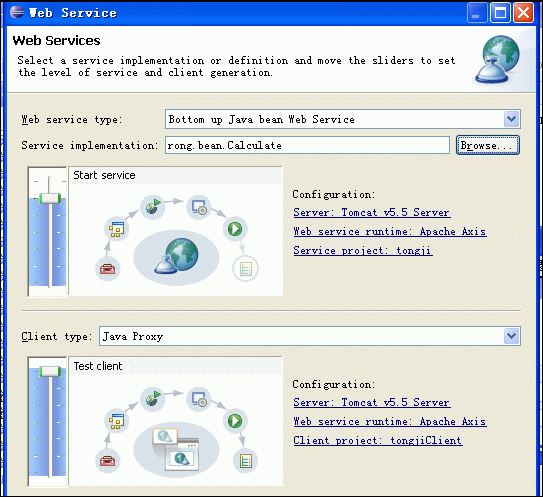
3. 產生 Web Service (Wizard)
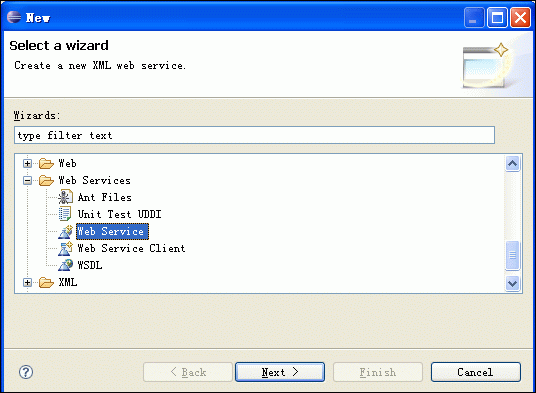
- 專案右鍵 → New → Other → Web Services → Web Service
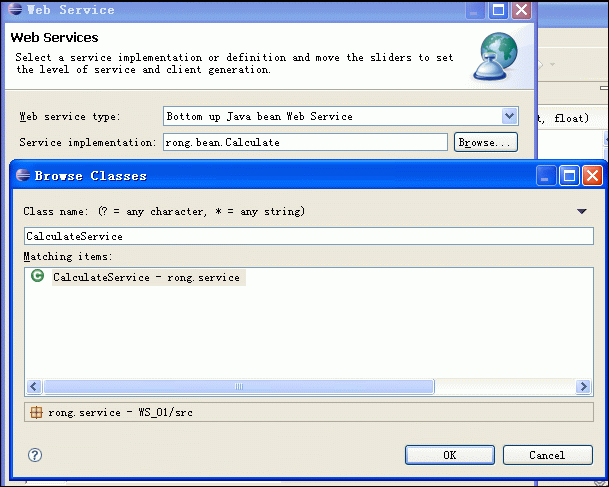
- Service implementation: Browse 選擇
CalculateService
- Web Service type 滑桿 → Start service (發布服務)
- Client type 滑桿 → Test client (產生測試客戶端)
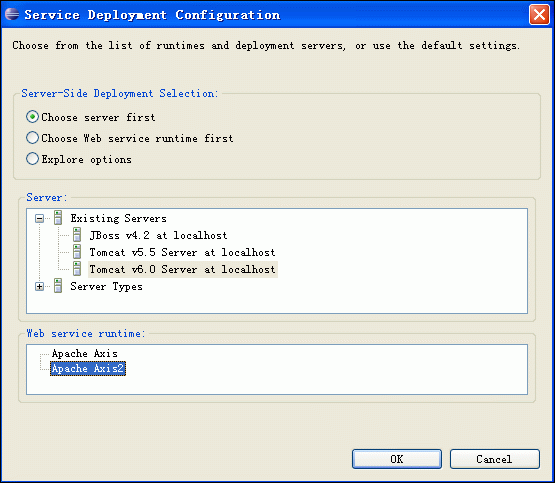
- Configuration (Server):Tomcat 6.0 + Apache Axis2
- Configuration (Client):同樣配置
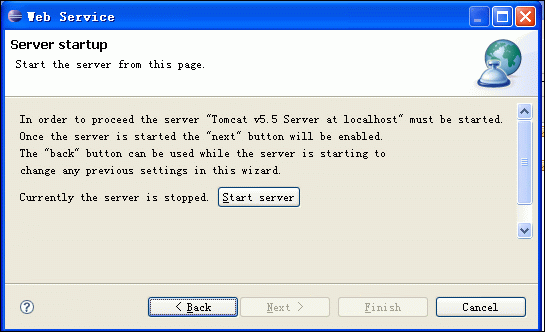
- Next → Next → Start Server (啟動 Tomcat)
- Finish
測試驗證
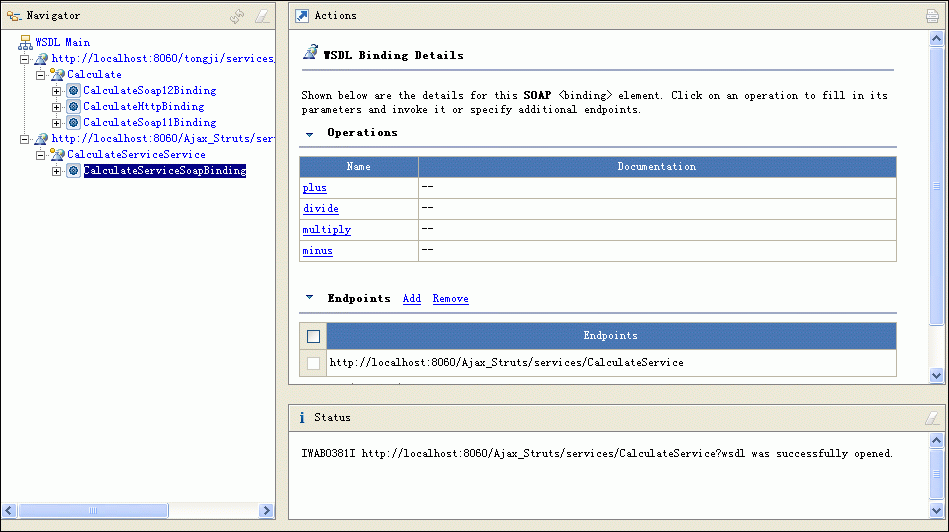
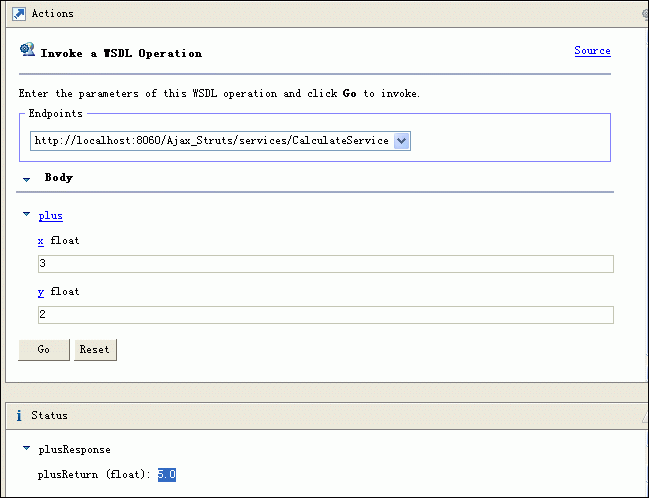
完成後自動開啟 Web Services Explorer:
- 選擇操作 (如 `plus`)
- 輸入參數: x=2, y=3
- 點擊 Go
- Status 欄顯示結果:
5.0
生成檔案結構說明
- `services.xml`:服務部署描述 (Axis2 特有)
- `wsdl` 目錄:WSDL 合約檔
- 客戶端 Stub:`CalculateServiceStub.java` 等
- 建構腳本:`build.xml` (Ant) / `.classpath` `.project`
進階擴展方向
- 複雜資料類型:自定義 Java Bean 自動映射為 XML Schema
- 安全性:WS-Security (UsernameToken, Signature, Encryption)
- 非同步調用:`CallbackHandler` / `Future` 模式
- REST 風格:Axis2 亦支援 RESTful 服務發布
- Maven 整合:`axis2-maven-plugin` 自動化建構
Axis2 + Eclipse Wizard 讓 Web Service 開發「所見即所得」,適合快速原型與教學驗證。