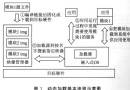
專案架構:SOAP → JNI → C++ 業務邏輯。SOAP 端每個方法僅做三件事:記錄入口日誌、初始化 JavaBean 參數、呼叫 JNI、記錄出口日誌。方法數十個,代碼靠複製貼上維護,新增橫切邏輯(如效能統計、事務邊界)需修改所有方法,極度脆弱。
public interface Interceptor {
    void before(InvokeJniInfo info);        // 方法前
    void after(InvokeJniInfo info);         // 方法後(正常返回)
    void exceptionThrow(InvokeJniInfo info); // 方法拋出異常
}
public class InvokeJniInfo {
    private Object proxy;           // 代理物件
    private Method method;          // 被呼叫方法
    private Object[] args;          // 參數陣列
    private Object result;          // 返回值
    private Throwable exception;    // 異常物件

    public InvokeJniInfo(Object proxy, Method method, Object[] args,
                         Object result, Throwable exception) {
        this.proxy = proxy; this.method = method; this.args = args;
        this.result = result; this.exception = exception;
    }
    // Getter/Setter 略
}public abstract class AbstractInterceptor implements Interceptor {
public void before(InvokeJniInfo info) {}
public void after(InvokeJniInfo info) {}
public void exceptionThrow(InvokeJniInfo info) {}
}// 日誌攔截器
public class LogInterceptor implements Interceptor {
private Log log = LogFactory.getLog("aop.log");
public void before(InvokeJniInfo info) {
log.debug("Enter " + info.getMethod().getName());
}
public void after(InvokeJniInfo info) {
log.debug("Exit " + info.getMethod().getName());
}
public void exceptionThrow(InvokeJniInfo info) {
log.error("Error in " + info.getMethod().getName(), info.getException());
}
}
// 參數初始化攔截器
public class InitParamsInterceptor extends AbstractInterceptor {
public void before(InvokeJniInfo info) {
if (info.getArgs().length > 0) {
InitContainsObjectNullUtil.initContainsOutParameter(info.getArgs()[0]);
}
}
}
public class InterceptorHandler implements InvocationHandler {
    private static final Log log = LogFactory.getLog(InterceptorHandler.class);
    private final List interceptors = new ArrayList<>();
    private final Object target;

    private InterceptorHandler(Object target) {
        this.target = target;
        // 註冊預設攔截器,順序即執行順序
        interceptors.add(new LogInterceptor());
        interceptors.add(new InitParamsInterceptor());
    }

    // 工廠方法
    public static Object newProxyInstance(Object target) {
        return Proxy.newProxyInstance(
            target.getClass().getClassLoader(),
            target.getClass().getInterfaces(),
            new InterceptorHandler(target)
        );
    }

    @Override
    public Object invoke(Object proxy, Method method, Object[] args) throws Throwable {
        InvokeJniInfo info = new InvokeJniInfo(proxy, method, args, null, null);
        Object result = null;
        Throwable thrown = null;

        // 1. Before 鏈(正序)
        log.debug("Invoking Before Interceptors");
        for (Interceptor ic : interceptors) ic.before(info);

        try {
            // 2. 真實方法呼叫
            log.debug("Invoking Target Method");
            result = method.invoke(target, args);
            info.setResult(result);

            // 3. After 鏈(逆序,模擬棧展開)
            log.debug("Invoking After Interceptors");
            for (int i = interceptors.size() - 1; i >= 0; i--) {
                interceptors.get(i).after(info);
            }
        } catch (Throwable t) {
            thrown = t;
            info.setException(t);
            // 4. Exception 鏈(逆序)
            log.debug("Invoking Exception Interceptors");
            for (int i = interceptors.size() - 1; i >= 0; i--) {
                interceptors.get(i).exceptionThrow(info);
            }
            throw t; // 保持異常傳播
        }
        return result;
    }
}
public class InterceptorFactory {
    private static final Log log = LogFactory.getLog(InterceptorFactory.class);

    public static Object getInterceptorProxyedObject(String className) {
        try {
            Class clazz = Class.forName(className);
            Object target = clazz.newInstance();
            return InterceptorHandler.newProxyInstance(target);
        } catch (Exception e) {
            log.error("Failed to create proxy for " + className, e);
            return null;
        }
    }
}public class SOAP {
private JniInterface jni = new JniClass();
public JavaBeanA aMethod(JavaBeanA param) {
log.debug("進入A方法");
InitContainsObjectNullUtil.initContainsOutParameter(param);
JavaBeanA result = jni.aMethod(param);
log.debug("退出A方法");
return result;
}
// 數十個類似方法...
}public class SOAP {
private JniInterface jni;
public SOAP() {
// 關鍵:獲得被代理的 JNI 介面實例
this.jni = (JniInterface) InterceptorFactory.getInterceptorProxyedObject("JniClass");
}
public JavaBeanA aMethod(JavaBeanA param) {
return jni.aMethod(param); // 一行搞定
}
// 其他方法同理,零橫切代碼
}getBean() 返回代理,實現攔截器自動裝配。Interceptor、切點匹配邏輯(此處簡化為全方法攔截)、before/after/throws 通知類型。InterceptorFactory,整合切點解析、通知排序、代理生成策略(JDK/CGLIB)。execution(* com..service.*(..)) 等模式。@Order 或優先級配置。TransactionInterceptor 結合 PlatformTransactionManager。理解此精簡實現,即掌握 Spring AOP 核心運作機制,亦具備自行構建輕量 AOP 框架的能力。