Spring Framework 是解決 J2EE 開發中常見問題的強大輕量級框架。它基於 JavaBeans 的配置管理機制,能夠實現高效、獨立且高度可復用的解決方案,讓應用程式的組裝變得簡單快捷。本文將帶領讀者一步步搭建 Spring 開發環境,並透過一個簡單的範例體驗 Spring 核心的控制反轉(IOC)特性。開發環境採用 Eclipse IDE。
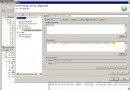
E:\spring。E:\spring\dist\ 目錄下所有的 JAR 檔案加入專案的 Build Path 中。commons-logging.jar 與 log4j.jar,並在 CLASSPATH 根目錄下建立 log4j.properties 配置檔,內容如下:
log4j.rootLogger=DEBUG, stdout
log4j.appender.stdout=org.apache.log4j.ConsoleAppender
log4j.appender.stdout.layout=org.apache.log4j.PatternLayout
log4j.appender.stdout.layout.ConversionPattern=%c{1} - %m%n首先定義一個通用的 Action 介面,模擬業務邏輯的執行入口:
package qs;

public interface Action {
    public String execute(String str);
}
接著提供兩種不同的實作類別,分別將字串轉為大寫與小寫:
package qs;

public class UpperAction implements Action {
    private String message;

    public String getMessage() { return message; }
    public void setMessage(String message) { this.message = message; }

    public String execute(String str) {
        return (getMessage() + str).toUpperCase();
    }
}package qs;
public class LowerAction implements Action {
private String message;
public String getMessage() { return message; }
public void setMessage(String message) { this.message = message; }
public String execute(String str) {
return (getMessage() + str).toLowerCase();
}
}在專案根目錄(Eclipse 專案預設工作路徑,即 .project 檔案所在目錄)建立 bean.xml,定義 Bean 及其屬性注入:
<?xml version="1.0" encoding="UTF-8"?>
<!DOCTYPE beans PUBLIC "-//SPRING//DTD BEAN//EN" "https://www.springframework.org/dtd/spring-beans.dtd">
<beans>
    <description>Spring Quick Start</description>
    <bean id="TheAction" class="qs.UpperAction">
        <property name="message">
            <value>HeLLo:</value>
        </property>
    </bean>
</beans>注意:bean.xml必須放在專案的「工作路徑」下,而非 CLASSPATH(預設輸出目錄/bin)中。Eclipse 預設工作路徑即為專案根目錄。
建立 Test.java,使用 FileSystemXmlApplicationContext 載入配置檔,從容器中取得 Bean 並呼叫方法:
package qs;

import org.springframework.context.ApplicationContext;
import org.springframework.context.support.FileSystemXmlApplicationContext;

public class Test {
    public static void main(String[] args) {
        // 載入專案根目錄下的 bean.xml
        ApplicationContext ctx = new FileSystemXmlApplicationContext("bean.xml");

        // 從容器獲取 Bean,無需手動 new 物件
        Action action = (Action) ctx.getBean("TheAction");

        // 執行業務邏輯
        System.out.println(action.execute("Spring"));
    }
}執行上述主程式,控制台輸出:
HELLO:SPRING若將 bean.xml 中的 class 屬性改為 qs.LowerAction,再次執行則輸出:
hello:spring這完美展示了 Spring IOC 容器管理物件生命週期與依賴關係的能力:只需修改配置檔,即可在不變動 Java 程式碼的情況下切換實作類別,實現了「面向介面編程」與「低耦合」。
本文示範了 Spring Framework 最基礎的環境搭建、Bean 定義、屬性注入(Setter Injection)與容器啟動流程。掌握這些核心概念後,即可進一步探索 Spring AOP、事務管理、資料存取等進階功能。