先前範例中,每幀彩色影像都新建 Bitmap 物件。Kinect 彩色攝像頭預設 30 FPS,每秒產生 30 個 Bitmap,造成大量記憶體配置與垃圾回收壓力。改用 WriteableBitmap(位於 System.Windows.Media.Imaging)可預先配置記憶體,後續僅更新像素資料,大幅降低 GC 負擔。
修改重點:
WriteableBitmap、Int32Rect、Stride 為成員變數,僅在初始化時計算一次。WriteableBitmap 並綁定至 UI Image 元素。ColorFrameReady 事件中直接呼叫 WritePixels 更新像素。private WriteableBitmap colorImageBitmap;
private Int32Rect colorImageBitmapRect;
private int colorImageStride;
private byte[] colorImagePixelData;
private void InitializeKinectSensor(KinectSensor kinectSensor) {
if (kinectSensor != null) {
ColorImageStream colorStream = kinectSensor.ColorStream;
colorStream.Enable();
colorImageBitmap = new WriteableBitmap(
colorStream.FrameWidth, colorStream.FrameHeight, 96, 96,
PixelFormats.Bgr32, null);
colorImageBitmapRect = new Int32Rect(0, 0, colorStream.FrameWidth, colorStream.FrameHeight);
colorImageStride = colorStream.FrameWidth * colorStream.FrameBytesPerPixel;
ColorImageElement.Source = colorImageBitmap;
kinectSensor.ColorFrameReady += Kinect_ColorFrameReady;
kinectSensor.Start();
}
}
private void Kinect_ColorFrameReady(object sender, ColorImageFrameReadyEventArgs e) {
using (ColorImageFrame frame = e.OpenColorImageFrame()) {
if (frame != null) {
byte[] pixelData = new byte[frame.PixelDataLength];
frame.CopyPixelDataTo(pixelData);
colorImageBitmap.WritePixels(colorImageBitmapRect, pixelData, colorImageStride, 0);
}
}
}無論顯示彩色或景深串流,均建議使用 WriteableBitmap 以減少記憶體配置/回收開銷。
每幀 ColorImageFrame 以位元組陣列回傳原始像素(Bgr32 格式:每像素 4 位元組,順序為 Blue、Green、Red、保留)。我們可在 ColorFrameReady 中直接操作陣列再顯示。
範例:關閉藍、綠兩通道,僅保留紅通道:
void kinectSensor_ColorFrameReady(object sender, ColorImageFrameReadyEventArgs e) {
    using (ColorImageFrame frame = e.OpenColorImageFrame()) {
        if (frame != null) {
            byte[] pixelData = new byte[frame.PixelDataLength];
            frame.CopyPixelDataTo(pixelData);
            for (int i = 0; i < pixelData.Length; i += frame.BytesPerPixel) {
                pixelData[i] = 0x00;     // Blue
                pixelData[i + 1] = 0x00; // Green
                // Red 通道保持原樣
            }
            colorImageBitmap.WritePixels(colorImageBitmapRect, pixelData, colorImageStride, 0);
        }
    }
}
其他常見像素演算法:
| 效果 | 核心程式碼片段 |
|---|---|
| 負片 | pixelData[i] = (byte)~pixelData[i]; (對三通道皆執行) |
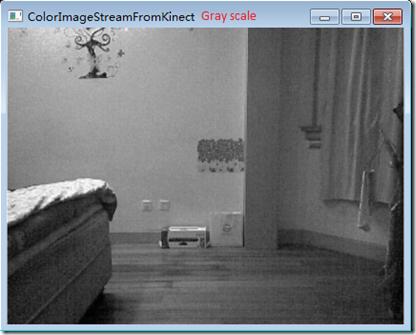
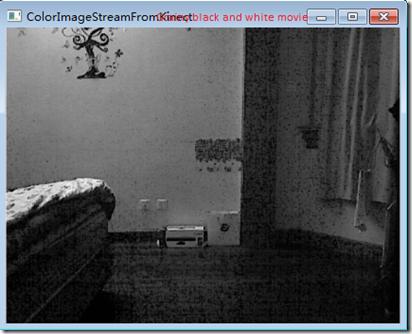
| 灰階 (最大值法) | byte gray = Math.Max(pixelData[i], pixelData[i+1]); gray = Math.Max(gray, pixelData[i+2]); 三通道皆設為 gray |
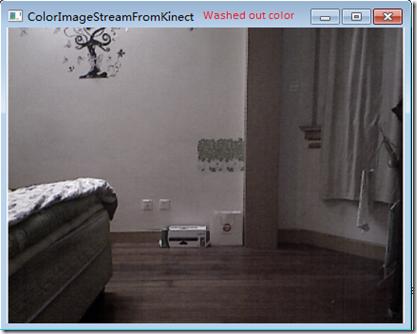
| 灰階 (加權平均) | double gray = pixelData[i]*0.11 + pixelData[i+1]*0.59 + pixelData[i+2]*0.3; 以去飽和度混合 |
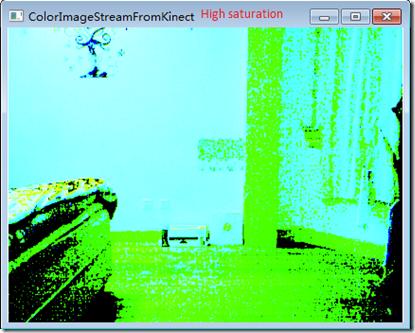
| 高飽和度門檻 | 各通道若 <0x33 或 >0xE5 設 0,否則設 0xFF |
執行結果圖例:
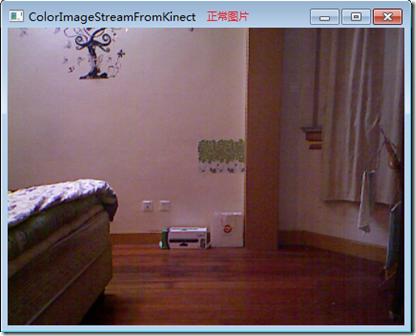
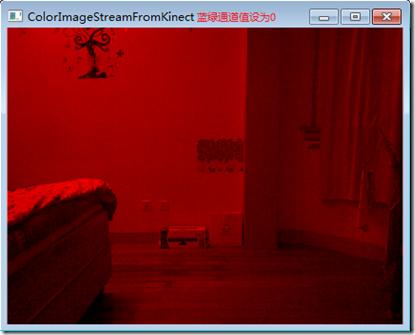
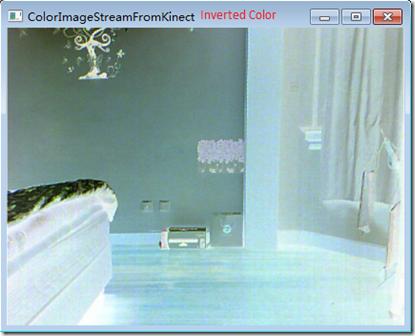
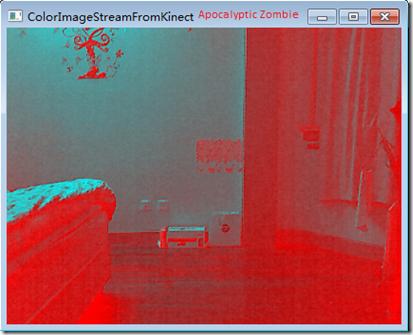
在 UI 加入按鈕,點擊時將目前 Image.Source (BitmapSource) 編碼為 JPEG 存檔:
<Button Content="Take Picture" Click="TakePictureButton_Click" />

private void TakePictureButton_Click(object sender, RoutedEventArgs e) {
    string fileName = "snapshot.jpg";
    if (File.Exists(fileName)) File.Delete(fileName);
    using (FileStream fs = new FileStream(fileName, FileMode.CreateNew)) {
        BitmapSource image = (BitmapSource)ColorImageElement.Source;
        JpegBitmapEncoder encoder = new JpegBitmapEncoder { QualityLevel = 70 };
        encoder.Frames.Add(BitmapFrame.Create(image));
        encoder.Save(fs);
    }
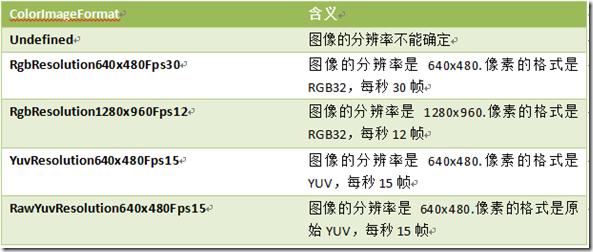
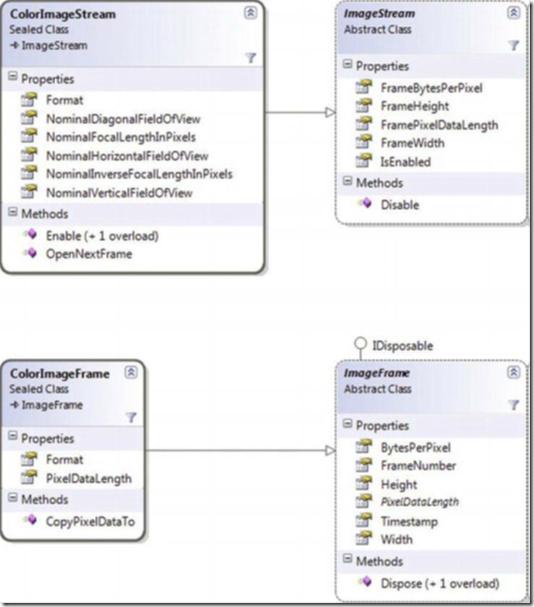
}ColorImageStream 為 KinectSensor 屬性,需呼叫 Enable() 啟用。其多載方法可指定 ColorImageFormat(解析度與 FPS)。啟用後可透過 Format 屬性取得實際格式。
關鍵屬性(繼承自 ImageStream):
FrameWidth, FrameHeight, FrameBytesPerPixel, FramePixelDataLengthNominalFocalLengthInPixels, NominalHorizontalFieldOfView, NominalVerticalFieldOfView, NominalDiagonalFieldOfView — 光學參數,建議使用以相容未來解析度變更。ColorImageFrame 代表單一影像幀,提供 CopyPixelDataTo(byte[]) 複製像素資料,以及 FrameNumber、Timestamp 等中繼資料。像素格式隨 ColorImageFormat 而定:RgbResolution640x480Fps30 對應 Bgr32(32 位元,無 Alpha)。
SDK 支援兩種資料取得模式:
ColorFrameReady 等事件,框架自動通知新幀到達。簡單易用,適合大多數 WPF 應用。ColorStream.OpenNextFrame(timeoutMs) 主動取得下一幀。適用於非事件驅動架構(如 XNA、主控台應用、機器人控制迴路),或極度追求效能、需精確控制幀率時。輪詢範例(搭配 CompositionTarget.Rendering 迴圈):
private void CompositionTarget_Rendering(object sender, EventArgs e) {
    DiscoverKinectSensor();
    PollColorImageStream();
}
private void PollColorImageStream() {
    if (_Kinect == null) return;
    try {
        using (ColorImageFrame frame = _Kinect.ColorStream.OpenNextFrame(100)) {
            if (frame != null) {
                frame.CopyPixelDataTo(_ColorImagePixelData);
                _ColorImageBitmap.WritePixels(_ColorImageBitmapRect, _ColorImagePixelData, _ColorImageStride, 0);
            }
        }
    } catch (Exception ex) { /* 錯誤處理 */ }
}
若輪詢與 UI 更新在同一執行緒,長時間運算會凍結介面。解決方案:使用 BackgroundWorker 或 Task 在背景執行緒輪詢,再透過 Dispatcher.BeginInvoke 更新 UI。
private void Worker_DoWork(object sender, DoWorkEventArgs e) {
    var worker = sender as BackgroundWorker;
    while (!worker.CancellationPending) {
        DiscoverKinectSensor();
        PollColorImageStream(); // 內部已用 Dispatcher 更新 UI
    }
}
總結:WPF 應用首選事件模式;僅在非 WPF 或極致效能需求下考慮輪詢。下一篇將介紹 DepthImageStream。