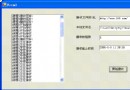
程序流程概覽
- 主窗體點擊按鈕 → 截取全屏 → 保存為 Bitmap。
- 創建無邊框全屏窗體
ScreenBody,以截圖為背景顯示。
- 用戶在
ScreenBody 上拖動選區、右鍵取消、雙擊確認。
- 確認後將選區圖像存入剪貼板,關閉全屏窗體。
主窗體代碼
public partial class MainForm : Form
{
    private void btnCutter_Click(object sender, EventArgs e)
    {
        // 1. 獲取主屏幕尺寸
        Rectangle bounds = Screen.AllScreens[0].Bounds;
        // 2. 創建全屏 Bitmap
        using (Bitmap img = new Bitmap(bounds.Width, bounds.Height))
        using (Graphics g = Graphics.FromImage(img))
        {
            // 3. 複制屏幕像素到 Bitmap
            g.CopyFromScreen(Point.Empty, Point.Empty, bounds.Size);
            // 4. 顯示全屏選區窗體
            ScreenBody body = new ScreenBody { BackgroundImage = img };
            body.Show();
        }
    }
}
關鍵 API 解析
Screen.AllScreens[0]:多顯示器環境下取主屏,單屏即為唯一屏。Graphics.CopyFromScreen(srcPt, destPt, size):高性能屏幕像素拷貝,直接操作顯存,比 BitBlt 封裝更簡便。FormBorderStyle.None + WindowState.Maximized:實現無邊框全屏覆蓋。
ScreenBody 核心字段
public partial class ScreenBody : Form
{
    private Graphics MainPainter;      // 主繪圖面
    private Pen pen;                   // 選區邊框筆
    private bool isDowned;             // 鼠標左鍵按下標誌
    private bool RectReady;            // 選區是否確定
    private Image baseImage;           // 原始全屏背景
    private Rectangle Rect;            // 當前選區矩形
    private Point downPoint;           // 鼠標按下起點
    private int tmpx, tmpy;            // 移動時的上一坐標
}
架構優化建議
- 將截圖邏輯封裝為
ScreenCapturer 服務類,便於單元測試與復用。
- 使用
IDisposable 模式統一管理 Graphics、Image、Pen 等非托管資源。
- 引入
BufferedGraphics 替代手動 Clone()/DrawImage,減少內存分配與 GC 壓力。
- 支持多顯示器:遍歷
Screen.AllScreens 建立虛擬桌面大圖,或分別對各屏截圖。
系列導航
- (一) 整體架構與核心截屏(本文)
- (二) 鼠標交互邏輯詳解
- (三) 輔助繪圖函數與收尾