| 層級 | 內容 | 用途 |
|---|---|---|
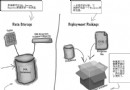
| 表現層 | 完整美術圖 (800×600) | 視覺呈現 |
| 遮罩層 | 半透明遮擋物 (樹木、建築上層) | 角色穿越時若隱若現 |
| 底層/副本圖 | 純色功能圖 (同尺寸,極小體積) | 障礙物、傳送點、陷阱、空中障礙等邏輯判定 |
副本圖以純色塊編碼地圖屬性:黑色=障礙物、白色=可通行、黃色=傳送點、可擴充紅色=陷阱、綠色=特殊 NPC、藍色=空中障礙、紫色=全域障礙等。純色圖壓縮極小,極適合 Silverlight 網頁遊戲下載。
private Color PickColor(BitmapSource bitmap, int x, int y)
{
    var crop = new CroppedBitmap(bitmap, new Int32Rect(x, y, 1, 1));
    byte[] pixels = new byte[4];
    crop.CopyPixels(pixels, 4, 0);
    // pixels[0]=B, [1]=G, [2]=R, [3]=A
    return Color.FromArgb(pixels[3], pixels[2], pixels[1], pixels[0]);
}注意:CroppedBitmap.CopyPixels 僅限 WPF;Silverlight 3.0+ 可用 WriteableBitmap 同樣實現。
BitmapSource Deeper = new BitmapImage(new Uri(@"Map\Deeper.jpg", UriKind.Relative));
Point Target;
int SpiritCenterX = 4, SpiritCenterY = 5, GridSize = 20;

private void Carrier_MouseLeftButtonDown(object sender, MouseButtonEventArgs e)
{
    Point p = e.GetPosition(Carrier);
    // 點擊處非障礙物才啟動移動
    if (PickColor(Deeper, (int)p.X, (int)p.Y) != Colors.Black)
    {
        Target = p;
        NormalMove(p); // 或 AStarMove(p);
    }
}

private void DispatcherTimer_Tick(object sender, EventArgs e)
{
    // 角色腳底視窗絕對座標
    int X = (int)(Canvas.GetLeft(Spirit) + SpiritCenterX * GridSize);
    int Y = (int)(Canvas.GetTop(Spirit) + SpiritCenterY * GridSize);

    Color c = PickColor(Deeper, X, Y);

    if (c == Colors.Black)
    {
        // 碰到障礙物 → 切換 A* 尋路
        AStarMove(Target);
    }
    else if (c == Colors.Yellow)
    {
        // 觸發傳送點 → 瞬間移動
        Storyboard.Stop();
        Canvas.SetLeft(Spirit, 200 - SpiritCenterX * GridSize);
        Canvas.SetTop(Spirit, 20 - SpiritCenterY * GridSize);
    }

    // 記錄軌跡(白點)
    var dot = new Rectangle { Fill = Brushes.Snow, Width = 5, Height = 5 };
    Carrier.Children.Add(dot);
    Canvas.SetLeft(dot, X);
    Canvas.SetTop(dot, Y);
}圖示中可見混合模式路徑平滑貼近牆角,而純 A* 路徑呈現明顯鋸齒狀折線。
switch 分支即可。目前尚無「純副本圖單獨尋路」完美方案(嘗試過在障礙物邊緣繪製誘導點,複雜地圖易失效)。若能攻克此點,將徹底省去 A* 演算法與矩陣維護,實現真正「美術主導邏輯」的開發範式。期待社群高手突破。
下一章實作遮罩層:從表現層剪裁半透明遮擋物(樹木、建築頂層),疊加於角色上方,實現角色穿越樹叢時若隱若現的真實感。