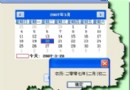
Windows 預設窗體永遠是矩形,但許多炫酷應用(如音樂播放器皮膚、啟動畫面、浮動工具)都需要「異形窗體」。本文詳細講解如何利用 TransparencyKey、FormBorderStyle.None 以及重寫 OnPaint 繪製位圖,輕鬆實現任意形狀、甚至字形窗體,並提供完整可運行代碼。
FormBorderStyle = FormBorderStyle.NoneTransparencyKey = BackColor,將背景色設為透明OnPaint,用 Graphics.DrawImage 畫載入的 PNG/BMP,圖像中透明色區域即成「挖空」效果private void InitializeComponent()
{
this.label1 = new System.Windows.Forms.Label();
this.SuspendLayout();
// label1:作為關閉按鈕,背景透明
this.label1.BackColor = System.Drawing.Color.Transparent;
this.label1.Location = new System.Drawing.Point(261, 56);
this.label1.Size = new System.Drawing.Size(17, 16);
this.label1.Click += new System.EventHandler(this.label1_Click);
// Form1 關鍵屬性
this.AutoScaleDimensions = new System.Drawing.SizeF(6F, 12F);
this.AutoScaleMode = System.Windows.Forms.AutoScaleMode.Font;
this.BackColor = System.Drawing.SystemColors.Control; // 必須與 TransparencyKey 一致
this.ClientSize = new System.Drawing.Size(393, 317);
this.Controls.Add(this.label1);
this.FormBorderStyle = System.Windows.Forms.FormBorderStyle.None; // 無邊框
this.Name = "Form1";
this.StartPosition = System.Windows.Forms.FormStartPosition.CenterScreen;
this.Text = "非矩形窗體";
this.TransparencyKey = System.Drawing.SystemColors.Control; // 透明色鍵
this.Load += new System.EventHandler(this.Form1_Load);
this.ResumeLayout(false);
}public partial class Form1 : Form
{
private Bitmap _shapeBitmap;
public Form1()
{
InitializeComponent();
}
private void Form1_Load(object sender, EventArgs e)
{
// 1. 載入圖片(建議 PNG 透明通道,或 BMP + MakeTransparent)
_shapeBitmap = new Bitmap("wordImage.bmp");
// 2. 若用 BMP,指定藍色為透明色(圖片設計時背景填純藍 #0000FF)
_shapeBitmap.MakeTransparent(Color.Blue);
// 3. 讓窗體大小跟隨圖片(可選)
this.ClientSize = _shapeBitmap.Size;
}
// 4. 核心:重寫 OnPaint 繪製圖片
protected override void OnPaint(PaintEventArgs e)
{
base.OnPaint(e);
e.Graphics.DrawImage(_shapeBitmap, Point.Empty);
}
// 5. 標籤點擊關閉窗體
private void label1_Click(object sender, EventArgs e)
{
this.Close();
}
// 6. 釋放資源
protected override void Dispose(bool disposing)
{
if (disposing && _shapeBitmap != null)
_shapeBitmap.Dispose();
base.Dispose(disposing);
}
}MakeTransparent。RGB(0,0,255)),代碼中 MakeTransparent(Color.Blue)。無標題欄後無法拖動,需攔截 WM_NCHITTEST:
protected override void WndProc(ref Message m)
{
    const int WM_NCHITTEST = 0x84;
    const int HTCLIENT = 1;
    const int HTCAPTION = 2;

    if (m.Msg == WM_NCHITTEST)
    {
        base.WndProc(ref m);
        if ((int)m.Result == HTCLIENT)
            m.Result = (IntPtr)HTCAPTION; // 告訴系統這是標題欄,可拖動
        return;
    }
    base.WndProc(ref m);
}| 現象 | 原因 | 解決 |
|---|---|---|
| 窗體顯示為矩形 | TransparencyKey 與 BackColor 不一致 | 兩者設為同一顏色 |
| 圖片邊緣鋸齒明顯 | 用 BMP + MakeTransparent,邊緣無半透明 | 改用 PNG 32位帶 Alpha 通道 |
| 點擊穿透(點不到控件) | 透明區域被視為「不存在」 | 在透明區放置透明 Label/Panel 接收點擊,或用 Region 裁剪 |
| 高 DPI 模糊 | 圖片未按 DPI 縮放 | 啟用 SetProcessDpiAwareness 或提供多倍圖 |
IrregularFormDemo/
├── Form1.cs           // 主窗體邏輯
├── Form1.Designer.cs  // 設計器代碼
├── Program.cs         // 入口
├── Resources/
│   └── wordImage.png  // 字形圖片(建議 PNG)
└── IrregularFormDemo.csproj掌握 TransparencyKey + OnPaint 組合,即可打造任意形狀窗體。進階可結合 Region、Layered Window (WS_EX_LAYERED) 實現半透明、漸變、點擊穿透控制等更豐富效果。本文代碼已在 .NET Framework 4.8 / .NET 6+ WinForms 驗證通過,直接複製即用。