我們的開發生活充滿了抽象層。若不了解抽象的內部運作便直接使用,往往會陷入困境。Windows 運行時 (WinRT) 便是這樣一個抽象層。本文將透過研究 WinRT 核心應用程式模型,揭開這層抽象的面紗。此模型以 CoreWindow 類別為中心,每個「新型」Windows 應用商店與 Windows Phone 應用程式都包含一個該類別的實例,但極少開發者知曉其存在與運作方式——這正是抽象成功的最佳證明。
自 Windows 8 API 發布以來,大量報導著墨於各種語言投射(C++/CX、C#、JavaScript)。但理解 WinRT 的最佳方式,是避開所有語言投射,直接使用標準 C++ 與經典 COM。唯有 C++ 能讓您透過現象看到本質(C 理論上也可,但會帶來不必要的麻煩)。您仍可選擇使用語言投射,但至少應清楚了解底層實際運作。
在 Visual Studio 2012 中建立 Windows 應用商店專案,刪除所有 XAML 與 C++ 原始檔,保留封裝資產。關鍵設定:在專案屬性中將「使用 Windows 運行時擴展」(/ZW) 設為「否」,禁用 C++/CX,確保純標準 C++ 編譯。加入 wWinMain 進入點:
int __stdcall wWinMain(HINSTANCE, HINSTANCE, PWSTR, int) { }
包含必要標頭與庫:
#include <windows.h>
#include <wrl.h>
#pragma comment(lib, "RuntimeObject.lib")
using namespace Microsoft::WRL;
使用 WRL 的 ComPtr 管理 COM 介面指標,並沿用 ASSERT 與 HR 進行錯誤處理。
應用程式模型首先需要多執行緒單元 (MTA)。WinRT 提供 RoInitialize(CoInitializeEx 的薄封裝):
HR(RoInitialize(RO_INIT_MULTITHREADED));
WinRT 放棄傳統 GUID 類別識別碼,改用文字類別識別碼(命名空間限定名稱)。使用 HSTRING 而非 BSTR,並透過 WindowsCreateStringReference 建立快速傳遞字串避免記憶體配置:
template <typename T, unsigned Count>
auto GetActivationFactory(WCHAR const (&classId)[Count]) -> ComPtr<T> {
    HSTRING_HEADER header; HSTRING string;
    HR(WindowsCreateStringReference(classId, Count - 1, &header, &string));
    ComPtr<T> result;
    HR(RoGetActivationFactory(string, __uuidof(T), reinterpret_cast<void**>(result.GetAddressOf())));
    return result;
}
取得 ICoreApplication 介面:
using namespace ABI::Windows::ApplicationModel::Core;
auto app = GetActivationFactory<ICoreApplication>(
    RuntimeClass_Windows_ApplicationModel_Core_CoreApplication);
WinRT 應用程式模型與 Windows 服務控制管理器 (SCM) 極其相似:SCM 啟動服務進程,等待其呼叫 StartServiceCtrlDispatcher 建立連線;WinRT 則等待進程取得 ICoreApplication 並呼叫 Run。若未及時回應,兩者都會終止進程。WinRT 負責應用程式生命週期,在事件發生時於執行緒呼叫應用程式。
應用程式必須提供 IFrameworkViewSource 實作,其 CreateView 方法在 UI 執行緒建立後被呼叫。為簡化,單一 SampleWindow 類別實作所有必要介面:
struct SampleWindow : IFrameworkViewSource, IFrameworkView, IActivatedEventHandler {};
IActivatedEventHandler 定義:
using namespace ABI::Windows::Foundation;
using namespace ABI::Windows::ApplicationModel::Activation;
typedef ITypedEventHandler<CoreApplicationView*, IActivatedEventArgs*> IActivatedEventHandler;
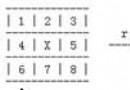
針對堆疊基礎類別的 QueryInterface 實作(圖 2):
auto __stdcall QueryInterface(IID const & id, void ** result) -> HRESULT {
    ASSERT(result);
    if (id == __uuidof(IFrameworkViewSource) || id == __uuidof(IInspectable) || id == __uuidof(IUnknown)) {
        *result = static_cast<IFrameworkViewSource*>(this);
    } else if (id == __uuidof(IFrameworkView)) {
        *result = static_cast<IFrameworkView*>(this);
    } else if (id == __uuidof(IActivatedEventHandler)) {
        *result = static_cast<IActivatedEventHandler*>(this);
    } else {
        *result = nullptr; return E_NOINTERFACE;
    }
    return S_OK; // 堆疊物件無需 AddRef
}
AddRef/Release 回傳非零值即可:
auto __stdcall AddRef() -> ULONG { return 2; }
auto __stdcall Release() -> ULONG { return 1; }
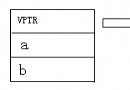
暫時以 E_NOTIMPL 填補(圖 3):
auto __stdcall GetIids(ULONG *, IID **) -> HRESULT { return E_NOTIMPL; }
auto __stdcall GetRuntimeClassName(HSTRING *) -> HRESULT { return E_NOTIMPL; }
auto __stdcall GetTrustLevel(TrustLevel *) -> HRESULT { return E_NOTIMPL; }
Initialize: 註冊 Activated 事件:
auto __stdcall Initialize(ICoreApplicationView * view) -> HRESULT {
    EventRegistrationToken token;
    HR(view->add_Activated(this, &token));
    return S_OK;
}
SetWindow: 取得 ICoreWindow:
using namespace ABI::Windows::UI::Core;
ComPtr<ICoreWindow> m_window;
auto __stdcall SetWindow(ICoreWindow * window) -> HRESULT {
    m_window = window; return S_OK;
}
Load: 準備初始呈現資源(註冊大小、可見性、DPI 事件、建立 DirectX 工廠等):
auto __stdcall Load(HSTRING) -> HRESULT { return S_OK; }
Activated 事件處理: 啟動視窗:
auto __stdcall Invoke(ICoreApplicationView *, IActivatedEventArgs *) -> HRESULT {
    HR(m_window->Activate()); return S_OK;
}
Run: 訊息迴圈:
auto __stdcall Run() -> HRESULT {
    ComPtr<ICoreDispatcher> dispatcher;
    HR(m_window->get_Dispatcher(dispatcher.GetAddressOf()));
    HR(dispatcher->ProcessEvents(CoreProcessEventsOption_ProcessUntilQuit));
    return S_OK;
}
Uninitialize: 可安全忽略:
auto __stdcall Uninitialize() -> HRESULT { return S_OK; }
編譯執行即可看到空白視窗。下一期將示範如何整合 Direct2D 呈現。