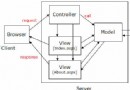
Controller 如何將模型傳遞給 View?ViewData、ViewBag、強型別模型三種方式差異?View 中如何撰寫顯示邏輯?HtmlHelper 內建方法與自訂擴展方法如何開發?本文以實戰角度完整解析 MVC 模型傳遞與視圖渲染全流程。
| 方式 | 語法 | 型別安全 | IntelliSense | 適用場景 |
|---|---|---|---|---|
| ViewData (字典) | ViewData["Key"] = model;@ViewData["Key"] | ❌ 執行期才知型別 | ❌ 無 | 臨時資料、跨 Action/Partial 共享簡單值 |
| ViewBag (動態) | ViewBag.Key = model;@ViewBag.Key | ❌ 動態解析 | ⚠️ 部分 (VS 有限度支援) | 同 ViewData,語法較簡潔 |
| 強型別模型 (推薦) | return View(model);@model MyModel@Model.Property | ✅ 編譯期檢查 | ✅ 完整 | **所有正式視圖**,重構安全、重構友好 |
public ActionResult Detail(int id)
{
    var product = _repository.GetById(id);
    if (product == null) return HttpNotFound();

    // 1. 強型別傳遞 (最佳)
    return View(product); // 隱含 View(model)

    // 2. 指定視圖名稱 + 模型
    // return View("CustomDetail", product);

    // 3. ViewData/ViewBag 輔助傳遞 (如下拉選單資料)
    ViewBag.Categories = _repo.GetCategories();
    ViewData["PageTitle"] = product.Name;
}@model MyShop.Models.ProductViewModel
@{
ViewBag.Title = Model.Name;
Layout = "~/Views/Shared/_Layout.cshtml";
}
<h1>@Model.Name</h1>
<div class="price">@Model.Price.ToString("C")</div>
@* 條件顯示 *@
@if (Model.InStock)
{
<button class="btn-buy">加入購物車</button>
}
else
{
<span class="out-of-stock">缺貨中</span>
}
@* 迴圈渲染集合 *@
@foreach (var img in Model.Images)
{
<img src="@img.Url" alt="@img.Caption" />
}| 分類 | 方法範例 | 用途 |
|---|---|---|
| 表單輸入 | TextBoxFor(m => m.Name), DropDownListFor(m => m.CategoryId, items), EditorFor(m => m.Description) | 強型別產生 input/select/textarea,自動綁定驗證屬性 |
| 顯示/標籤 | DisplayFor(m => m.CreatedDate), LabelFor(m => m.Email) | 唯讀顯示、產生 label 標籤 |
| 驗證訊息 | ValidationMessageFor(m => m.Name), ValidationSummary() | 顯示模型驗證錯誤 |
| 連結/路由 | ActionLink("詳情", "Detail", new { id = Model.Id }), RouteLink(...) | 產生 <a> 連結 |
| 部分視圖 | Partial("_ProductCard", Model), RenderPartial(...) | 渲染子視圖 |
| 防偽/編碼 | AntiForgeryToken(), Encode(str), Raw(html) | 安全性、輸出編碼 |
public static class HtmlHelperExtensions
{
    // 產生 Bootstrap 風格輸入框群組
    public static MvcHtmlString BootstrapTextBoxFor(
        this HtmlHelper html,
        Expression> expression,
        string labelText = null,
        object htmlAttributes = null)
    {
        var metadata = ModelMetadata.FromLambdaExpression(expression, html.ViewData);
        string htmlFieldName = ExpressionHelper.GetExpressionText(expression);
        string label = labelText ?? metadata.DisplayName ?? metadata.PropertyName;

        var input = html.TextBoxFor(expression, htmlAttributes);
        var validation = html.ValidationMessageFor(expression);

        var wrapper = new TagBuilder("div");
        wrapper.AddCssClass("form-group");
        wrapper.InnerHtml = $@"
            <label class=""control-label"">{label}</label>
            {input}
            {validation}";

        return MvcHtmlString.Create(wrapper.ToString());
    }
}
視圖中使用:
@Html.BootstrapTextBoxFor(m => m.Email, "電子郵件", new { @class = "form-control", placeholder = "請輸入 Email" })**強型別模型 + @model + HtmlHelper 強型別方法** 是 MVC 視圖開發的鐵三角:編譯期安全、重構無痛、IntelliSense 全程相隨。ViewData/ViewBag 僅作輔助。善用 EditorFor/DisplayFor 配合 DataAnnotations 與 EditorTemplates/DisplayTemplates 目錄約定,可實現「依模型元資料自動產生 UI」的高階生產力。擴展方法則將專案通用 UI 模式 (Bootstrap 群組、日期選擇器、標籤雲) 封裝為可複用元件。