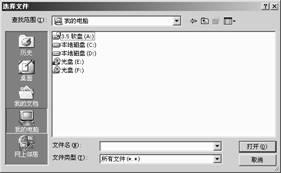
上傳功能需兩個核心控制項:
WebFile)—— 提供「瀏覽」按鈕讓使用者選取本機檔案btnUpLoad)—— 觸發上傳動作private void BtnUpload_Click(object sender, System.EventArgs e)
{
if (WebFile.PostedFile.FileName == "")
{
Info.Text = "請先選擇要上傳的文件";
return;
}
try
{
char[] spliter = { '\\' };
string[] FileName = WebFile.PostedFile.FileName.Split(spliter, 10);
string FullPath = CurrentPath + @"\" + FileName[FileName.Length - 1];
WebFile.PostedFile.SaveAs(FullPath);
LoadDir(CurrentPath);
}
catch
{
Info.Text = "上傳文件失敗,請與管理員聯系";
}
}
WebFile 屬於 HtmlInputFile 類別,其 PostedFile 屬性回傳 HttpPostedFile 物件,封裝上傳檔案的所有資訊:
FileName:用戶端完整路徑(如 C:\Users\Doc\test.pdf)ContentLength:檔案大小(位元組)ContentType:MIME 型別InputStream:檔案資料流SaveAs(path):將檔案儲存至伺服器指定路徑用戶端回傳完整路徑,需解析純檔名:
string[] parts = WebFile.PostedFile.FileName.Split('\\');
string fileName = parts[parts.Length - 1]; // 取陣列最後一項
此法雖簡單但有相容性風險(Unix 路徑用 '/'),建議改用 Path.GetFileName()。
關鍵設定:<form> 標籤必須設定 enctype="multipart/form-data",否則檔案不會上傳。
<form id="WebForm1" method="post" runat="server" enctype="multipart/form-data">
同時 <input type="file"> 需加上 id="WebFile" name="WebFile" 讓伺服器端識別。
Web.config 設定 <httpRuntime maxRequestLength="102400" />(單位 KB)ContentType 與副檔名,防止惡意上傳圖示展示瀏覽對話框選取檔案後,點擊「確定」完成上傳,介面自動重新整理顯示新檔案。